"Explore the world of GUIs, event-driven programming, and graphics in C# through an introductory journey touching on the importance of well-designed GUIs, event handlers, common GUI components, layout positioning, and the shift from absolute to relative positioning for better scalability across different screen sizes."
Please find below an Image/Link to download the presentation.
The content on the website is provided AS IS for your information and personal use only. It may not be sold, licensed, or shared on other websites without obtaining consent from the author. If you encounter any issues during the download, it is possible that the publisher has removed the file from their server.
You are allowed to download the files provided on this website for personal or commercial use, subject to the condition that they are used lawfully. All files are the property of their respective owners.
The content on the website is provided AS IS for your information and personal use only. It may not be sold, licensed, or shared on other websites without obtaining consent from the author.
E N D
Presentation Transcript
Module 9 Part 2 GUI, Event driven programing, and Graphics in C#
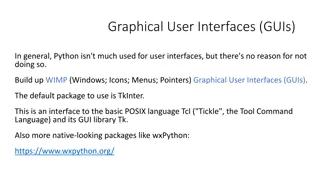
Intro to GUIs Finally this semester we are going to look at building GUIs in C#. Why are we doing it in C# not Java? C# provides a much better interface for building GUIs than Java. If you are interested in GUIs in Java, check out JavaFX in IntelliJ Again this is a huge topic which we are only going to scratch the surface of.
Event driven programming Most things you have written so far in Java or C# were executed in a linear fashion. It starts at the top of main, and works its way through the code. Event driven is different. You ll write lots of event handlers they don t get executed until a user causes them by pressing a button, typing text, or clicking somewhere on the screen. Then you ll design a GUI, and connect each GUI element to the appropriate event handlers.
Why use GUIs? If well designed, should be natural for people to understand how to use it without extensive training. This includes logically arranging the data, only showing what s necessary at any given time to not overwhelm, hiding rarely used elements in advanced screens, or sub menus. UI design is a whole discipline. There are trends which come and go as people learn what works better. Currently clean minimal designs are favored over complex busy designs. Larger easy to read fonts are favored over pages of text. More animations and storytelling are favored.
Common Parts of a GUI The GUI will run in a window. The window has a background color, size etc The information in the window is typically laid out in a logical fashion. Commonly windows are laid out as a grid or table, a tree or as cards. Sometimes all are used. Users interact with the GUI through: Menus, Buttons, selection lists, radio buttons (select only one), checkboxes (select many), date pickers, file choosers, labels (text strings), knobs, sliders, links, progress bars, etc. If the GUI is graphical, you ll be drawing items on a canvas and possibly moving them.
Positioning items in a GUI (Layout) Items are positioned with an XY coordinate. (0,0) is the top left corner Thus a line drawn from 75,60 to 350,250 would be a diagonal line
Absolute vs Relative positioning While you could lay out an interface by positioning every item at specific locations, that layout won t scale well on different size screens. Think about your phone, you can look at it in portrait mode, or in landscape mode. The dimensions of the screen are very different in those 2 configurations. Thus if you absolutely placed everything, some things would be off screen. Instead we ll typically use relative positioning. That way things can reflow when the screen size changes.
Review of Hexadecimal Colors will be specified as 3 hexadecimal values, so let s review Hexadecimal. Hex is a number system based on 16 digits 0-9, A, B, C, D, E and F. Any decimal number 9 or below is the same in Hex. Decimal 10 = A, Decimal 11= B ... Decimal 15 = F Decimal 16 = 10 Decimal 17 = 11 ... Decimal 26 = 1A Decimal 31 = 1F Decimal 32 = 20 ... Decimal 255 = FF
Colors Any color can be represented by 3 (hex) values of Red, Green and Blue. Red = FF 00 00 Green = 00 FF 00 Blue = 00 00 FF Yellow = FF FF 00 Purple = FF 00 FF White = FF FF FF Black = 00 00 00 Every shade and color can be achieved by altering the 3 values.
GUI Libraries We ll be using the Windows Forms app in Visual Studio Open Visual Studio. Choose New Project , Click on Windows Forms Application Give it a name. Now if you run the project, you should see your hello world window.
Building a login form You ll begin by dragging a panel from the toolbox on the left onto Form1 Next drag 2 Labels, 2 TextBoxes, and a Button Click on the first Label, on the right choose Properties and change its Text to Username: Click on the second Label, and change its Text to Password: Click on the first TextBox, change its Design-name to username Click on the second TextBox, and change its PasswordChar to *, and its Design-name to password Click on Submit and change it s Text to Submit Finally drag a 3rd Label below the submit button. Change it s text to an empty string, and it s name to response
Adding the event handler Click on Form1.cs at the top of your window. You ll see it ll have automatically created button1_Click Add the following code: string result = username.Text + " attempted to login"; response.Text = result;
Adding a second form In the Search Solution Explorer window right click on the name of your project and choose Add - Form (Windows Form) . Design the second form. In your event handler for the submit button you can switch to the second form with: Form2 f2 = new Form2(); f2.Show(); this.Hide();
Instead of opening a new window You can replace a part of the previous window, for example the Panel you added. Form2 f2 = new Form2() { TopLevel = false, TopMost = true }; panel1.Controls.Add(f2); f2.Show(); You d now have to hide the other things which are in the panel More likely you d create a new panel with the new content, and switch them on the same form.
Doing some basic drawing In a new project you ll override the OnPaint Method. At the end of the override you ll call your parents OnPaint() method passing it a PaintEventArgs argument. This triggers the paint event. Create a Graphics object Create a pen to draw the line. Create a solidbrush to make the filled in circle. Using the graphics object call DrawLine passing the pen and starting x,y, ending x,y Using the graphics object call FillEllipse passing the solidbrush, and
Draw some basic shapes C# protected override void OnPaint(PaintEventArgs e) { Graphics g = e.Graphics; Pen pen = new Pen(Brushes.Black); SolidBrush fillbrush = new SolidBrush(Color.Black); g.DrawLine(pen, 40, 10, 10, 40); g.FillEllipse(fillbrush, 10, 60, 30, 30); base.OnPaint(e); }
Building an interactive app Next we are going to build a trivial interactive app. This will be a basic tic tac toe game. We need to draw 4 lines that intersect We ll do that with the basic draw lines commands in each language Then we ll setup an event handler for when the user clicks the mouse in the window Wherever the user clicks we ll place an X or an O. We ll keep track of which one we just placed, and then switch to the next for the next click. We aren t going to worry about lining up the X and O or figuring out who won etc.
In C# draw the lines In Form1.Design.cs add these lines: string turn = "X"; protected override void OnPaint(PaintEventArgs e) { base.OnPaint(e); Graphics g = e.Graphics; Pen myPen = new Pen(Brushes.Black); SolidBrush myBrush = new SolidBrush(Color.Black); g.DrawLine(myPen, 10, 100, 290, 100); g.DrawLine(myPen, 10, 200, 290, 200); g.DrawLine(myPen, 100, 10, 100, 290); g.DrawLine(myPen, 200, 10, 200, 290); } In InitializeComponent() add: this.MouseDown += new System.Windows.Forms.MouseEventHandler(this.Form1_MouseDown);
Add event handler Into Form1.cs add (get to it by double clicking on the form): private void Form1_MouseDown(object sender, MouseEventArgs e) { using (Graphics graphics = CreateGraphics()) { graphics.DrawString(turn, DefaultFont, new SolidBrush(Color.Blue), e.X, e.Y); if (turn == "X") { turn = "O"; } else { turn = "X"; } } }
Frontend vs backend coding Most applications we ve written so far have been simple programs that do a single task. Larger applications are often divided and coded in two separate sections Backend Typically interacts with data sources (e.g. databases, files, internet APIs), implements all the logic. Frontend Sometimes a web application, or mobile app, or desktop application or all three. Middleware Often the interface between the backend, and the various front ends may be a set of APIs which allow new front ends to be developed in different formats.


")