CASE IH JX55T TIER 1 engine, 2WD tractor Service Repair Manual Instant Download
CASE IH JX55T TIER 1 engine, 2WD tractor Service Repair Manual Instant Download
Download Presentation

Please find below an Image/Link to download the presentation.
The content on the website is provided AS IS for your information and personal use only. It may not be sold, licensed, or shared on other websites without obtaining consent from the author. If you encounter any issues during the download, it is possible that the publisher has removed the file from their server.
You are allowed to download the files provided on this website for personal or commercial use, subject to the condition that they are used lawfully. All files are the property of their respective owners.
The content on the website is provided AS IS for your information and personal use only. It may not be sold, licensed, or shared on other websites without obtaining consent from the author.
E N D
Presentation Transcript
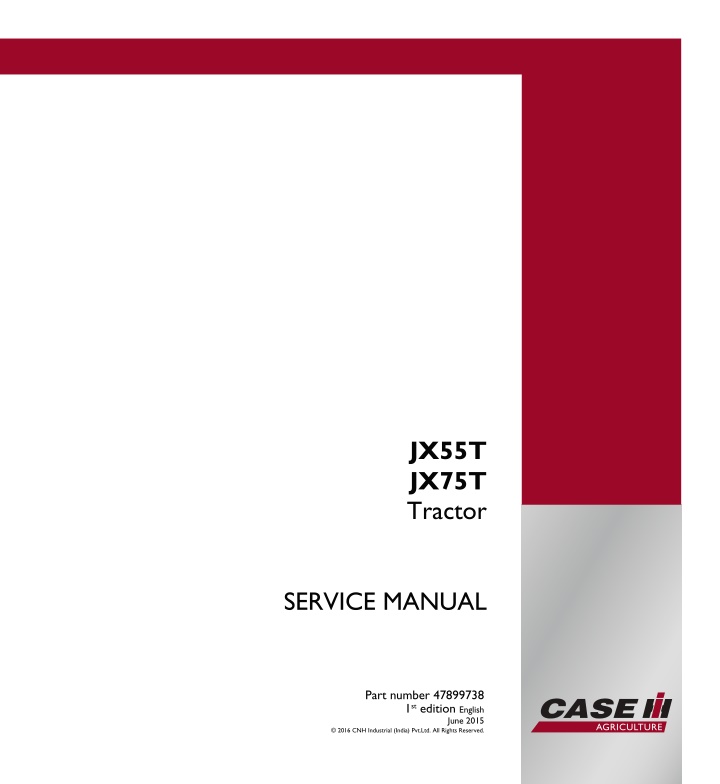
JX55T JX75T Tractor SERVICE MANUAL Part number 47899738 1st edition English June 2015 2016 CNH Industrial (India) Pvt.Ltd. All Rights Reserved.
SERVICE MANUAL JX55T TIER 1 engine, 2WD tractor JX55T TIER 1 engine, 4WD tractor JX75T TIER 1 engine, 2WD tractor JX75T TIER 1 engine, 4WD tractor 47899738 24/06/2015 EN
Contents INTRODUCTION Engine....................................................................................... 10 [10.001] Engine and crankcase ............................................................. 10.1 [10.102] Pan and covers .................................................................... 10.2 [10.106] Valve drive and gears .............................................................. 10.3 [10.101] Cylinder heads ..................................................................... 10.4 [10.105] Connecting rods and pistons....................................................... 10.5 [10.103] Crankshaft and flywheel............................................................ 10.6 [10.110] Balancer and damper .............................................................. 10.7 [10.218] Fuel injection system............................................................... 10.8 [10.202] Air cleaners and lines .............................................................. 10.9 [10.400] Engine cooling system ........................................................... 10.10 [10.414] Fan and drive .................................................................... 10.11 [10.304] Engine lubrication system........................................................ 10.12 Clutch ....................................................................................... 18 [18.110] Clutch and components ............................................................ 18.1 Transmission.............................................................................. 21 [21.114] Mechanical transmission ........................................................... 21.1 [21.140] Mechanical transmission internal components..................................... 21.2 [21.126] Gearbox external controls.......................................................... 21.3 [21.145] Gearbox internal components...................................................... 21.4 Four-Wheel Drive (4WD) system .................................................. 23 [23.314] Drive shaft.......................................................................... 23.1 Front axle system ....................................................................... 25 [25.400] Non-powered front axle ............................................................ 25.1 [25.100] Powered front axle ................................................................. 25.2 47899738 24/06/2015
https://www.ebooklibonline.com Hello dear friend! Thank you very much for reading. Enter the link into your browser. The full manual is available for immediate download. https://www.ebooklibonline.com
[25.102] Front bevel gear set and differential ............................................... 25.3 [25.108] Final drive hub, steering knuckles, and shafts ..................................... 25.4 Rear axle system........................................................................ 27 [27.100] Powered rear axle.................................................................. 27.1 [27.106] Rear bevel gear set and differential................................................ 27.2 [27.120] Planetary and final drives .......................................................... 27.3 Power Take-Off (PTO)................................................................. 31 [31.101] Rear mechanical control ........................................................... 31.1 [31.201] Power Take-Off (PTO) drive shaft.................................................. 31.2 Brakes and controls .................................................................... 33 [33.120] Mechanical service brakes......................................................... 33.1 [33.110] Parking brake or parking lock ...................................................... 33.2 Hydraulic systems....................................................................... 35 [35.000] Hydraulic systems.................................................................. 35.1 [35.104] Fixed displacement pump.......................................................... 35.2 [35.359] Main control valve.................................................................. 35.3 [35.204] Remote control valves ............................................................. 35.4 [35.100] Main lift system..................................................................... 35.5 Steering..................................................................................... 41 [41.101] Steering control .................................................................... 41.1 [41.200] Hydraulic control components...................................................... 41.2 [41.216] Cylinders ........................................................................... 41.3 Wheels...................................................................................... 44 [44.511] Front wheels........................................................................ 44.1 Electrical systems....................................................................... 55 [55.000] Electrical system ................................................................... 55.1 [55.100] Harnesses and connectors......................................................... 55.2 [55.201] Engine starting system............................................................. 55.3 47899738 24/06/2015
[55.301] Alternator........................................................................... 55.4 [55.302] Battery.............................................................................. 55.5 [55.404] External lighting .................................................................... 55.6 [55.408] Warning indicators, alarms, and instruments ...................................... 55.7 47899738 24/06/2015
INTRODUCTION 47899738 24/06/2015 1
INTRODUCTION Foreword Important notice All maintenance and repair operations described in this manual should be carried out exclusively by CASE IH authorised workshops. All instructions should be carefully observed and special equipment where indicated should be used. Anyone who carries out service operations described without carefully observing these prescriptions will be directly responsible for any damage caused. Notes for equipment Equipment which CASE IH proposes and shows in this manual is: - Studied and designed expressly for use on CASE IH tractors. - Necessary to make reliable repair. - Accurately built and strictly tested to offer efficient and long-lasting working life. Notice The words front , rear , right-hand side and left-hand side refer to the different parts as seen from the operator s seat oriented to the normal direction of movement of the tractor. 47899738 24/06/2015 3
INTRODUCTION Safety rules This warning symbol points out important messages involving personal safety. Carefully read the safety rules contained herein and follow advised precautions to avoid potential hazards and safeguarded your safety. In this manual you will find this symbol together with the following keywords. WARNING: It gives warning about improper repair operations and potential consequences affecting the service tech- nician s personal safety. DANGER: It gives specific warning about potential dangers for personal safety of the operator or other persons directly or indirectly involved in the operation. To prevent accidents Most accidents and personal injuries taking place in workshops are due from non-observance of some essential rules and safety precautions. The possibility that an accident might occur with any type of machines should not be disregarded, no matter how well the machine in question was designed and built. A wise and careful service technician is the best precautions against accidents. Careful observance of this only basic precaution would be enough to avoid many severe accidents. DANGER Never carry out any cleaning, lubrication or maintenance operations when the engine is running. 47899738 24/06/2015 4
INTRODUCTION Safety rules Generalities Carefully follow specified repair and maintenance procedures. Do not wear rings, wrist watches, jewels, unbuttoned or flapping clothing such as ties, torn clothes, scarves, open jackets or shirts with open zips which could get caught in moving parts. Use approved safety clothing such as anti-slipping footwear, gloves, safety goggles, helmets, etc. Wear safety glasses with side guards when cleaning parts using compressed air. Damaged or frayed wires and chains are unreliable. Do not use them for lifting or towing. Wear suitable protection such as approved eye protection, helmets, special clothing, gloves and footwear whenever welding. All persons standing in vicinity of the welding process should wear approved eye protection. Never look at the welding arc if your eyes are not suitably protected. Never carry out any repair on the machine if someone is sitting on the operator s seat, except they are qualified operators assisting in the operation to be carried out. Never operate the machine or use attachments from a place other than sitting at the operator s seat or at the side of the machine when operating the fender switches. Never carry out any operation on the machine when the engine is running, except when specifically indicated. Stop the engine and ensure that all pressure is relieved from hydraulic circuits before removing caps, covers, valves, etc. All repair and maintenance operations should be carried out with greatest care and attention. Disconnect the batteries and label all controls to warn that the tractor is being serviced. Block the machine and all equipment which should be raised. Never check or fill fuel tanks or batteries, nor use starting liquid if you are smoking or near open flames as such fluids are flammable. The fuel filling gun should always remain in contact with filler neck. Maintain this contact until the fuel stops flowing into the tank to avoid possible sparks due to static electricity build-up. To transfer a failed tractor, use a trailer of a low loading platform trolley if available. To load and unload the machine from the transportation means, select a flat area providing a firm support to the trailer or truck wheels. Firmly tie the machine to the truck or the trailer platform and block wheels as required by the transporter. Always use lifting equipment of appropriate capacity to lift or move heavy components. Chains should always be safely fastened. Ensure that fastening device is strong enough to hold the load foreseen. No persons should stand near the fastening point. The working area should be always kept clean and dry. Immediately clean any spillage of water or oil. Never use gasoline, diesel oil or other flammable liquids as cleaning agents. Use non-flammable non-toxic propri- etary solvents. Do not pile up grease or oil soaked rags, as they constitute a great fire hazard. Always place them into a metal container. Start up Never run the engine in confined spaces which are not equipped with adequate ventilation for exhaust gas extrac- tion. Never bring your body, arms, legs, feet, hands, fingers near fans or rotating belts. Engine Always loosen the radiator cap very slowly before removing it to allow pressure in the system to dissipate. Coolant should be topped up only when the engine is stopped. Do not fill up fuel tank when the engine is running. Never adjust the fuel injection pump when the tractor is moving. Never lubricate the tractor when the engine is running. 47899738 24/06/2015 5
INTRODUCTION Electrical systems If it is necessary to use auxiliary batteries, cables must be connected at both sides as follows. (+) to (+) and (-) to (-). Avoid short-circuiting the terminals. Gas released from batteries is highly flammable. During charging, leave the battery compartment uncovered to improve ventilation. Avoid sparks or flames near the battery area. Do not smoke. Do not charge batteries in confined spaces. Always disconnect the batteries before performing any type of service on the electrical system. Hydraulic systems Some fluid coming out from a very small port can be almost invisible and be strong enough to penetrate skin. For this reason, Never use your hands to check for leaks, but use a piece of cardboard or a piece of wood for this purpose. If any fluid is injected into the skin, seek medical aid immediately. Lack of immediate medical attention may result in serious infections or dermatitis. Always take system pressure readings using the appropriate gauges. Wheels and tires Check that the tires are correctly inflated at the pressure specified by the manufacturer. Periodically check for possible damage to the rims and tires. Stay a the tire side when inflating. Check the pressure only when the tractor is unloaded and tires are cold to avoid wrong reading due to over- pres- sure. Never cut, nor weld a rim with the inflated tire assembled. To remove the wheels, block both front and rear tractor wheels. Raise the tractor and install safe and stable supports under the tractor in accordance with the regulations in force. Deflate the tire before removing any object caught into the tire tread. Never inflate tires using flammable gases as they may originate explosions and cause injuries to bystanders. Removal and installation Lift and handle all heavy components using lifting equipment of adequate capacity. Ensure that parts are supported by appropriate slings and hooks. Use lifting eyes provided to this purpose. Take care of the persons near the loads to be lifted. 47899738 24/06/2015 6
SERVICE MANUAL Engine JX55T TIER 1 engine, 2WD tractor JX55T TIER 1 engine, 4WD tractor JX75T TIER 1 engine, 2WD tractor JX75T TIER 1 engine, 4WD tractor 47899738 24/06/2015 10
Engine - Engine and crankcase Engine - General specification General specifications Make JX75T JX55T IVECO 4 stroke, diesel, naturally aspirated, direct injection, water cooled 75 Hp 4 104.000 mm (4.094 in) 115.000 mm (4.528 in) 3908 cm (238 in ) 18:1 1-3-4-2 650 RPM 2770 RPM 2500 RPM Type 55 Hp 3 Power Number of cylinders Bore Stroke Cubic capacity Compression ratio Firing order Idle speed Maximum no load speed Rated speed 104.000 mm (4.094 in) 115.000 mm (4.528 in) 2931 cm (179 in ) 18:1 1-2-3 650 RPM 2770 RPM 2500 RPM Engine block Cylinder liner seat diameter in engine block Cylinder sleeve O.D Interference between liners and seats in block Liner O.D oversize Cylinder liner inner diameter Maximum ovality and taper due to wear Liner inner diameter oversize 106.850 106.900 mm (4.207 4.209 in) 107.020 107.050 mm (4.213 4.215 in) 0.120 0.200 mm (0.005 0.008 in) 0.200 mm (0.008 in) 104.00 104.024 mm (4.09 4.095 in) 0.120 mm (0.005 in) 0.400 0.800 mm (0.016 0.031 in) Camshaft bush seat diameters Front Intermediate Rear Tappet seat bore diameter 54.780 54.805 mm (2.157 2.158 in) 54.280 54.305 mm (2.137 2.138 in) 53.780 53.805 mm (2.117 2.118 in) 15.000 15.018 mm (0.591 0.591 in) 0.100 mm (0.004 in) 0.200 mm (0.008 in) 0.300 mm (0.012 in) 84.200 84.230 mm (3.315 3.316 in) Tappet oversize Main bearing seat bore diameter Cylinder head Valve guide seat bore diameter in head Valve guide oversize Valve stand-in Maximum stand-in permitted Injector standout Maximum stand-out permitted Original cylinder head height Maximum head dressing allowed 13.950 13.983 mm (0.549 0.551 in) 0.200 mm (0.008 in) 0.700 1.000 mm (0.028 0.039 in) 1.300 mm (0.051 in) 0.050 0.700 mm (0.002 0.028 in) 1.000 mm (0.039 in) 92 mm (4 in) 0.500 mm (0.020 in) Exhaust valves Valve head diameter Valve stem diameter Face angle Stem to guide clearance (worm or cold) Cam lift Valve lift 37.500 37.750 mm (1.476 1.486 in) 7.985 8.000 mm (0.314 0.315 in) 45 30 7 0.300 mm (0.012 in) 5.677 mm (0.224 in) 10.060 mm (0.396 in) Intake valves Valve head diameter Valve stem diameter 43.300 45.500 mm (1.705 1.791 in) 7.985 8.000 mm (0.314 0.315 in) 47899738 24/06/2015 10.1 [10.001] / 3
Engine - Engine and crankcase Face angle Stem to guide clearance (worm or cold) Cam lift Valve lift 60 30 7 0.300 mm (0.012 in) 5.250 mm (0.207 in) 9.310 mm (0.367 in) Valve springs Number per valve Free length Length loaded at 26.1 28.9 kg (57.5 63.7 lb) Length loaded at 51.2 56.5 kg (112.9 124.6 lb) 1 44.600 mm (1.756 in) 34.000 mm (1.339 in) 23.800 mm (0.937 in) Valve timing Intake opening (before top dead centre) Intake closing (after bottom dead centre) Exhaust opening (before bottom dead centre) Exhaust closing (after top dead centre) 12 31 50 16 Valve inserts Valve guide O.D Valve guide oversize Valve guide interference fit in housing cylinder head Valve guide fitted I.D after reaming Valve stem clearance in guide Maximum wear clearance Maximum valve stem eccentricity over one revolution with stylus on sealing face 13.933 14.016 mm (0.549 0.552 in) 0.200 mm (0.008 in) 0.0050 0.0500 mm (0.0002 0.0020 in) 8.023 8.043 mm (0.316 0.317 in) 0.0230 0.0580 mm (0.0009 0.0023 in) 0.130 mm (0.005 in) 0.030 mm (0.001 in) Engine - Torque Description Thread size Torque Angle ( 125 135 ) + ( 135 145 ) 90 60 60 Bolt, cylinder head (C1) 40 N m (354 lb in) M12 X 1.25 M14 X 1.25 M12 X 1.25 M11 X 1.25 M12 X 1.25 M8 X 1.25 M30 X 1.5 M12 X 1.25 M12 X 1.25 M12 X 1.25 M12 X 1.25 Bolt, main bearing caps (C2) Bolt, timing cover and case (C3) Bolt, connecting rod caps (C4) Bolt, flywheel (C5) Bolt, rocker shaft bracket (C6) Nut, crankshaft pulley hub (C7) Bolt, fan and alternator drive pulley (C8) Nut, injection pump shaft gear (C9) Nuts, injection pump to support (C10) Retaining screws, additional weights (C11) 80 N m (708 lb in) 40 N m (354 lb in) 40 N m (354 lb in) 40 N m (354 lb in) 25 N m (221 lb in) 300 N m (2655 lb in) 49 N m (434 lb in) 64 N m (566 lb in) 23 N m (204 lb in) 110 N m (974 lb in) Engine - Sealing Operation description Sealant specification LOCTITE 270 LOCTITE 243 LOCTITE 510 LOCTITE 270 LOCTITE 270 LOCTITE 510 LOCTITE 243 LOCTITE 270 Loctite 5699 Adopter for oil filter (S1) Adopter for tachometer cable (S2) Flywheel housing to engine block (S3) Timing gear case studs (S4) Timing gear cover dowel pin (S5) Starter motor to flywheel housing (S6) Allen plug in cylinder head thermostat housing (S7) Cylinder head exhaust manifold studs (S8) Oil sump to engine block (S9) 47899738 24/06/2015 10.1 [10.001] / 4
Engine - Engine and crankcase Operation description Sealant specification Loctite 77164 LOCTITE 243 Silencer mounting studs on exhaust manifold (S10) Flywheel bolt (S11) Engine - Special tools CAUTION Operations described in this section of the manual must be performed using the following essential tools to work safely and achieve the best technical results with additional savings of time and effort. Tool description Tool number 290284 290740 291050 292320 9970846 9970845 9970364 9970848 9970844 82834312 9971375 9971378 9971410 9971367 Local Local Injector tester Sling hook, engine Cylinder head valve spring compressor Tractor splitting trolley Installer rear main oil seal Installer front oil seal Dummy injector Swan neck pipe (fuel timing) Engine mounting bracket (to be used with engine stand 293860) Steering wheel puller Bushes for steering wheel puller Remover, hand accelerator pin Cylinder pressure test Kit Lube pressure check Kit Piston ring compressor Piston ring expander 47899738 24/06/2015 10.1 [10.001] / 5
Engine - Engine and crankcase Crankcase - General specification Crank gear Crankshaft - bearings Main journal diameter 79.791 79.810 mm (3.141 3.142 in) 0.254 mm (0.010 in) 0.508 mm (0.020 in) 0.762 mm (0.030 in) 1.016 mm (0.040 in) 2.168 2.178 mm (0.085 0.086 in) 0.254 mm (0.010 in) 0.508 mm (0.020 in) 0.762 mm (0.030 in) 1.016 mm (0.040 in) 0.034 0.103 mm (0.001 0.004 in) 0.180 mm (0.007 in) 63.725 63.744 mm (2.509 2.510 in) 0.254 mm (0.010 in) 0.508 mm (0.020 in) 0.762 mm (0.030 in) 1.016 mm (0.040 in) 1.805 1.815 mm (0.071 0.071 in) 0.254 mm (0.010 in) 0.508 mm (0.020 in) 0.762 mm (0.030 in) 1.016 mm (0.040 in) 0.033 0.087 mm (0.001 0.003 in) 0.180 mm (0.007 in) 3.378 3.429 mm (0.133 0.135 in) 0.127 mm (0.005 in) 0.254 mm (0.508 in) 0.508 mm (0.020 in) 31.766 31.918 mm (1.251 1.257 in) 32.000 32.100 mm (1.260 1.264 in) 0.082 0.334 mm (0.003 0.013 in) 0.400 mm (0.016 in) Main journal undersize Main bearing wall thickness Main bearing undersize Main journal clearance in bearings Maximum wear clearance Crankpin diameter Crankpin undersize Big end bearing wall thickness Big end bearing undersize Crankpin clearance in big end bearing Maximum wear clearance Crankshaft thrust washer thickness Thrust washer oversize Width of main bearing housing over thrust washers Length of corresponding main journal Crankshaft end float Maximum wear clearance Maximum main journal and crankpin ovality or taper after grinding Maximum main journal and crankpin ovality or taper due to wear Maximum main journal misalignment crankshaft resting on end journals Maximum misalignment of crankpins relative to main journals (in either direction) Tolerance from outer crankpin edge to crankshaft center line Maximum crankshaft flange run-out with gauge stylu, over 108.000 mm (4.252 in) diameter (total gauge reading) Maximum flywheel seat eccentricity relative to main journals (total gauge reading) 0.0100 mm (0.0004 in) 0.0500 mm (0.0020 in) 0.0100 mm (0.00039 in) 0.2500 mm (0.00984 in) 0.1000 mm (0.0039 in) 0.0250 mm (0.0010 in) 0.0400 mm (0.0016 in) 47899738 24/06/2015 10.1 [10.001] / 6
Engine - Engine and crankcase Connecting rods Small end bore diameter Small end bushing outer diameter Bushing interference fit in small end Small end bushing fitted ID Big end bore diameter Maximum connecting rod axis misalignment at 125.000 mm (4.921 in) Maximum connecting rod weight difference over a complete set from the same engine 41.846 41.884 mm (1.647 1.649 in) 41.979 42.017 mm (1.647 1.649 in) 0.0950 0.1710 mm (0.0037 0.0067 in) 38.004 38.014 mm (1.496 1.497 in) 67.407 67.422 mm (2.654 2.654 in) 0.0700 mm (0.0028 in) 25.00 g (0.88 oz) Pistons Piston diameter (Measured at 57.000 mm (2.244 in) from base of skirt and right angles to pin) Piston clearance in liner Maximum wear clearance Piston oversize range Piston stand-out with respect to head at TDC Piston pin diameter Piston pin seat bore in piston Piston pin clearance in piston Piston pin clearance in small end bushing Maximum wear clearance Maximum weight difference between pistons on same engine Piston ring clearance in groove Top 2nd 3rd Maximum wear clearance Top 2nd and 3rd Piston ring gap Top 2nd 3rd Maximum wear gap 103.852 103.870 mm (4.089 4.089 in) 0.174 0.212 mm (0.007 0.008 in) 0.300 mm (0.012 in) 0.400 0.800 mm (0.016 0.031 in) 0.430 0.840 mm (0.017 0.033 in) 37.983 37.990 mm (1.495 1.496 in) 38.000 38.006 mm (1.496 1.496 in) 0.0100 0.0230 mm (0.0004 0.0009 in) 0.0140 0.0310 mm (0.0006 0.0012 in) 0.060 mm (0.002 in) 20.00 g (0.71 oz) 0.0900 0.1220 mm (0.0035 0.0048 in) 0.0600 0.0850 mm (0.0024 0.0033 in) 0.0400 0.0750 mm (0.0016 0.0030 in) 0.500 mm (0.020 in) 0.200 mm (0.008 in) 0.400 0.650 mm (0.016 0.026 in) 0.300 0.550 mm (0.012 0.022 in) 0.300 0.600 mm (0.012 0.024 in) 1.200 mm (0.047 in) Dynamic balancer ( JX75T only) Idler gear jack shaft clearance in gear bushing * Flyweight gear shaft clearance in front bushing * Drive pinion clearance in bushings * Connecting sleeve spine, Power Take-Off (PTO) gear connection and flyweight drive gear backlash Flyweight gear shaft clearance in rear bushing ** Pivot clearance in flyweight bushings Flyweight bushing interference fit in housing Idler gear jack shaft clearance in bushing ** 0.050 0.100 mm (0.002 0.004 in) 0.050 0.100 mm (0.002 0.004 in) 0.050 0.100 mm (0.002 0.004 in) 0.038 0.106 mm (0.001 0.004 in) 0.013 0.061 mm (0.001 0.002 in) 0.020 0.073 mm (0.001 0.003 in) 0.040 0.100 mm (0.002 0.004 in) 0.013 0.061 mm (0.001 0.002 in) * Bushing interference fit in housing: 0.063 0.140 mm (0.002 0.006 in) ** Bushing interference fit in housing: 0.037 0.101 mm (0.001 0.004 in) 47899738 24/06/2015 10.1 [10.001] / 7
Suggest: If the above button click is invalid. Please download this document first, and then click the above link to download the complete manual. Thank you so much for reading
Engine - Engine and crankcase Engine - Static description The engines are with 4 cylinders ( JX75T) and 3 cylinders ( JX55T). Both engines feature cross flow cylinder heads, with the inlet and exhaust manifolds on opposite sides of the cylinder head. The fuel and air combustion process, takes place in the specially designed bowel in the crown of the pistons. Cylinder head assembly The cylinder head incorporates valves and springs, with the valve rocker arm shaft assembly bolted to the cylinder block through the cylinder head. Cylinder head retaining bolts are evenly spaced with a six- point pattern around each cylinder, this ensures an even clamping load across the cylinder head. The intake and exhaust manifolds are bolted to the head. The intake manifold is mounted on the right-hand side of the engine, with the diesel injectors mounted outside the rocker cover. The exhaust manifold is mounted on the left side of the engine. Water outlet connections and thermostat being attached to the front of the cylinder block directly behind the radiator. Valve guides are inserted into the cylinder head, and replaceable. Special replaceable cast alloy valve seats are pressed into each valve port during manufacturing. No over size valve seats on guides are available. All valves are fitted with positive value rotators, valve clearance is maintained by adjustment of the self locking ad- justing screw, mounted in each of the rocker arms. Camshaft assembly The camshaft runs in 3 replaceable bushes. The camshaft drive gear is in mesh with and driven by the camshaft idler gear which is driven by the crankshaft timing gear. Camshaft end thrust is controlled by a thrust plate bolted to the block, and located between the camshaft gear and the front camshaft journal. A helical gear is integral on rear of cam shaft, and drives the engine oil lubrication pump mounted forward of the flywheel. Cylinder block assembly The cylinder block is an alloy cast iron with deep cylinder skirts & water jackets for cooling the cylinders. The cylinder bores are machined integral with the cylinder block, during the manufacturing process. Cylinders are in line and vertical and numbered from 1 to 3 or 4 from front of the engine to the rear. The oil sump, which is attached to the bottom of the cylinder block, is the reservoir for the engine oil lubrication system. A cast iron engine front cover and front plate is attached to the front of the engine and covers all of the timing gear assembly. Crankshaft assembly The crankshaft is supported in the cylinder block by 5 and 4 main bearings in JX75T and JX55T engines respectively. The crankshaft is manufactured from steel with machined finished crank webs. End thrust is controlled by a thrust bearing incorporated in the centre main bearing of the crankshaft in JX75T engine and in the second main bearing from flywheel side in JX55T engine. A dynamic balancer is fitted and driven by crankshaft to ensure smooth running operation. Front and rear crankshaft oil sealing is effected by one piece seals that are designed for long and durable service life. Connecting rods Connecting rods Wedge shaped at the small end has been designed to reduce the reciprocating weight at the piston end. The connecting rods are heavy beam construction and are assembled as a matched set to each engine, attached to the crankshaft, by means of insert type bearings. 47899738 24/06/2015 10.1 [10.001] / 8
https://www.ebooklibonline.com Hello dear friend! Thank you very much for reading. Enter the link into your browser. The full manual is available for immediate download. https://www.ebooklibonline.com

![[PDF⚡READ❤ONLINE] Black Hole Astrophysics: The Engine Paradigm (Springer Praxis](/thumb/21503/pdf-read-online-black-hole-astrophysics-the-engine-paradigm-springer-praxis.jpg)
