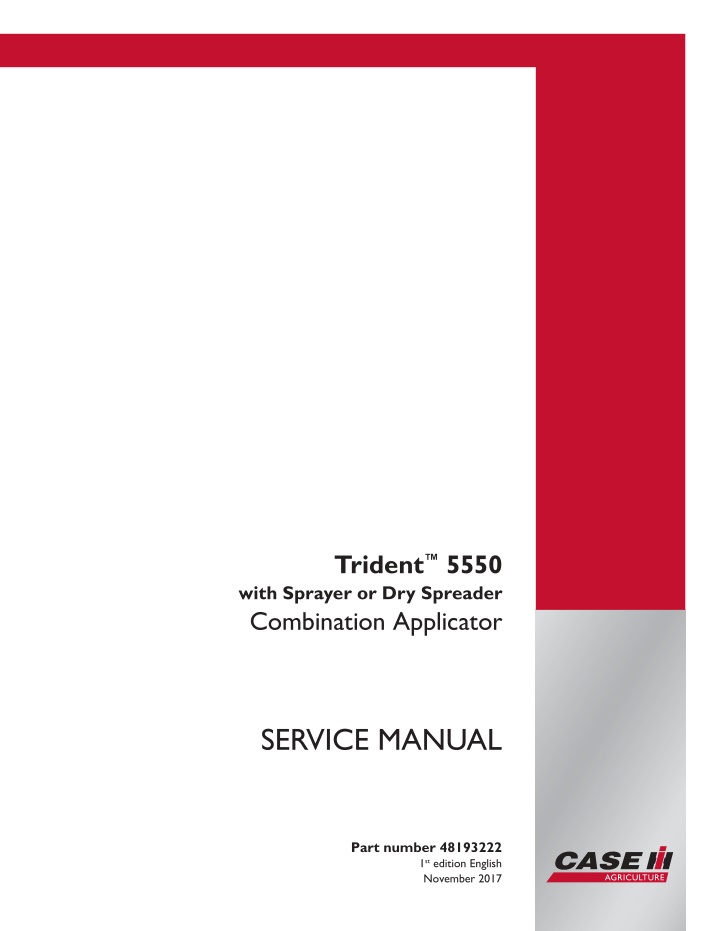
CASE IH Trident 5550 with Sprayer or Dry Spreader Combination Applicator Service Repair Manual Instant Download (PIN YGT044219 and above)
CASE IH Trident 5550 with Sprayer or Dry Spreader Combination Applicator Service Repair Manual Instant Download (PIN YGT044219 and above)
Download Presentation

Please find below an Image/Link to download the presentation.
The content on the website is provided AS IS for your information and personal use only. It may not be sold, licensed, or shared on other websites without obtaining consent from the author. If you encounter any issues during the download, it is possible that the publisher has removed the file from their server.
You are allowed to download the files provided on this website for personal or commercial use, subject to the condition that they are used lawfully. All files are the property of their respective owners.
The content on the website is provided AS IS for your information and personal use only. It may not be sold, licensed, or shared on other websites without obtaining consent from the author.
E N D
Presentation Transcript
Trident 5550 with Sprayer or Dry Spreader Combination Applicator SERVICE MANUAL Printed in U.S.A. Part number 48193222 1st edition English November 2017 2017 CNH Industrial America LLC. All Rights Reserved. Case IH is a trademark registered in the United States and many other countries, owned or licensed to CNH Industrial N.V., its subsidiaries or affiliates.
Link Product / Engine Product Market Product North America Engine Trident 5550 Combo Applicator Trident Combo Applicator [YGT044219 - ] F2CFE613J*B057 48193222 22/11/2017
Contents INTRODUCTION Engine....................................................................................... 10 [10.001] Engine and crankcase ............................................................. 10.1 [10.206] Fuel filters .......................................................................... 10.2 [10.202] Air cleaners and lines .............................................................. 10.3 [10.500] Selective Catalytic Reduction (SCR) exhaust treatment........................... 10.4 [10.400] Engine cooling system ............................................................. 10.5 [10.414] Fan and drive ...................................................................... 10.6 Power coupling........................................................................... 19 [19.100] Drive shaft.......................................................................... 19.1 [19.110] Flywheel damper ................................................................... 19.2 Front axle system ....................................................................... 25 [25.100] Powered front axle ................................................................. 25.1 Rear axle system........................................................................ 27 [27.100] Powered rear axle.................................................................. 27.1 Hydrostatic drive......................................................................... 29 [29.200] Mechanical control ................................................................. 29.1 [29.218] Pump and motor components...................................................... 29.2 Brakes and controls .................................................................... 33 [33.202] Hydraulic service brakes ........................................................... 33.1 [33.110] Parking brake or parking lock ...................................................... 33.2 Hydraulic systems....................................................................... 35 [35.000] Hydraulic systems.................................................................. 35.1 [35.300] Reservoir, cooler, and filters........................................................ 35.2 [35.104] Fixed displacement pump.......................................................... 35.3 [35.106] Variable displacement pump ....................................................... 35.4 48193222 22/11/2017
https://www.ebooklibonline.com Hello dear friend! Thank you very much for reading. Enter the link into your browser. The full manual is available for immediate download. https://www.ebooklibonline.com
[35.911] Sprayer boom hydraulic system.................................................... 35.5 [35.948] Frame positioning extending ....................................................... 35.6 Pneumatic system ...................................................................... 36 [36.908] Pneumatic suspension ............................................................. 36.1 Frames and ballasting................................................................. 39 [39.100] Frame .............................................................................. 39.1 [39.130] Sprayer boom ...................................................................... 39.2 Steering..................................................................................... 41 [41.216] Cylinders ........................................................................... 41.1 Wheels...................................................................................... 44 [44.511] Front wheels........................................................................ 44.1 [44.520] Rear wheels........................................................................ 44.2 Cab climate control..................................................................... 50 [50.100] Heating............................................................................. 50.1 [50.200] Air conditioning..................................................................... 50.2 [50.300] Cab pressurizing system........................................................... 50.3 Electrical systems....................................................................... 55 [55.000] Electrical system ................................................................... 55.1 [55.100] Harnesses and connectors......................................................... 55.2 [55.988] Selective Catalytic Reduction (SCR) electrical system ............................ 55.3 [55.640] Electronic modules................................................................. 55.4 [55.019] Hydrostatic drive control system ................................................... 55.5 [55.512] Cab controls........................................................................ 55.6 [55.050] Heating, Ventilation, and Air-Conditioning (HVAC) control system................. 55.7 [55.DTC] FAULT CODES.................................................................... 55.8 Spraying.................................................................................... 78 [78.110] Chemical spraying.................................................................. 78.1 48193222 22/11/2017
[78.111] Spraying pump ..................................................................... 78.2 Platform, cab, bodywork, and decals............................................. 90 [90.100] Engine hood and panels ........................................................... 90.1 [90.116] Fenders and guards................................................................ 90.2 48193222 22/11/2017
INTRODUCTION 48193222 22/11/2017 1
INTRODUCTION Foreword - Important notice regarding equipment servicing All repair and maintenance work listed in this manual must be carried out only by qualified dealership personnel, strictly complying with the instructions given, and using, whenever possible, the special tools. Anyone who performs repair and maintenance operations without complying with the procedures provided herein shall be responsible for any subsequent damages. The manufacturer and all the organizations of its distribution chain, including - without limitation - national, regional, or local dealers, reject any responsibility for damages caused by parts and/or components not approved by the manu- facturer, including those used for the servicing or repair of the product manufactured or marketed by the manufacturer. In any case, no warranty is given or attributed on the product manufactured or marketed by the manufacturer in case of damages caused by parts and/or components not approved by the manufacturer. The manufacturer reserves the right to make improvements in design and changes in specifications at any time without notice and without incurring any obligation to install them on units previously sold. Specifications, descriptions, and illustrative material herein are as accurate as known at time of publication but are subject to change without notice. In case of questions, refer to your CASE IH Sales and Service Networks. 48193222 22/11/2017 3
INTRODUCTION Safety rules Personal safety This is the safety alert symbol. It is used to alert you to potential personal injury hazards. Obey all safety messages that follow this symbol to avoid possible death or injury. Throughout this manual you will find the signal words DANGER, WARNING, and CAUTION followed by special in- structions. These precautions are intended for the personal safety of you and those working with you. Read and understand all the safety messages in this manual before you operate or service the machine. DANGER indicates a hazardous situation that, if not avoided, will result in death or serious injury. WARNING indicates a hazardous situation that, if not avoided, could result in death or serious injury. CAUTION indicates a hazardous situation that, if not avoided, could result in minor or moderate injury. FAILURE TO FOLLOW DANGER, WARNING, AND CAUTION MESSAGES COULD RESULT IN DEATH OR SERIOUS INJURY. Machine safety NOTICE: Notice indicates a situation that, if not avoided, could result in machine or property damage. Throughout this manual you will find the signal word Notice followed by special instructions to prevent machine or property damage. The word Notice is used to address practices not related to personal safety. Information NOTE: Note indicates additional information that clarifies steps, procedures, or other information in this manual. Throughout this manual you will find the word Note followed by additional information about a step, procedure, or other information in the manual. The word Note is not intended to address personal safety or property damage. 48193222 22/11/2017 4
INTRODUCTION Personal safety General safety rules Use caution when operating the machine on slopes. Raised equipment, full tanks and other loads will change the center of gravity of the machine. The machine can tip or roll over when near ditches and embankments or uneven surfaces. Never permit anyone other than the operator to ride on the machine. Never operate the machine under the influence of alcohol, drugs, or while otherwise impaired. When digging or using ground engaging attachments be aware of buried cables. Contact local utilities to determine the locations of services. Pay attention to overhead power lines and hanging obstacles. High voltage lines may require significant clearance for safety. Hydraulic oil or diesel fuel leaking under pressure can penetrate the skin, causing serious injury or infection. DO NOT use your hand to check for leaks. Use a piece of cardboard or paper. Stop engine, remove key and relieve the pressure before connecting or disconnecting fluid lines. Make sure all components are in good condition and tighten all connections before starting the engine or pressur- izing the system. If hydraulic fluid or diesel fuel penetrates the skin, seek medical attention immediately. Continuous long term contact with hydraulic fluid may cause skin cancer. Avoid long term contact and wash the skin promptly with soap and water. Keep clear of moving parts. Loose clothing, jewelry, watches, long hair, and other loose or hanging items can become entangled in moving parts. Wear protective equipment when appropriate. DO NOT attempt to remove material from any part of the machine while it is being operated or components are in motion. Make sure all guards and shields are in good condition and properly installed before operating the machine. Never operate the machine with shields removed. Always close access doors or panels before operating the machine. Dirty or slippery steps, ladders, walkways, and platforms can cause falls. Make sure these surfaces remain clean and clear of debris. A person or pet within the operating area of a machine can be struck or crushed by the machine or its equipment. DO NOT allow anyone to enter the work area. Raised equipment and/or loads can fall unexpectedly and crush persons underneath. Never allow anyone to enter the area underneath raised equipment during operation. Never operate engine in enclosed spaces as harmful exhaust gases may build up. Before starting the machine, be sure that all controls are in neutral or park lock position. Start the engine only from the operator s seat. If the safety start switch is bypassed, the engine can start with the transmission in gear. Do not connect or short across terminals on the starter solenoid. Attach jumper cables as described in the manual. Starting in gear may cause death or serious injury. Always keep windows, mirrors, all lighting, and Slow Moving Vehicle (SMV) emblem clean to provide the best possible visibility while operating the machine. Operate controls only when seated in the operator s seat, except for those controls expressly intended for use from other locations. 48193222 22/11/2017 5
SERVICE MANUAL Engine Trident 5550 Combo Applicator 48193222 22/11/2017 10
Engine - Engine and crankcase Engine - Remove Prior operation: Remove the hood, refer to Hood - Remove (90.100) Prior operation: Evacuate the AC system, refer to Air conditioning - Service instruction - System evacuation and recharging (50.200) Prior operation: Remove the radiator and aftercooler package, refer to Engine cooling system - Remove - Radiator and after cooler package (10.400) Prior operation: Remove the DOC catalyst, refer to Selective Catalytic Reduction (SCR) muffler and catalyst - Remove - Diesel Oxidation Catalyst (DOC) (10.500) 1. Set the battery disconnect switch to the off position. 2. Remove the four bolts (1) from the air filter duct (2). 1 RAIL17SP00532AA 3. Loosen the clamp (1) on the air intake tube. Disconnect the humidity sensor (2). 2 RAIL17SP00534AA 4. Remove the four mounting bolts under the air cleaner. 3 RAIL17SP00924AA 48193222 22/11/2017 10.1 [10.001] / 3
Engine - Engine and crankcase 5. Remove the air cleaner assembly. 4 RAIL17SP00537AA 6. Remove the bolts (1) securing the air cleaner mounting bracket (2), left side shown. Remove the one bolt (1) for the deaeration tank bracket. 5 RAIL17SP00538AA 7. Disconnect the hose from the bottom of the deaeration tank, (hose not shown), disconnect the p-clamp for the over flow hose from the tank bracket. 6 RAIL17SP00925AA 48193222 22/11/2017 10.1 [10.001] / 4
Engine - Engine and crankcase 8. Remove the air cleaner bracket. 7 RAIL17SP00539AA 8 RAIL17SP00540AA 9. Disconnect the coolant lines (1) from the DEF coolant tank. Remove the air cleaner support bracket mounting bolts (2) from the hood support bracket. 9 RAIL17SP00579AA 48193222 22/11/2017 10.1 [10.001] / 5
Engine - Engine and crankcase 10. Remove the air cleaner support bracket mounting to frame bolts (1) on both side of engine. 10 RAIL17SP00581AA 11 RAIL17SP00582AA 11. Remove the four bracket mounting bolts (1) (left side shown) from the radiator mounting bracket. 12 RAIL17SP00584AA 12. Remove any wire harness clamps from the air cleaner support bracket. 13 RAIL17SP00585AA 48193222 22/11/2017 10.1 [10.001] / 6
Engine - Engine and crankcase 13. Using suitable lifting equipment, lift the air cleaner support bracket off. 14 RAIL17SP00586AA 14. Disconnect the fan drive electrical connector (1). Cut the wire ties (2). Remove the six fan drive mounting nuts (3). 15 RAIL17SP00587AA 15. Remove the fan assembly or set into fan shroud. 16 RAIL17SP00588AA 16. Remove the clamp and disconnect the air intake pipe (1). 17 RAIL17SP00590AA 48193222 22/11/2017 10.1 [10.001] / 7
Engine - Engine and crankcase 17. Disconnect the AC lines (1) from the AC compressor Disconnect the AC compressor connector (2). 18 RAIL17SP00591AA 18. Disconnect the ECM connector X-816F (1) from the controller. 19 RAIL17SP00593AA 19. Disconnect the excite cable (1) from the alternator. Disconnect the ground cable (2) from the alternator mounting bolt. 20 RAIL17SP00594AA 20. Disconnect the FPT harness interface connector X-840F (1). 21 RAIL17SP00597AA 48193222 22/11/2017 10.1 [10.001] / 8
Engine - Engine and crankcase 21. Disconnect harness connector X-806F (1) from the cold start relay. Disconnect connector X-817F (2) for the grid heater. 22 RAIL17SP00598AA 22. Disconnect the positive cable (1) from the cold start relay. 23 RAIL17SP00600AA 23. Cut the wire ties (1) securing the wire harness to the engine. 24 RAIL17SP00601AA 24. Disconnect the air compressor line (1) from the com- pressor. 25 RAIL17SP00602AA 48193222 22/11/2017 10.1 [10.001] / 9
Engine - Engine and crankcase 25. Remove the two bolts (1) from the bell housing secur- ing the wire harness. 26 RAIL17SP00603AA 26. Disconnect the P-clamps (1) from the bottom of the engine. 27 RAIL17SP00604AA 27. Disconnect the power cables (1) from the starter. Dis- connect the ground wire (2) from the starter. 28 RAIL17SP00605AA 28. Remove the clamps (1), remove the drive shaft shield (2). 29 RAIL17SP00606AA 48193222 22/11/2017 10.1 [10.001] / 10
Engine - Engine and crankcase 29. Remove the bolts (1) securing the flywheel shield (2). 30 RAIL17SP00611AA 30. Remove both shields. 31 RAIL17SP00610AA 31. Remove the four u-joint bolts securing the drive shaft to the fly wheel damper. 32 RAIL17SP00609AA 32. Disconnect the two coolant lines (1) from the left side of the engine. 33 RAIL17SP00612AA 48193222 22/11/2017 10.1 [10.001] / 11
Engine - Engine and crankcase 33. Using suitable lifting equipment, attach to the two lift- ing brackets. 34 RAIL17SP00613AA 34. Remove the four engine mount bolts. Left rear mount shown. 35 RAIL17SP00614AA 35. Slowly raise the engine out. 36 RAIL17SP00613AA 48193222 22/11/2017 10.1 [10.001] / 12
Engine - Engine and crankcase Engine - Install 1. With the proper lifting equipment, pick the engine up, move it in place then lower it onto the chassis. 1 RAIL17SP00613AA 2. Line up and install the four engine mounting bolts. Torque the bolts to 485 515 N m (358 380 lb ft). 2 RAIL17SP00614AA 3. Connect the two coolant hoses (1), secure the with the clamps removed earlier. 3 RAIL17SP00612AA 4. Connect the drive shaft to the fly wheel damper. Torque bolts to 70 94 N m (52 69 lb ft). 4 RAIL17SP00609AA 48193222 22/11/2017 10.1 [10.001] / 13
Suggest: If the above button click is invalid. Please download this document first, and then click the above link to download the complete manual. Thank you so much for reading
Engine - Engine and crankcase 5. Install the fly wheel shield (1) and secure the shield with the bolts removed earlier. 5 RAIL17SP00611AA 6. Install the drive shaft shield (1), secure the shield with the clamps removed earlier. 6 RAIL17SP00606AA 7. Connect the starter power cables (1). ground cable (2). Connect the 7 RAIL17SP00605AA 8. Secure the hoses to the bottom of the engine using the p-clamps (1) removed earlier. 8 RAIL17SP00604AA 48193222 22/11/2017 10.1 [10.001] / 14
https://www.ebooklibonline.com Hello dear friend! Thank you very much for reading. Enter the link into your browser. The full manual is available for immediate download. https://www.ebooklibonline.com

