Crafting a Unique Extended Essay on Artistic Exploration
Dive into the world of art with an engaging extended essay that explores the works of two artists, delves into their unique styles, and compares their influences on your own creative process. Unleash your creativity and analytical skills as you craft a thought-provoking essay filled with personal insights and captivating images.
Download Presentation

Please find below an Image/Link to download the presentation.
The content on the website is provided AS IS for your information and personal use only. It may not be sold, licensed, or shared on other websites without obtaining consent from the author. If you encounter any issues during the download, it is possible that the publisher has removed the file from their server.
You are allowed to download the files provided on this website for personal or commercial use, subject to the condition that they are used lawfully. All files are the property of their respective owners.
The content on the website is provided AS IS for your information and personal use only. It may not be sold, licensed, or shared on other websites without obtaining consent from the author.
E N D
Presentation Transcript
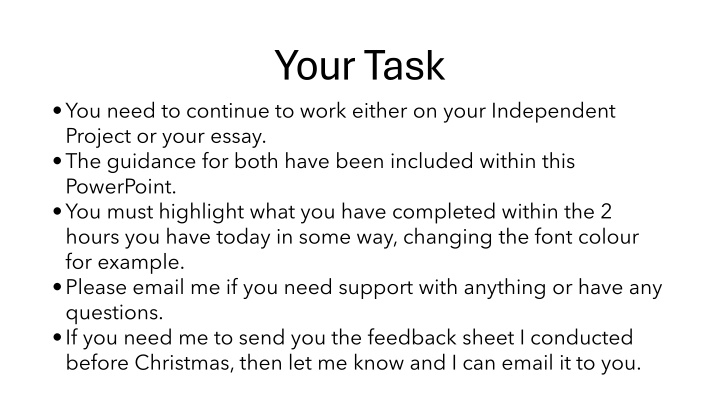
Your Task You need to continue to work either on your Independent Project or your essay. The guidance for both have been included within this PowerPoint. You must highlight what you have completed within the 2 hours you have today in some way, changing the font colour for example. Please email me if you need support with anything or have any questions. If you need me to send you the feedback sheet I conducted before Christmas, then let me know and I can email it to you.
1. Extended Essay Document: q Open MS Word q Save as Fine Art Extended Essay q In the document, set it out as: q Title: Unit 1 Personal Investigation Essay: INSERT OWN TITLE (this title should link to your work) q Your name 2. Bibliography Essay Document: q Open MS Word q Save as Textiles Essay Bibliography q Set out as above with your title and your name q Underneath, you will list every website, book or supporting source that you use to support your essay for images or any literature including interviews, quotes and general information. Do this by copying and pasting the links in or listing the title of the book and name of the author. 3. The Essay structure itself: q Must be between 1,000 and 3,000 words with supporting images from your artists and your own work. q Set out your essay into chunks like so and use the word count as a rough guide to make sure that you meet the minimum word count: q Introduction (200 words) q Artist One (500 words) q Artist Two (500 words) q Comparing the two artists (200 words) q Evaluation (200 words) 4. Essay detail and what to write: q Introduction (200 words): q Introduce what you are going to write about including your two chosen artists and your project theme (personal investigation). q For my extended essay, I am going to write about q As part of my personal investigation for Unit 1, through my extended essay, I am going to q I have chosen to explore in depth the work of . and because q How will you do this/ answer what you set out to do? q I will look to explore I will do this by q Within my essay, I want to I will q Why does your theme interest you? q I chose **** as my personal investigation theme because q Outline what it is that you want to write about and what you hope to achieve. q In this essay, I want to write about I want to explore q I hope that I am able to .
q Artist One and Artist Two (500 words each): q This is like your artist research in your sketchbooks, but you need to go into depth. Use the same structure below as a guide for both of your artists. You also need to be researching interviews that they have given, multiple websites that their work might feature on as they tend to talk a lot more in depth about their work. q Include images of their work that support your work and ideas and copy the links that you find them into your bibliography. q Introduction to the artist. q ARTIST NAME is the first/ second artist that I am going to explore I chose this artist because q For my first/ second artist, I am going to investigate the work of q Artist information. As you would do in your sketchbook. q What is their work about and how does it link to your work and theme? Like with your artist research, include techniques, processes, tools, equipment and materials. Subject matter and their inspiration is key here. q What are your favourite pieces of their work and why? Select x2 pieces to write about, making references to your ideas and theme. Support this with images of both their work and yours. q How have these particular pieces been made? Explain how you have then applied these techniques and methods to your own pieces. q How do they link to your own work/ outcomes? It is good to show images of your work and theirs together to support what you are writing about. q How has this/ have these artists influenced your work, overall creative learning journey and final outcomes? Support this again with images of your work. q Comparing the two artists (200 words): q Describe the similarities and differences in their work. Think techniques, processes, outcomes, subject matter. q Whose work do you find more influential and why? q Whose work had a bigger impact on society and why? Is this relevant to your artists? For some choices this will be a key talking point as for many, they change how something is done, perceived, utilised. q Whose work reflects in your ideas and final outcomes more and why? q When exploring and researching these two artists, I q Though both artists are show inspired me q Though I have been influenced by both artists, ARTIST NAME has had the biggest influence on because. q Evaluation (200 words): q What have your learnt over the course of your personal investigation work? q How has this affected you as an artist, your thinking and design process or your abilities as an artist? q Over the course of my personal investigation project, I have q From this, I have learnt q Overall, I have . q In conclusion, I have
Mindmap of Ideas: Mindmap of Ideas: Include themes you might look at, branch off ideas for each one, for example, nature, architecture or street photography. Mood board of Ideas: Mood board of Ideas: Images only. This can either go on the slide with your statement of intent or on the slide after it. Statement of Intent: Statement of Intent: Why have you chosen this specific theme for your independent project? How will you develop it? What personal meaning can you incorporate? What skills will you develop in this project? - Macro photography, general photography skills, composition etc. Which photographers will you look at? (I will look at the work of... their work is interesting and relevant to my own ideas). Why? I also plan to broaden my research methods by... A list of research methods you plan to use e.g. books, YouTube videos, articles etc. (don't write them in unless you plan to use them, it is better to add them in later and discuss in your evaluation than it is to mention them in your statement of intent and not include.) I think it is important to look at the work of others throughout the assignment in order to support the development of my ideas. Artist Research: Artist Research: Look at a very minimum of 3/8 photographers. It is useful to have some at the start of your work before your first shoot and some throughout to show your refinement and progression with the project. Your artist research should not be solely a biography about the photographer. Have a couple of relevant facts, but the bulk of your research needs to be what you like about the work (lighting, composition, subject matter etc) and how it will influence your work. The examiner needs to see how you can link your research with your own work, being able to discuss the work of an artist is crucial to your development and progression as it will aid you when writing your photoshoot summaries and project evaluation. Photoshoots: Photoshoots: You need a minimum of 3/8 photoshoots for your project. Each shoot should have at least 30 images. Within each shoot, you need a plan, contact sheet, edits and a summary.
Photoshoot plans: Photoshoot plans: For your plan, it needs to be something simple and brief, a few sentences explaining your intentions. What will be your subject? What location will you use? (Doesn't need to be specific, you could just say a city centre so you have a choice, a forest, abandoned building etc). What photographer are you focusing on? Contact sheets: Contact sheets: For your contact sheet, you need to include all images taken for that shoot, not just favourites or carefully chosen ones. With this, it is better for the examiner to see how you've realised your intentions and how you have been reflective and recognised what ones do or do not work. Highlight your most successful images (6) in green and your least successful (6) in red. This way, you can write about them easily on your contact sheet slide. When writing about your contact sheet, highlight what you have done this shoot. It may seem repetitve or even a waste of time, however, it is all important so the examiner can be clear on what you have done. For example, "in this shoot I took photos of different building textures..." The sentence above would feed nicely into you discussing your most successful and least successful images. "I have chosen the green highlioghted images as my most successful because...". You can then talk about how they have related to your intentions set out in your plan, the composition, lighting, subject matter etc. "The images highlighted in red are my least successful because...:. You can then talk about how these have not related to your intentions in your plan. Maybe the lighting isn't great, they are blurry, or the composition isn't up to the standard you want it to be. Edits: Edits: When documenting your edits you can do it in two ways. The first way would be to discuss each edit individually; this is best if you are using different adjustment layers for each edit. The second way would be to put them all on one slide and write about them as a collective, this is best if you are using the same adjustment layers for each edit. You should include the original and the edited version. Screenshot the adjustment panel (not numbers of brightness etc, just the final adjustment panel when it is finished). You should discuss what you have done "I decreased the brightness and increased the contrast because...". You need to tell the examiner your intentions behind your edits and whether it worked as you'd hoped. If you have done 'further editing' repeat the process above.
Photoshoot summary: Photoshoot summary: For each photoshoot you need a summary. You should explain whether you have met the intentions that you set out in your plan. Did you capture the subject matter you wanted? Did you utilise the photographer well enough? Have your edits been an overall success or not? Will you continue down this path for the next shoot or will you try something new? Overall, has this shoot been a success or not? Project evaluation: Project evaluation: This is a larger version of a photoshoot summary. You need to discuss your project as a whole and go into depth on what has been successful and what has not. Have you realised the intentions that you set out in your statement of intent? What photographers have you looked at? Have you captured these in your shoots/overall? Have you used any additional sources? (Only talk about this if you have) What have you learnt whilst completing this project? What would you change about it if you could? Overall, has this project been successful or unsuccessful? What are your thoughts for future projects based on this one? Make sure that you discuss your final images and your reasonings for choosing them. Talk about the overall look after editing, composition, lighting, subject matter, the ones that show off your intentions from your initial statement strongly. Final Images: Final Images: Choose 5-10 of your best edits for your final images.

