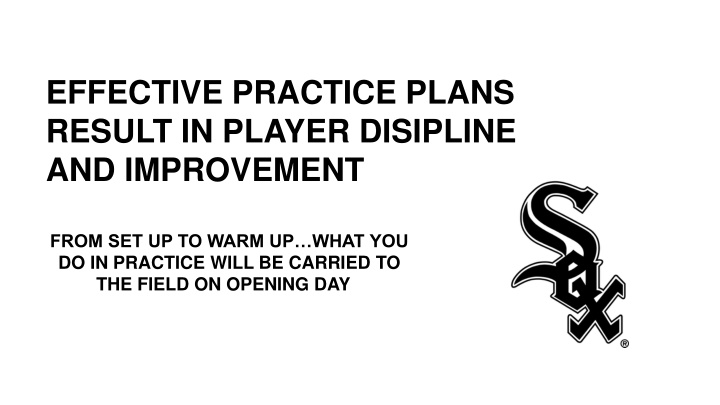
EFFECTIVE PRACTICE PLANS RESULT IN PLAYER DISIPLINE AND IMPROVEMENT
Develop effective softball practice plans for player discipline and improvement starting from warm-up to field drills. Learn beginner practice formats, defensive strategies, key techniques for accurate throwing, and essential drills.

Download Presentation

Please find below an Image/Link to download the presentation.
The content on the website is provided AS IS for your information and personal use only. It may not be sold, licensed, or shared on other websites without obtaining consent from the author.If you encounter any issues during the download, it is possible that the publisher has removed the file from their server.
You are allowed to download the files provided on this website for personal or commercial use, subject to the condition that they are used lawfully. All files are the property of their respective owners.
The content on the website is provided AS IS for your information and personal use only. It may not be sold, licensed, or shared on other websites without obtaining consent from the author.
E N D
Presentation Transcript
EFFECTIVE PRACTICE PLANS RESULT IN PLAYER DISIPLINE AND IMPROVEMENT FROM SET UP TO WARM UP WHAT YOU DO IN PRACTICE WILL BE CARRIED TO THE FIELD ON OPENING DAY!!
BEGINNERS PRACTICE FORMAT & OUTLINE (1-2 HOUR PRACTICE) BEGIN EACH PRACTICE WITH TEAM ANNOUNCEMENTS WARM UP Lap Stretch i.e., Upper & Lower Body Form Run (Agility) i.e. High Knees, Power Skips, Shuffle, etc. YOU ARE 10 MINUTES INTO YOUR PRACTICE
DEFENSE Playing Catch Beginner and Advanced techniques of receiving the ball. Total practice time 5-15 minutes. YOU ARE 15-25 MINUTES INTO YOUR PRACTICE Throwing (Individual Skills) Grip, Shak , Ready, Break, Power Position, Throw, Wrist Flips, Controlled Catch, Catch Step Throw, Pitching, (Group Work) Relay Drill. Total practice time 10- 25 minutes. YOU ARE 25-50 MINUTES INTO YOUR PRACTICE Fielding- (Individual Skills) Controlled fielding of groundballs and flyballs. Total practice time 10-25 minutes. YOU ARE 35-75 MINUTES INTO YOUR PRACTICE
5 Keys to Quick and Accurate Softball Throwing #1: Balanced Position One of the things that you always want to do when throwing is get in a balanced position. If you come up fielding in your balanced position, you can really stand, put all your weight on the back/rear foot. This is a strong balanced position. When you release the ball, all your power and strength should be behind your release. Whether you re pitching or whether you re hitting, at release or at contact, you always want your body behind the release point or the contact point. So, if you have a balanced position, you ll be able to do that. #2: Don t Short on the Throw Another error that can sometimes occur is the player wants to short on it. You want to very quickly release the ball and get rid of it to first base, but what tends to happen is, you bring it back down and never reach through. You never pull the forearm through and consequently it turns out to be a short throw. #3: Look At Your Target Look at your target the whole time. With the head up, find your target early. And be sure to square the shoulders and the hips to your target. #4: Finish in a Strong Position Use your lower body muscles to really project that ball, and focus on quick, fast arm speed at your release. The quicker you have the wrist and the arm coming through, the more velocity you can project on the ball. Starting with the foot, turning the hip, and finishing through, everything goes towards your target rather than off to the side. #5: Hurry With Control You want your players to get to the ball as quickly as they can and release the ball as accurately as they can, and not use the term rush . Sometimes rush has a negative connotation. You want to make sure your players hurry with control. Get to the ball and release it as quickly as you can. You don t want to hold the ball very long.
Throwing Drills Grip: The 4-seam fastball grip should be used. Index, middle, and ring finger across the seam thumb directly underneath Wrist Flips: Players stand 7-10 feet apart. Four-seam grip with elbow at shoulder height extended in front of body. Glove under elbow for support. Ball is flipped to partner with emphasis on rotation and follow through. Done daily, each player should aim for 5 perfect flips. Ten Toes: Have each person face each other with glove in front of their face and make sure all 10 toes are facing the other person SHAK: An acronym for proper glove side alignment: shoulder, hip, ankle, knee. The SHAK side of your body should be facing target Ready: Starting position-gunfighter- ( SHAK dup towards target) with hands together at chest. Break: Also known as arm action. Hands come apart with thumbs under (like dumping a water cup) while taking arm thumb to the thigh, knuckles (fingers) to the sky, elbow up high. Power Position: Also known as arm slot. Feet spread shoulder width, knees flexed, glove or elbow at target, proper closed body alignment (SHAK), throwing elbow at shoulder height, back of throwing hand facing target: see the W (proper grip will make a W on ball). Throw: Also known as arm path. Small step, hips rotate, tuck, (love glove to chest) while allowing throwing arm to go with body. Stick chest out towards glove, head should never move off target. Bend back and bow to finish. Follow through with throwing arm and show back of throwing shoulder to target. Controlled Catch: Two lines, one throwing (directional side to target, ball in glove), one line receiving (gunfighter position). On command, (thumb to thigh knuckles to sky, glove spin throw) players from throwing side throw to receiving side.
Throwing Drills (Continued) Catch, Step, Throw: Throwing line and receiving side in gunfighter position. Throwing side steps to target lining up directional side and does thumb to thigh, knuckles to sky (arm action) at same time. On command of Throw, player throws ball. Receiving line positions body to receive ball, once received, player immediately steps in line to target and performs proper arm action. Once player has fundamentals correct, put it all together. Relay Drill: Line-up a minimum of three players about 5-10 feet apart. Ball is thrown down the line to each player. Fielding Drills Ground Balls on Knees: Roll ball back and forth to control with two hands with glove. Ground Balls Standing: Standing with partner close together roll ball back and forth for control. Forehand Play: We must get the front shoulder on the target on this play to keep the ball from sailing away from the target. Backhand Play: You must make sure that you are bending at the knees, instead of straight down at the waist. You want to keep your eyes as close to the glove as you can. Fly Ball Angles: Players start in single file line, each with a ball. The first player in line will give their ball to the coach. Coach then points in a direction. Player uses proper footwork (drop step, crossover) to initiate pursuit. Fly Ball Communication: Put players in two lines, designation one line as center and one as left. Either roll ball or throw fly ball between to lines. Calls should be one word (i.e. Ball, Mine, Me). Players then switch lines. This drill can be used for practicing ground balls, line drives and fly balls.
OFFENSE Hitting (Individual Skills) Set-Up, Stride Position, Hit off Tees, Drills. Practice 10-25 minutes YOU ARE 45-100 MINUTES INTO YOUR PRACTICE 1. Stance 2. Load 3. Hands in 4. Bent elbow @ contact 5. Long through extension 6. Follow through
OFFENSE Hitting Drills Set-Up: Stance: Feet parallel, toes pointed straight, weight on inner balls of feet, knees inside feet, grip: knocking knuckles lined up, back elbow half-way up, front shoulder on pitcher, head upright eyes level, hands held on top of strike zone. Stride Position: Stride: Step to pitcher, front toe still pointing to home plate, weight is at a 50/50. Slow Motion Swings: Any new mechanical idea or adjustment should be executed correctly in a slow-motion dry swing so that the hitter can feel the proper movement. Standard Tee Work: Emphasis on stride alignment and not over-stepping the ball and tee. Early Stride-Separation: Front or side flips, short pitch or batting practice where the hitter goes through their weight transfer back and stride separation then pauses in a strong launch position before the ball is flipped. The purpose of this drill is to show the hitter that this is their strongest hitting position, and this is where they should be when they take a pitch. Whiffle Ball Front Toss: Multiple lines at one time for more repetitions. Coaches toss the balls so players can practice consistent swing. Step In Drill: The hitter will be in their normal set-up but just with an open stance. They will have the bat on the shoulder and when the stride foot advances forward the hands take the bat to the proper launch position.
Team Drills Introduce 1 or 2 game situations and what each position does and why. Location of the 9 positions & Corresponding number to each position #1 Pitcher, #2 Catcher, #3 First Baseman, #4 Second Baseman, #5 Third Baseman, #6 Shortstop, #7 Leftfielder, #8 Centerfielder, #9 Right fielder
Team Drills Game Play Situations: Simulate situations with coach hitting fungos and players running bases and playing defense. Other coaches should roam field-giving instruction from play to play. With advanced players, they may hit with coaches pitching. Fly Ball Communication: Two players line up at least 40 feet apart. A ball is hit or thrown in between the players forcing them to communicate and call the ball on its downward flight. A player should call the ball until it is in their glove. Base-running Home To First: Drop bat, step w/back foot out of box. Three step peek. Hit front part of bag. Forward lean Breakdown/ look to right for overthrow. 1. 2. 3. 4. 5.
DRILL #1: Coach acts as 1st baseman w/ball in hand. As runner crosses base and looks to right coach either holds onto ball and runner returns to base, or coach tosses ball behind him and runner sees overthrow and breaks for second base. Rounding First: Drop bat, back foot out of box. Three step peek, read play. Banana route, (3 steps out -3 steps in). Inside corner, read play, chest to infield, back to bag 1. 2. 3. 4. DRILL #2: Coach sets up as shortstop. As runner sneaks peek coach simulates fielding a ground ball, runner runs through bag. Coach can also simulate going out for cut-off by turning around with his back to infield. Runner takes banana route and rounds bag. First to Third: Check outfielders Pick up coach twice Inside corner Slide, stop on bag, round 3rd base pick up ball.
DRILL#3: Position a coach in 3rd base coaching box. Runner runs, picks up coach half-way to second. Coach signals player to hold up at second or continue to third. As player reaches second, pick up coach again. After reading play coach may signal player to advance or hold up. Runner picks up coach into third. Second Base to Home: Check outfielders. Primary & Secondary leads. Read infield grounders off bat (left or right of body). Pick up coach, round bag, inside corner. 1. 2. 3. 4. DRILL#4: Position a coach shortstop side of pitching mound. Runner begins secondary lead. Coach rolls ball. If rolled left side of runner, runner advances toward third, pick up coach at third base. If ball rolled to right of runner, runner stays at second. Position a coach in third base coaching box. Runner advances towards third and coach signals to hold up on bag, round bag and pick up ball, or round bag and advance to home. 3rd Base to Home: Shuffle in foul territory, return in fair. Tag 1. 2. COMPLETED 1-2 HOUR PRACTICE
The White Sox Academy Fastpitch Staff Thanks You For Your Continued Effort To Teach and Coach Please feel free to reach out to members of our staff if you have any questions.


")