Efficient Certificate Handling for nECY with FIP 140-2 Enabled
"Learn the steps to successfully load certificates on a nECY device with FIP 140-2 enabled using XCA software and RSA Private Key section, ensuring a smooth process from start to finish."

Download Presentation

Please find below an Image/Link to download the presentation.
The content on the website is provided AS IS for your information and personal use only. It may not be sold, licensed, or shared on other websites without obtaining consent from the author. If you encounter any issues during the download, it is possible that the publisher has removed the file from their server.
You are allowed to download the files provided on this website for personal or commercial use, subject to the condition that they are used lawfully. All files are the property of their respective owners.
The content on the website is provided AS IS for your information and personal use only. It may not be sold, licensed, or shared on other websites without obtaining consent from the author.
E N D
Presentation Transcript
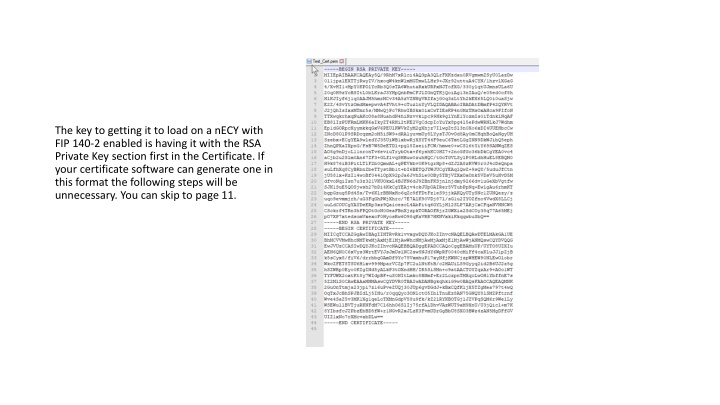
The key to getting it to load on a nECY with FIP 140-2 enabled is having it with the RSA Private Key section first in the Certificate. If your certificate software can generate one in this format the following steps will be unnecessary. You can skip to page 11.
Download the XCA Software from the link below. https://hohnstaedt.de/xca/index.php/download I used the portable as I did not want to install on my Windows machine.
Unzip to local drive and run the XCA.exe application.
When you run the software the first time you will need to create a New DataBase. Save the file where you would like to.
It will ask you for a password. Create according to your standards.
Select the Certificate that you want to use on the nECY.
Highlight the Certificate you want to use with the nECY. Click on Export.
Using the drop down list select PEM+key as the export format.
Login to your nECY and navigate to the System section on the right and then Web Server tab.
Click on the Arrow next to Mode for certificate and select Custom.
Click on Select and browse to the file. Enter the password and then hit apply.
Youll receive this warning message. Scroll down and click apply.
Eclypse It will then show that the nECY is rebooting. After that it should work with your certificate.