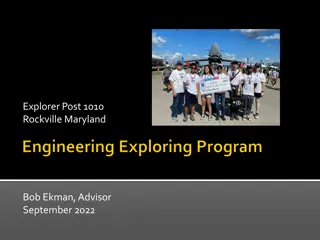
Engineering Design Lesson: Robotics Arm Prototype Challenge
In this engineering design challenge, students are tasked with creating a proof-of-concept prototype of a robotic arm to safely move hazardous waste. The scenario involves lifting a radioactive bottle and moving it to a safe space using limited materials. The requirements and constraints add complexity to the task, pushing students to think creatively and strategically to achieve the objective.

Download Presentation

Please find below an Image/Link to download the presentation.
The content on the website is provided AS IS for your information and personal use only. It may not be sold, licensed, or shared on other websites without obtaining consent from the author. If you encounter any issues during the download, it is possible that the publisher has removed the file from their server.
You are allowed to download the files provided on this website for personal or commercial use, subject to the condition that they are used lawfully. All files are the property of their respective owners.
The content on the website is provided AS IS for your information and personal use only. It may not be sold, licensed, or shared on other websites without obtaining consent from the author.
E N D
Presentation Transcript
Experience Engineering Design Lesson 1.4
What does it mean to say that engineering is everywhere? Essential Question for Unit 1
Activity 1.4.1 Hazardous Waste Cleanup Design
Scenario Your engineering group has been tasked in an operation involving a cleaning operation on a site with hazardous waste. Your group has been asked to design and construct a robotic arm to lift a bottle of highly radioactive product and move it to a designated safe space. We will clear the site using a robot to keep people safe.
Overview Today s task involves developing a proof-of-concept prototype; a lower- technology device that models the final device that will be constructed. Your group must complete a design in a specified period of time and may only use the supplied materials and tools.
Materials permitted per group 5 pieces of cardboard 10 binder clips 12 wooden clothespins 16 craft sticks 1 box of 100 standard size paper clips 8 unsharpened standard wood pencils 24 rubber bands 2 standard wire hangers no more than 1.2 m (~4 ft) of twine no more than 1.2 m (~4 ft) of string no more than 1.2 m (~4 ft) of duct tape The following are provided but may not be included as part of the prototype: 1 pair scissors for construction writing utensils and up to 8 sheets of paper for designing a copy of the student handout
Requirements The design solution must be able to: 1) pick up a standard, unopened 12-16 ounce water bottle from a designated starting spot located 24 inches from the edge of a table, 2) place it upright on a designated landing spot also 24 inches from the edge of a table, and 3) completely disengage from the water bottle.
Constraints 1) No part of the operator may cross the plane of the edge of the table. 2) The specific bottle to be used will not be available before the competition. 3) The design solution must only be constructed from the list of permitted materials. The drawing utensils and paper (used for sketching) and the scissors (or other tools used during construction) may not be incorporated into the prototype.
Procedure 1) [10 minutes] Design: Sketch out your solution on paper. 2) [40 minutes] Build and Test: Your group must use the materials provided and the limited class time to create and test your prototype. 3) [20 minutes] Score: See student handout for details. NOTE: Be sure to document your process by taking photos of your design on paper and your physical prototype as it is built, tested, and scored. This will be needed for the written design brief that is assigned for homework.
Discussion Was this a team activity or a group activity? Why? Was this engineering design? Why or why not?
Extended Discussion [In original design groups] Reflect on your scores. Create a visual representation of what the whole group did during the activity and what individuals did during the activity. [Whole class gallery walk] Go with your group around the room to visit and discuss other groups representations. [In original design groups] What specific things could your group have done differently to improve the following? The design experience The group (or team?) experience The final performance of the design solution