Ensuring Accessible Presentations

This guide provides essential steps to create accessible presentations, including checking contrast, setting slide titles, organizing reading order, and handling tables properly. Follow these guidelines to enhance the accessibility of your presentation content.

Download Presentation

Please find below an Image/Link to download the presentation.
The content on the website is provided AS IS for your information and personal use only. It may not be sold, licensed, or shared on other websites without obtaining consent from the author.If you encounter any issues during the download, it is possible that the publisher has removed the file from their server.
You are allowed to download the files provided on this website for personal or commercial use, subject to the condition that they are used lawfully. All files are the property of their respective owners.
The content on the website is provided AS IS for your information and personal use only. It may not be sold, licensed, or shared on other websites without obtaining consent from the author.
E N D
Presentation Transcript
Insert Presentation Title Insert Presentation Subtitle if applicable
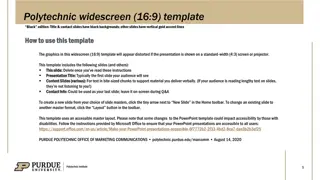
Working with this template Read the content on each slide to familiarize yourself with the steps you must take to ensure your presentation is accessible. Select Home > New Slide to begin adding your content. If you choose to use a different colour theme, be sure to check that the colours used for fonts and backgrounds meet contrast requirements. To check contrast, use the following tool: WebAIM contrast checker If you add a background, choose a simple background and verify that there is enough contrast against the foreground text colour. Delete the guideline slides once you are completed.
Check accessibility while you work The Accessibility Checker is a tool that reviews your content and flags accessibility issues it comes across. The Accessibility Checker also suggests how you can resolve the issues that appear. To manually launch the Accessibility Checker, select Review > Check Accessibility. The Accessibility pane opens, and you can now review and fix accessibility issues. At the bottom of the Accessibility pane, you will find a link to the Help content about making documents accessible. Review the information and use it as a guide to ensure the content you add to this template follows accessibility best practices.
Give every slide a title A person with a visual disability that uses a screen reader relies on the slide titles to know which slide is which. Select Review > Check Accessibility. On the Accessibility ribbon, expand the Slide Title menu by selecting the dropdown. The options that appear depend on whether a title placeholder exists or not, and what element is selected on your slide. If you do not want a title to appear in your presentation, delete the title placeholder, expand the Slide Title menu, and choose Add Hidden Slide Title. It will be positioned off-slide, be read by a screen reader, but will not appear in your presentation.
Set the reading order of slide contents When you create slides, putting the objects in a logical reading order is crucial for screen reader users to understand the slide. Select Accessibility > Reading Order Pane. When the screen reader reads the slide, it reads the objects in the order they are listed in the Reading Order pane. In the Reading Order Pane, you can change the order by selecting an item and using the up and down arrows to change the order, or you can click on an item and drag it to a different position in the list.
Tables Avoid tables if possible and present the data another way, like paragraphs with headings and only use tables for data, not for layout. Avoid fixed width tables. Use table headers: in the Table Design tab, in the Table Styles Options group, select the Header Row checkbox. Type your column headings. Do not merge cells, split cells, leave cells blank, or nest tables. In the Accessibility tab, choose Alt Text to provide a description that can help screen reader users better understand the table. Header 1 Header 2 Header 3 Header 4 Data 1.1 Data 2.1 Data 3.1 Data 4.1
Add alt text to visuals Alternative (alt) text briefly describes the image, its intent, and what is important about it. Screen readers read the description. To add or edit alt text right click on the image and choose View Alt Text. The alt text should not be longer than a short sentence or two. Do not repeat the surrounding textual content or use phrases such as, "a graphic of" or "an image of.
Create accessible hyperlink text Links should convey clear and accurate information about the destination. For example, avoid using link texts such as "Click here," "See this page," "Go here," or "Learn more." Instead include the full title of the destination page. If the title on the hyperlink's destination page gives an accurate summary of what s on the page, use it for the hyperlink text. For example: Add a hyperlink to a slide.
Use accessible font format To reduce the reading load, select familiar sans serif fonts such as Arial or Calibri. Use larger and/or bold font for headings. Use fonts 11-14 points in size for body text. Avoid using all capital letters and excessive italics. Only use underline for hyperlink text to help users be certain when text is a link. Be sure links show an underline and are not just indicated with colour so that people who are colour blind know that the text is linked even if they can t see the color.
Add captions to audio and video Make your presentation more inclusive to people who are deaf or hard of hearing by adding captions and subtitles in videos and audio. Create closed captions for a video Add captions to an audio file in PowerPoint When delivering a presentation, enable the Always Use Subtitles checkbox on the Accessibility tab. PowerPoint will use the microphone to listen to you speak and use an AI-powered service to convert the speech into captions displayed on the screen as you present. Present with real-time, automatic captions or subtitles in PowerPoint
Charts and Diagrams Ensure the chart style you choose includes text labels, does not depend on only colour to comprehend, and that the colour contrast is appropriate. Select the chart, right click, and choose View Alt Text to add or edit a text description that will help screen reader users understand the content of the chart. Example 4th set 9% 3rd set 10% 1st set 58% 2nd set 23% 1st set 2nd set 3rd set 4th set