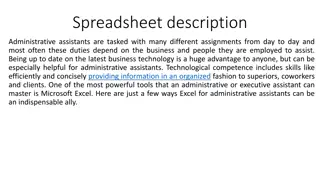
Excel for Project Managers: Versatile Tool for Efficient Management

Project managers require training in various fields, and Excel is an essential tool for them. It aids in budget calculations, data storage, analysis, and chart generation. The interface, workbooks, cells, and formula bar are key components. Learn how to utilize Excel effectively for project management tasks.

Download Presentation

Please find below an Image/Link to download the presentation.
The content on the website is provided AS IS for your information and personal use only. It may not be sold, licensed, or shared on other websites without obtaining consent from the author.If you encounter any issues during the download, it is possible that the publisher has removed the file from their server.
You are allowed to download the files provided on this website for personal or commercial use, subject to the condition that they are used lawfully. All files are the property of their respective owners.
The content on the website is provided AS IS for your information and personal use only. It may not be sold, licensed, or shared on other websites without obtaining consent from the author.
E N D
Presentation Transcript
Microsoft Excel 2010(1) Lecture2 Computer skills2 2018-2019 1. Understanding the Excel Interface 2. Data and Excel Tables 3. Calculations on Data 4. Shortcut key in Excel
Project managers needs Project managers need training in a variety of fields, including accounting, logistics, people management, and, of course, office productivity software. Excel is the go-to tool for project managers because it has so many different uses. You can store financial data in Excel to calculate a project s budget, lists of items and their prices and availability, and scheduling constraints for multiple departments. You can use what if analysis to determine the optimal solution to a problem with multiple variables, and you can produce charts that graphically summarize a project s status
1. Understanding the Excel Interface As you learned, Understanding Microsoft Office 2010, each Office 2010 application has the same basic controls, including a tabbed Ribbon, a title bar, a status bar, scroll bars, and Backstage view. Spreadsheets help us to organize, calculate, and make sense of numeric data. Like the orderly row-and-column format of a paper ledger, a spreadsheet enables users to organize large amounts of data so that it is easy to understand and easy to refer to.
Workbooks and Worksheets workbook An Excel data file, containing one or more worksheets. worksheet A tabbed page of a workbook, containing a grid of rows and columns. Sheet area is the place where you type your text Excel calls a data file a workbook. Each workbook, by default, contains three tabbed pages. Each page is a worksheet.
Rows, Columns, and Cells cell The intersection of a row and a column in a worksheet. cell address The column letter and the row number that intersect to form the cell, such as A2 or B6. Name box The box above cell A1 where the name of the active cell appears. active cell The cell that the cell selector is on. Any content entered will appear in the active cell. cell selector The movable dark outline around the active cell.
Formula Bar When a cell contains a formula, the result of the formula appears in the cell itself. The formula appears in the formula bar, above the column headings. formula bar The bar above the worksheet where the contents of the active cell appear. If the active cell contains a formula, the formula appears in the formula bar and the result of the formula appears in the cell itself.
Example 2, formula in cell C4 is =C2+C3. Because that cell is active, you can see the formula in the formula bar. Cell C4 itself shows the result: 7. and Name box shows the cell s address: C4. If the cell contains a numeric value or a text string, the formula bar shows the same content as the cell itself.
2. Data and Excel Tables structured that pattern to it, with the same type of information in every row, as in a database. data a :Data has consistent
Converting a Range to a Table table :A group of cells that work together to store structured data. To quickly create a table in Excel, do the following: 1. Select the cell or the range in the data. 2. Select Home > Format as Table. 3. Pick a table style. 4. In the Format as Table dialog box, select the checkbox next to My table as headers if you want the first row of the range to be the header row, and then click OK.
There are two methods of converting a range to a table : 1. default table style 2. Choice of Style. After the table has been created, you can change the table style from the Table Tools Design tab.
Converting a Range to a Table (Default Style) Use these steps to convert a range to a table and apply the default table style to it: 1.Select the range. 2.On the Insert tab, click Table.
Converting a Range to a Table (Your Choice of Style) Use these steps to convert a range to a table and apply your choice of table style to it: 1.Select the range. 2.On the Home tab, click Format as Table. 3.Click the desired style.
Sorting a Table In a table, each column is known as a field. A field contains a specific type of structured data, such as Phone or Address. Each row is a record, containing all the fields for a specific instance. To sort means to put records into a specific order according to the entry in a certain field. To sort a table, 1. click the down-arrow button to the right of the field by which you want to sort 2. opening a menu, and on that menu, click Sort A to Z or Sort Z to A, depending on whether you want an ascending sort or descending sort.
field :A column in a table, storing one particular kind of information, such as Phone or Name. Record :A row in a table, storing information about a specific person, place, or thing. sort :To put records in a specific order according to the entry in a certain field. Ascending sort :An A to Z sort, or a sort from smallest to largest. descending sort :A Z to A sort, or a sort from largest to smallest.
Filtering a Table filter :To hide certain records according to criteria you specify. To clear a filter, display the Data tab and click Clear, or open the field s menu and choose Clear Filter from Fieldname. You can filter a table by: 1. exclude records 2. criteria you define
1. Exclude records that contain a certain value in a certain field: open a field s menu at the bottom menu, clear the check boxes for any entries that you do not want to be included. of the
2. criteria you define : open a field s menu, point to Text Filters (or Number Filters, or whatever appears, depending on the field data type) to open a submenu, and then choose a filtering criterion, such as Equals, Does Not Equal, Begins With, or Ends With.
Moving Around in a Worksheet 1. To type in a cell, you must make it the active cell, either by clicking it or by using one of the keyboard methods of moving the cell selector. 2. Moving the cell selector is not the same as scrolling. When you scroll the worksheet, you change which cells are visible, but you do not change the active cell. 3. To enter content in a cell, make the cell active by moving the cell selector to it, as you learned in the preceding section, and then just start typing. 4. When you are finished, move to another cell.
Keyboard Shortcuts for Moving the Cell Selector Any arrow key Tab Shift+Tab Ctrl+arrow key One cell in the direction of the arrow One cell to the right One cell to the left To last or first non-empty cell in the direction of the arrow Ctrl+End To bottommost, rightmost cell of worksheet contains data Ctrl+Home Home Page Down Page Up Alt+Page Down Alt+Page Up Ctrl+Page Down Ctrl+Page Up To the beginning of the worksheet To the beginning of the active cell s row One screen down One screen up One screen to the right One screen to the left To the next sheet in the workbook To the previous sheet in the workbook
Entering Values The flashing vertical bar is called the insertion point and it represents the location where text will appear when you type.
Typing and Editing Cell Content To edit a cell s content, make the cell active and then do any of the following: 1. To replace the cell s content with a new entry, type the new entry. 2. To edit the cell s content without replacing it entirely, click in the formula bar and make your edits there, or double- click the cell to move an insertion point into it and then edit the text directly in the cell. 3. To clear all the text from the cell, press the Delete key. 4. To clear both the text and the formatting from the cell, click the Home tab, click the Clear button, and click Clear All.
Working with Ranges A range is one or more cells that are selected at the same time. A range can be a single contiguous rectangular block or multiple cells or groups of cells from including on different worksheets. different locations,
Describing a Range When a range is a contiguous rectangular block, its name is written with the upper-left cell address, a colon, and the lower-right cell address, like this: B2:C8. When a range contains non-contiguous cells or blocks, the pieces are separated by commas, like this: B2:C8,E2:E8.
Selecting a Range To select an entire row, click its row number. To select an entire column, click its column letter. You can select multiple rows or multiple columns by dragging across the row numbers or column letters. You can drag across a contiguous range to select it. To select a noncontiguous range with the mouse, hold down the Ctrl key as you drag across the blocks of cells to select and click the individual cells to select. Release the Ctrl key when you are done choosing cells to include. You can also use keyboard shortcuts to select a range,
Selecting a Range Ctrl+A Ctrl+spacebar Shift+spacebar Ctrl+Shift+arrow key The entire worksheet The entire column of the active cell The entire row of the active cell The last nonblank cell in the same column or row as the active cell, or if the next cell is blank, to the next nonblank cell Ctrl+Shift+End The last non-empty cell on the worksheet (lower-right corner) Ctrl+Shift+Home Ctrl+Shift+Page Down Cell A1 The current and next sheets in the workbook Ctrl+Shift+Page Up The current and preceding sheets in the workbook
Changing the Structure of a Worksheet As you input your worksheet s content, changing the structure of a worksheet is easy. You can add and delete columns, rows, and even individual cells, merge multiple cells into one big cell, and move and copy data from one range to another. Inserting individual cells can be a layout challenge because the existing cells have to go somewhere to make room for them. When inserting cells, you specify whether the existing cells should shift down or to the right. Similarly, deleting individual cells can be challenging because their deletion leaves a hole in the spreadsheet that the surrounding cells must fill by shifting their positions either up or to the left.
Inserting Rows or Columns Use these steps to insert one or more rows or columns: 1. Select the row that the new row should appear above or the column that the new column should appear to the left of. If you want to insert multiple rows or columns, select multiple rows or columns. For example, to insert three rows above row 10, you would select rows 10, 11, and 12. 2. On the Home tab, click Insert.
Deleting Rows or Columns Use these steps to delete one or more rows or columns. 1. Select the row(s) or column(s) to delete. 2. On the Home tab, click Delete. OR Right-click the selected range and choose Delete from the context menu.
Inserting Cells Use these steps to insert one or more cells: 1. Select a range where you want the new cells to be inserted. It doesn t matter if that range already contains data. 2. On the Home tab, click the down arrow to the right of the Insert button. The Insert dialog box opens. 3. Click the option button to describe what should happen to the cells in the selected range. 4. Click OK.
Deleting Cells Use these steps to delete one or more cells: 1. Select a range of cells that you want to delete. 2. On the Home tab, click the down arrow to the right of the Delete button. The Delete dialog box opens. 3. Click the option button to describe what surrounding cells should shift to fill in the vacated space. 4. Click OK.
Merging and Unmerging Cells The orderly grid format of a worksheet means that you have the same number of rows in each column, and the same number of columns in each row usually. For special layout effects, you can merge two or more cells into a single cell that occupies the same space as the two would have taken up separately. Merging is often done to center a title or heading across the top of a set of columns.
Merging Cells Use these steps to merge contiguous cells: 1. Select the cells to merge. Keep in mind that only the text in the upper-left cell will remain after the merge; it will appear as the text in the merged cell. 2. On the Home tab, click the Merge and Center button. Unmerging Cells Use these steps to unmerge a merged cell: 1. Select the merged cell. 2. On the Home tab, click the down arrow to the right of the Merge and Center button. 3. On the menu that appears, click Unmerge Cells. Note that any text that was deleted as a result of the merge will not return when the cell is unmerged.
3. Calculations on Data Excel uses standard operators for equations, such as a plus sign for addition (+), minus sign for subtraction (- ), asterisk for multiplication (*), forward slash for division (/), and caret (^) for exponents. The key thing to remember when writing formulas for Excel is that all formulas must begin with an equals sign (=). This is because the cell contains or is equal to the formula and its value.
EXAMPLE1: create a simple formula in Excel: 1. Select the cell where the answer will appear (B4, for example). 2. Type the equals sign (=). 3. Type the cell address that contains the first number in the equation (B1, for example). 4. Type the operator you need for your formula. For example, type the addition sign (+). 5. Type the cell address that contains the second number in the equation (B2,for example). 6. Press Enter. The formula will be calculated, and the value will be displayed in the cell.
")


")
")