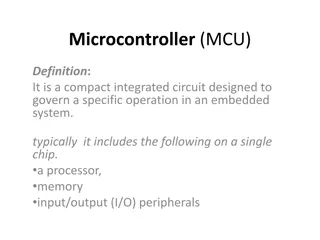
Guide to Controlling High-Power LEDs with Microcontrollers
Delve into the world of controlling high-power LEDs with microcontrollers using ICs for power regulation. Explore the CN 5711 IC, circuit connections, LED intensity adjustments, and microcontroller integration for seamless project implementation.

Download Presentation

Please find below an Image/Link to download the presentation.
The content on the website is provided AS IS for your information and personal use only. It may not be sold, licensed, or shared on other websites without obtaining consent from the author.If you encounter any issues during the download, it is possible that the publisher has removed the file from their server.
You are allowed to download the files provided on this website for personal or commercial use, subject to the condition that they are used lawfully. All files are the property of their respective owners.
The content on the website is provided AS IS for your information and personal use only. It may not be sold, licensed, or shared on other websites without obtaining consent from the author.
E N D
Presentation Transcript
Controlling High-Power LEDs with Microcontrollers A guide to using ICs for LED power control
Introduction Musique - Introduction to the topic of controlling LEDs with microcontrollers Highlights the use of LEDs and the presenter's interest in using them for projects Promotes the upcoming video as an explanation of a simple IC for LED power control Encourages viewers to subscribe to the presenter's channel for support Photo by Pexels Photo by Pexels
The Module Discusses the discovery of a module on AliExpress AliExpress that meets the presenter's needs Explains that the module can be powered by a 4.2V lithium battery Describes the simple circuit design and its easy integration into future projects Mentions the components of the circuit: CN 5711, resistor, and potentiometer Photo by Pexels Photo by Pexels
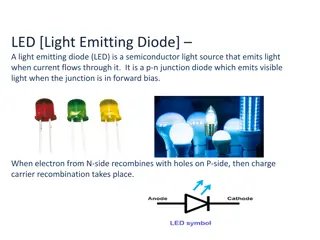
CN 5711 IC Introduces the CN 5711 IC as a current regulation solution for driving LEDs Mentions the input voltage range and the ability ability to adjust constant output current Highlights the temperature regulation and overcurrent protection features Explains the three ways to adjust the output current, focusing on PWM control Photo by Pexels Photo by Pexels
Circuit Connection Demonstrates the simple circuit connection for powering the LED using the module Explains the connection of power supply to the 'V1' and 'CE' pins Shows the connection of the 'LED' pin to the positive terminal of the LED Mentions the common ground connection between the module and microcontroller Photo by Pexels Photo by Pexels
Adjusting LED Intensity Demonstrates how to adjust the LED intensity using the potentiometer Explains that the module allows for adjusting the LED current from 30 to 320mA Shows the audience how to achieve the desired intensity by turning the potentiometer Emphasizes the versatility of the module in controlling LED brightness Photo by Pexels Photo by Pexels
Microcontroller Integration Explains how to use a microcontroller, such as Arduino, ESP32, or ATtiny85, to control the module Shows the connections required, such as connecting the 'CE' pin to an Arduino GPIO Mentions the addition of a ground connection between the microcontroller and the module Highlights the ease of generating a PWM signal using microcontrollers Photo by Pexels Photo by Pexels
Code Implementation Demonstrates the code implementation for controlling the LED with Arduino Nano Mentions the availability of similar code for ATtiny85, ESP32, and ESP8266 Encourages viewers to access the presenter's GitHub repository for instructions Explains the functionalities of the loaded code, including LED flashing and intensity adjustment Photo by Pexels Photo by Pexels
Final Experiment Describes the presenter's attempt to create a custom module with the CN 5711 IC Mentions its successful operation but highlights its large size and aesthetics Teases the upcoming video on a more professional PCB design by the presenter Expresses gratitude to the viewers and offers additional information and support Photo by Pexels Photo by Pexels
Conclusion Summarizes the content of the presentation Mentions the availability of the guide and additional information in the video description Encourages viewers to leave comments for any questions or doubts Expresses appreciation for the viewers' engagement and visits to the presenter's channel