Hack A Solar Circuit Exploration
Embark on a hands-on exploration of dissecting a solar-powered device to unveil its circuit components. Discover and understand the roles of elements like solar cells, resistors, LEDs, batteries, and transistors. Ensure safety measures and follow step-by-step procedures to gain insights into electricity generation and circuit flow. Use images and checklists provided to guide your learning process.

Download Presentation

Please find below an Image/Link to download the presentation.
The content on the website is provided AS IS for your information and personal use only. It may not be sold, licensed, or shared on other websites without obtaining consent from the author.If you encounter any issues during the download, it is possible that the publisher has removed the file from their server.
You are allowed to download the files provided on this website for personal or commercial use, subject to the condition that they are used lawfully. All files are the property of their respective owners.
The content on the website is provided AS IS for your information and personal use only. It may not be sold, licensed, or shared on other websites without obtaining consent from the author.
E N D
Presentation Transcript
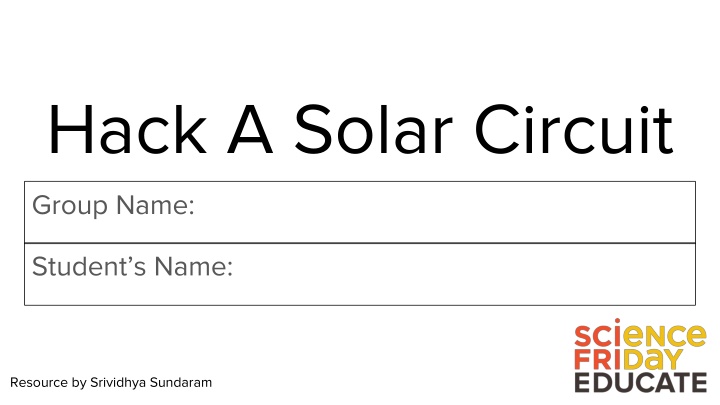
Hack A Solar Circuit Group Name: Student s Name: Resource by Srividhya Sundaram
Exploration: Hack A Solar Circuit 1. Ensure that anyone and everyone in your group is wearing safety glasses and work gloves to protect your eyes and hands during the activity from plastic fragments Get an adult to help break apart one or more of the outer coverings of a solar-powered device With the help of an adult, use tools like a screwdriver to remove all inner circuit components, being careful not to break individual 2. 3. components as you work. Avoid puncturing any of the electrical components; some may need force to be applied before they can be removed. 4. Carefully examine the inside of the device and all of the individual circuit components. Here s what you might find: a solar panel, LED bulb, transistor, battery holder with a battery, transistor and a chip. Use [the checklist in your engineering notebook] to guide as you discover each of the components in the circuit.
Materials Materials required Solar garden light or toy Options: Mini spotlights Stake Lights Pathway Lights Solar-powered dancing toy Precision screwdriver set, hammer, flathead screwdriver Safety glasses and leather work gloves (for all observers)
Garden Light Dissected Use this image to help you make sure you didn t miss any parts of your circuit
Find The Components Checkmark this box as you find the component Name of the component Schematic Symbol What does this component do? Solar cell Resistor
Find The Components Checkmark this box as you find the component Name of the component Schematic Symbol Picture of component What does this component do? LED Battery Transistor
Reflect Upon Your Destruction On your solar circuit diagram, use arrows to illustrate to show the flow of electrons. Write a brief explanation of how electricity is generated and flows through the circuit.
Plan And Build Your Own Circuit Using the solar circuit as inspiration, you will design, sketch and build your own simplified solar-powered circuit. For this build, you need to focus on only two parts: the solar panel and the LED bulb. If you are able to take the solar panel and the LED bulb from the garden light without damaging them (strictly under adult supervision only), you can use those supplies instead of buying them. However, for reliability, you may want to use new components.
Your Circuit Design Be sure to describe the role of each component and how it will work within your circuit. Sketch your planned solar circuit in your engineering notebook, in the same style and using the same symbols you used to sketch the solar circuit in the first activity.
Describe the process Explain in the section below how you and your group ultimately created your design. Be sure to provide specific details such as the order you did things, what pieces were connected where, and anything you made sure you did or didn t do to achieve your desired end result.
Your Finished Circuit Place an image or sketch of your finished design here
Create Your Own Origami Circuit Design Constraints Your challenge is to integrate your solar circuit into an Your design must address a real problem origami structure to create a lightweight, foldable, solar- You may only use the materials provided to you by powered device that solves a problem. your teacher to construct your design Design and Build your solar-powered origami: Must work consistently after being folded and 1. Identify a problem that your origami, solar-powered unfolded multiple times device will solve Your design cannot harm humans or innocent animals 2. Make an origami pacman, hat, fan, crane, or other What Problem Will Your Design Solve? origami structure (an animatable) 3. Integrate and adapt your solar power circuit into your a technology using origami and your solar light circuit. Materials Solar-powered circuit Square sheets of paper Scissors
Your Circuit Design Sketch Your Design How Will It Work?
Describe the process Explain in the section below how you and your group ultimately created your design. Be sure to provide specific details such as the order you did things, what pieces were connected where, and anything you made sure you did or didn t do to achieve your desired end result.
Your Finished Origami Circuit Place an image or sketch of your finished design here
Troubleshooting If you re experiencing problems: Make sure to connect the positive terminal of the solar panel to the positive terminal of the LED and negative terminal of the solar panel to the negative terminal of the LED. If your contraption does not work, here are some possible solutions. If your LED bulb does not glow, even after making the connections as described in the previous step test it with a coin cell battery. If it does not work, you might want to try it out with another LED bulb. If the LED bulb works well with the coin cell battery but does not work with solar panel, check if you have enough sunlight for the solar panel to be efficient. If opening and closing the origami structure does not stimulate the on and off of the circuit, make sure if you have placed the electrical components in locations that closes and opens the circuit correctly. If you are using a good working motor and it does not start with a solar panel, it might need a gentle push from you to get started.
Reflection Questions Directions: Answer the following questions using evidence from your experience. Ideal answers should use specific evidence from the activity to justify answers. Were you able to create a circuit with your origami creation? What evidence do you have that you created a circuit? How does your solar panel work? Explain it in your own words.
Reflection Questions Draw the origami circuit you have created. Label the following components in your diagram - load, power source and conducting material. Explain how your circuit works.
Reflection Questions What are some of the benefits of using origami in STEM (science, technology, engineering, and math) fields and careers? What are the some of the challenges you encountered during this process? How did you overcome your challenges?
Reflection Questions What ideas of your own did you apply to your creation? Why did you do so? Did you try other origami structures? Which one did you choose?
Reflection Questions After watching the applications of origami in different fields, which one impressed you? Why? To what other fields do you think origami could be applied? How do you think it would help to design better solutions?
Origami Circuit Rubric For Reflection Questions 3 2 1 Design was created and operated as a fully functional circuit by lighting up LED, sounding the buzzer, etc. The creation functioned normally and did not have to be specifically held at a certain angle for example for the circuit to work. The circuit worked consistently despite repeated manipulation of the origami circuit. Design was created and operated as a fully functional circuit by lighting up the LED., sounding the buzzer, etc. The origami creation needed to be manipulated, held, or maintained in a specific angle in order for the circuit to be completed. Design was created, but the LED or other device did not work or did not work in a consistent manner as the origami was manipulated. Origami Circuit s Electronic Functionality The origami creation was able to fold and unfold and fold repeatedly without negatively impacting the circuit. The origami creation was able to fold and unfold a limited number of times or only with specific assistance from the designers. The origami creation was unable to fold and unfold without tearing. Origami Circuit s Origami Functionality The origami folds created a design capable of addressing the desired problem.The designed created to do so solves the problem in a manner, which is both realistic and unique. The origami folds created a design capable of addressing the desired problem. The origami design does not reasonably address the group s desired problem. Origami Circuit s Problem Solving Ability Reflection questions were answered and specific evidence from the activity was used to justify answers. Questions were answered, but evidence used did not connect to the activity. Questions were answered incompletely with little or no relevant evidence. Reflection Questions