Introduction to Engineering Design: Digital Logic and Robotics Implementation
Explore the hardware and software implementation of digital logic in robotics, covering topics such as If-Then-Else, Switch-case, FSM, and sensor configurations. Understand the intelligent robot system with magnetic sensors and motors, along with practical control methods. Get insights into using Arduino boards and debugging interfaces for programming robotic functionalities.

Download Presentation

Please find below an Image/Link to download the presentation.
The content on the website is provided AS IS for your information and personal use only. It may not be sold, licensed, or shared on other websites without obtaining consent from the author. If you encounter any issues during the download, it is possible that the publisher has removed the file from their server.
You are allowed to download the files provided on this website for personal or commercial use, subject to the condition that they are used lawfully. All files are the property of their respective owners.
The content on the website is provided AS IS for your information and personal use only. It may not be sold, licensed, or shared on other websites without obtaining consent from the author.
E N D
Presentation Transcript
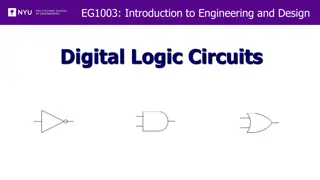
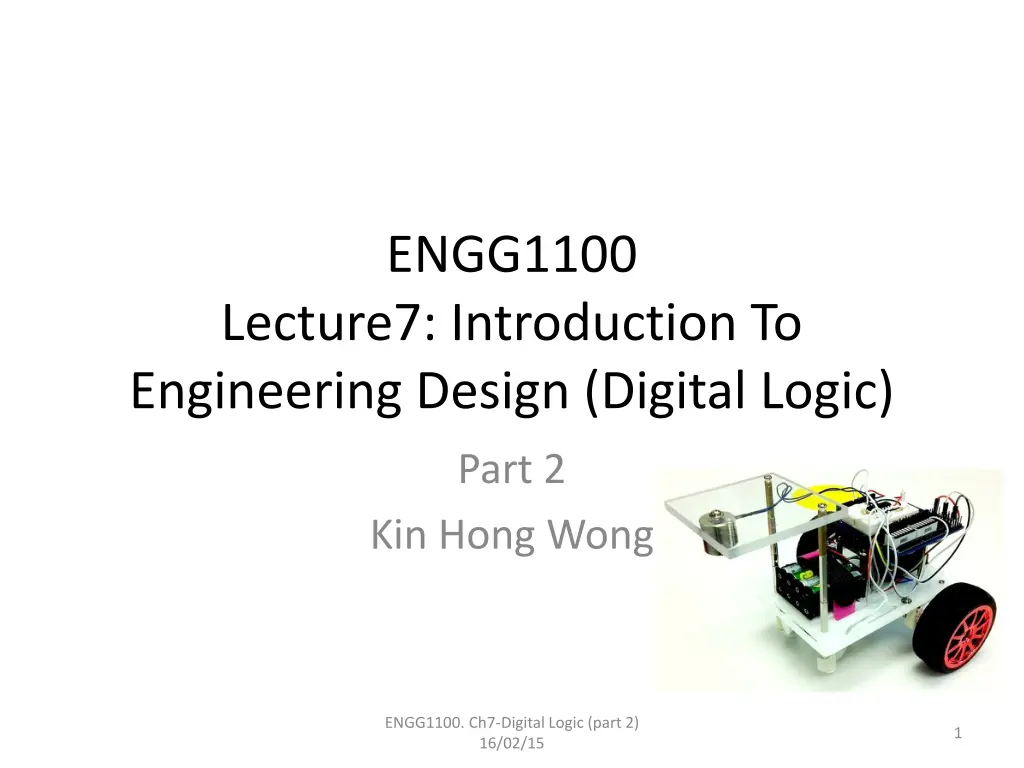
ENGG1100 Lecture7: Introduction To Engineering Design (Digital Logic) Part 2 Kin Hong Wong ENGG1100. Ch7-Digital Logic (part 2) 16/02/15 1
Intro. | Robot | If-Then-Else | Switch-case | FSM | no sensor | 2 sensors | 3 sensors Overview Part 1 (late week): Introduction 1.1 What is Digital logic? 1.2 Digital operations (AND, OR, NOT) 1.3 Truth table 1.4 Robot Hardware 1.5 Software implement of digital operations Part 2 : Hardware/software Implementation 2.1 Robot system 2.1 Use of If-then-else (software method 1) 2.2 Use of switch case (software method 2) 2.3 Finite state machines ENGG1100. Ch7-Digital Logic (part 2) 16/02/15 2
Intro. | Robot | If-Then-Else | Switch-case | FSM | no sensor | 2 sensors | 3 sensors 2.1 The Intelligent Robot system USB cable Programmer to update the program Magnetic strips Magnetic sensors S1, S2 Arduino board (programs to be run in the Arduino computer): : Loop { If . then . else . } Our debug interface Board In1 In2 In3 In4 Motor drivers Out1 Out2 Out3 Out4 L293D H-bridge RM1 RM2 LM1 LM2 S2 S1 ENGG1100. Ch7-Digital Logic (part 2) 16/02/15 3
Intro. | Robot | If-Then-Else | Switch-case | FSM | no sensor | 2 sensors | 3 sensors Our debug (interface) board You may use the debug board provided to connect input/output signals to the Arduino board ENGG1100. Ch7-Digital Logic (part 2) 16/02/15 4
Intro. | Robot | If-Then-Else | Switch-case | FSM | no sensor | 2 sensors | 3 sensors Sensors of our robot The robot is facing you Magnetic Switch Sensors S1,S2,S3 each can be 1 or 0 Magnetic field detected =>Si=0 No Magnetic field detected =>Si=1 5 5 S2 S3 S1 ENGG1100. Ch7-Digital Logic (part 2) 16/02/15
Intro. | Robot | If-Then-Else | Switch-case | FSM | no sensor | 2 sensors | 3 sensors Motors of our robot The robot is facing you Motors: LM1, LM2, RM1 and RM2 Instruction LM1(0) sets LM1 to be 0 Instruction LM1(1) sets LM1 to be 1 Motor control method {LM1=1 and LM2=0}=> Left-motor moves forward {LM1=0 and LM2=1} => Left-motor moves backward {LM1=0 and LM2=0} => Left-motor stops Similar for the right-motor RM1 RM2 LM1 LM2 ENGG1100. Ch7-Digital Logic (part 2) 16/02/15 6 6
Intro. | Robot | If-Then-Else | Switch-case | FSM | no sensor | 2 sensors | 3 sensors Software: Programing procedures Document about the use of Arduino eLearning: https://elearn.cuhk.edu.hk/webapps/login/ Workshop 2: Introduction to Arduino http://www.arduino.cc/en/Main/Documentation Edit program Compile Download to the SMART-car-board Run the program ENGG1100. Ch7-Digital Logic (part 2) 16/02/15 7
Intro. | Robot | If-Then-Else | Switch-case | FSM | no sensor | 2 sensors | 3 sensors 2.2 Method 1: to implement logic operations in a program using Logic Formula (use of IF-Then-Else) ENGG1100. Ch7-Digital Logic (part 2) 16/02/15 8
Intro. | Robot | If-Then-Else | Switch-case | FSM | no sensor | 2 sensors | 3 sensors Using two sensors S2,S1 to follow a magnetic stripe Sensors: S2 S1 Terminal Magnetic sensors S1, S2 Top down view Forward Magnetic field detected =>Si=0 No Magnetic field detected =>Si=1 ENGG1100. Ch7-Digital Logic (part 2) 16/02/15 9 9 S2 S1
Intro. | Robot | If-Then-Else | Switch-case | FSM | no sensor | 2 sensors | 3 sensors Method 1 (Use of If-then-else): This program will enable the robot to follow the magnetic path The program segment: Void loop() { LM1(0);LM2(0);RM1(0);RM2(0); Notations used in the program Void Loop ( )= repeated the execution of the lines inside { } LM1(0) sets the digital output LM1 to 0 LM1(1) sets the digital output LM1 to 1 == means condition && means logic operation AND || means logic operation OR ! means logic operation NOT //comment, for you to put in your own notes //comment :LM1 =S1 AND S2 If (S1()==1 && S2()==1) LM1(1); Else LM1(0); //comment :LM2 = S1 OR S2 If (S1()==1 || S2()==1) LM2(1); Else LM2(0); RM1 RM2 LM1 LM2 } You may need to write S1(),S2(),LM1(),LM2(), etc. for your own system S2 S1 ENGG1100. Ch7-Digital Logic (part 2) 16/02/15 10
Intro. | Robot | If-Then-Else | Switch-case | FSM | no sensor | 2 sensors | 3 sensors 2.2 Software Method 2 : to implement logic operation in a program using truth table (Use of Switch-Case) ENGG1100. Ch7-Digital Logic (part 2) 16/02/15 11
Intro. | Robot | If-Then-Else | Switch-case | FSM | no sensor | 2 sensors | 3 sensors Exercise2.1: Truth table example to make our robot to follow the magnetic strip Case 1) S1=1 (no mag. strip detected) , S2=1 (no mag. strip detected) on both sides of magnetic strips: Robot should move forward 2) S1=1, S2=0 (robot deviates to the left side of the magnetic strip): Robot should turn right 3) S1=0, S2=1 (robot deviates to the right side of the magnetic strip): Robot should turn left 4) S1=0,S2=0 (robot reaches the terminal) : Robot should stop S1 S2 Magnetic strip Robot Fill in the table (control truth table) Case Inputs Outputs S1 S2 S1 S2 LM1 LM2 RM1 RM2 1) 1 1 1 0 1 0 S1 S2 2) 1 0 ?__ ?__ ?__ ?__ 3) 0 1 ?__ ?__ ?__ ?__ 4) 0 0 ?__ ?__ ?__ ?__ S1 S2 forward:LM1, LM2, RM1, RM2= 1010 turn right:LM1, LM2, RM1, RM2= 1000 turn left:LM1, LM2, RM1, RM2= 0010 Magnetic field detected =>Si=0 No Magnetic field detected =>Si=1 ENGG1100. Ch7-Digital Logic (part 2) 16/02/15 12
Intro. | Robot | If-Then-Else | Switch-case | FSM | no sensor | 2 sensors | 3 sensors After the truth table is obtained we will use Switch case in a program to implement it You may treat it as a table lookup method In English it means: If INPUT is code1, result 1 will occur If INPUT is code2, result 2 will occur If INPUT is code3, result 3 will occur Etc switch (INPUT) { case code1 : result 1; break; Code_i=inputs for row i of a truth table Result_i=output for row i of a truth table case code2 : result 2; break; case code3 : result 3; break; : } ENGG1100. Ch7-Digital Logic (part 2) 16/02/15 13
Intro. | Robot | If-Then-Else | Switch-case | FSM | no sensor | 2 sensors | 3 sensors Program example for our robot You only need to edit the program to change the desired truth table The program segment that produces the truth table on the right void LogicTable() { // S2,S1 are the least significant 4 bits of IN_sensor in the program switch (IN_sensor) // 0b00FEDCBA { case 0bxxxxxx11 : LM1(1);LM2(0);RM1(1);RM2(0); break; case 0bxxxxxx10 : LM1(1);LM2(0);RM1(0);RM2(0); break; case 0bxxxxxx01 : LM1(0);LM2(0);RM1(1);RM2(0); break; default : LM1(0);LM2(0);RM1(0);RM2(0); break; } } Inputs Outputs LM2 0 0 0 0 S2 0 0 1 1 S1 0 1 0 1 LM1 0 0 1 1 RM1 0 1 0 1 RM2 0 0 0 0 Magnetic sensors S1, S3 S2 ENGG1100. Ch7-Digital Logic (part 2) 16/02/15 14 S2 S3 S1
Intro. | Robot | If-Then-Else | Switch-case | FSM | no sensor | 2 sensors | 3 sensors 2.3 Introduction to Finite State Machines We will have three examples here: a) Simple finite state machine (no sensor). E.g.: The dancing robot b) An finite state machine uses 2 sensors. E.g. The robot that follows the magnetic strip c) An finite state machine uses 3 sensors. E.g. The robot that follows the magnetic strip, and stops when it detects a magnet in the front. ENGG1100. Ch7-Digital Logic (part 2) 16/02/15 15
Intro. | Robot | If-Then-Else | Switch-case | FSM | no sensor | 2 sensors | 3 sensors Understanding finite state machines Example of a door State Transition Transition condition Entry action http://en.wikipedia.org/wiki/State_diagram ENGG1100. Ch7-Digital Logic (part 2) 16/02/15 16
Intro. | Robot | If-Then-Else | Switch-case | FSM | no sensor | 2 sensors | 3 sensors Example in life State1: Year 1 Reg. 12 course go to state 2 after 1 year State of a student at CUHK Start: go to state 1 State 1=Year 1: entry action: register 12 courses Transition: go to state 2 after 1 year State 2=Year 2: entry action: register 12 courses Transition: go to state 3 after 1 year State 3=Year 3: entry action: register 12 courses Transition: go to state 4 after 1 year State 4=Year 4: entry action: register 8 courses and FYP Final_year_project Transition: go to stop after 1 year Stop: Graduation State2: Year 2 Reg. 12 course go to state 3 after 1 year State3: Year 3 Reg. 12 course go to state 4 after 1 year State4: Year 4 Reg. 8 Course & FYP after 1 year graduation ENGG1100. Ch7-Digital Logic (part 2) 16/02/15 17
Intro. | Robot | If-Then-Else | Switch-case | FSM | no sensor | 2 sensors | 3 sensors 2.3a) The simple state machine (no transition condition ) The robot that dances with a pattern Forward 2 seconds, turn left 2 seconds and turn right 2 seconds, stop and repeat the pattern again Video demo: http://youtu.be/iyakbVyoafI ENGG1100. Ch7-Digital Logic (part 2) 16/02/15 18
Intro. | Robot | If-Then-Else | Switch-case | FSM | no sensor | 2 sensors | 3 sensors Simple finite state machine for (3a) : No sensor input (no transition condition) Entry actions Start Transition Output: LM1,LM2,RM1,RM2=1010 State1 Entry action: Move Forward Transition: After 2 seconds Transition: After 2 seconds State2 State4 E: Turn Left E:Stop After 2 seconds Output: LM1,LM2,RM1,RM2=0000 Output: LM1,LM2,RM1,RM2=0010 After 2 seconds State3 E:Turn Right Output: LM1,LM2,RM1,RM2=1000 Flow diagram Baisc form ENGG1100. Ch7-Digital Logic (part 2) 16/02/15 19
Intro. | Robot | If-Then-Else | Switch-case | FSM | no sensor | 2 sensors | 3 sensors Implementation of the finite state machine for (3a) Use of DELAY: DELAY_TIME=2000 motors(LM1,LM2,RM 1,RM2,SPEED,SPEE D,DELAY_TIME); Part of the sample source code is shown below: switch(state) { case STATE1: LM1=1;LM2=0;RM1=1;RM2=0;SPEED=200; //entry action DELAY_TIME=2000; // transition :delay 2 seconds motors(LM1,LM2,RM1,RM2,SPEED,SPEED,DELAY_TIME); state=STATE2; // next state will be state2 break; //end of the current state case STATE2: LM1=0;LM2=0;RM1=1;RM2=0;SPEED=200;DELAY_TIME=2000; // delay 2 seconds motors(LM1,LM2,RM1,RM2,SPEED,SPEED,DELAY_TIME); state=STATE3; //next state will be state3 break; //end of the current state // to be continued on next page Exercise: explain the meaning of state 2 Set motor to run forward with speed=200 You may need to write the function motors( ) for your project ENGG1100. Ch7-Digital Logic (part 2) 16/02/15 20
Intro. | Robot | If-Then-Else | Switch-case | FSM | no sensor | 2 sensors | 3 sensors Continue from last page Exercise 2.2 case STATE3: (fill in by students) case STATE4: break; (fill in by students) default: //none of above will be forced to run state4 state=STATE4; break; } break; Exercise2.2: Fill in the missing programs in state 3 and 4 ENGG1100. Ch7-Digital Logic (part 2) 16/02/15 21
Intro. | Robot | If-Then-Else | Switch-case | FSM | no sensor | 2 sensors | 3 sensors 2.3b) A finite state machine uses 2 sensors (with transition condition) E.g. The robot that follows the magnetic strip ENGG1100. Ch7-Digital Logic (part 2) 16/02/15 22
Intro. | Robot | If-Then-Else | Switch-case | FSM | no sensor | 2 sensors | 3 sensors Example in life (with transition condition : study hard) State of a student at CUHK Start go to state1 State 1=Year 1: entry action: register 12 courses Transition: if (study hard) promote to state2 (year2) else go back to state 1 State 2=Year 2: entry action: register 12 courses Transition: if (study hard) promote to state3 (year3) else go back to state 2 State 3=Year 3: entry action: register 12 courses Transition: if (study hard) promote to state4 (year4) else go back to state 3 State 4=Year 4: entry action: register 12 courses Transition: if (study hard) promote to stop(graduation) else back go to state4 Stop: Graduation ENGG1100. Ch7-Digital Logic (part 2) 16/02/15 23
Intro. | Robot | If-Then-Else | Switch-case | FSM | no sensor | 2 sensors | 3 sensors Demo for 2.3b) An finite state machine uses 2 sensors The robot can follow the magnetic strip Video Demo: http://youtu.be/NWHjWrq_VoY Demo programs may be available from the eLearning: https://elearn.cuhk.edu.hk/webapps/login/ Workshop 2: Introduction to Arduino Two-State FSM demo 7.4b ENGG1100. Ch7-Digital Logic (part 2) 16/02/15 24
Intro. | Robot | If-Then-Else | Switch-case | FSM | no sensor | 2 sensors | 3 sensors 2.3c) Add another sensor at the front to detect the target object Sensors: S2, S1 are facing the ground to detect the magnetic stripe S3 is facing the front, used to detect the target object S3=1 if no object is detected S3=0 if an object is detected Magnetic sensors S1, S3 S2 ENGG1100. Ch7-Digital Logic (part 2) 16/02/15 25 25 S2 S3 S1
Intro. | Robot | If-Then-Else | Switch-case | FSM | no sensor | 2 sensors | 3 sensors A finite state machine uses 3 sensors E.g. Follow the magnetic strip, find the CAN and stop Video Demo : http://youtu.be/JEQkuax7lKE The robot finds the CAN using the magnetic strip placed under the testing board and stops End point S1 Obstacle LM1,LM2 S3 S2 Start point RM1,RM2 ENGG1100. Ch7-Digital Logic (part 2) 16/02/15 26
Finite state machine using 3 sensors (s1, s2, s3)with transition conditions for (3c) Flow diagram Basic form 27 ENGG1100. Ch7-Digital Logic (part 2) 16/02/15
Intro. | Robot | If-Then-Else | Switch-case | FSM | no sensor | 2 sensors | 3 sensors Program 3c (S1, S2, S3 are used) S1, S2 for following the magnetic strip S3 for detecting the CAN The sample source code (program_segment3) is shown below: switch(state) { case STATE1: // forward for 1 second LM1=1;LM2=0;RM1=1;RM2=0; SPEED=200;DELAY_TIME=10; motors(LM1,LM2,RM1,RM2,SPEED,DELAY_TIME); // if ( S3()==1 && S2()==1 && S1()=0 ) state=STATE2; else if(S3()==1 && S2()==0 && S1()=1) state=STATE3; else if((S3==0) || (S3()==1 && S2()==0 && S1()=0)) state=STATE4; break; case STATE2: //robot turns left LM1=0;LM2=0;RM1=1;RM2=0;SPEED=200;DELAY_TIME=10; motors(LM1,LM2,RM1,RM2,SPEED,DELAY_TIME); // if ( S3()==1 && S2()==1 && S1()=1 ) state=STATE1; //back to state 1 else if(S3()==1 && S2()==0 && S1()=1) state=STATE3; else if((S3==0) || (S3()==1 && S2()==0 && S1()=0)) state=STATE4; break; 16/02/15 Move forward for 1 second If S3=0, a CAN is detected, next state is state4 Robot deviated to the right, goto state 2 Robot deviated to the left goto state 3 ENGG1100. Ch7-Digital Logic (part 2) 28
Intro. | Robot | If-Then-Else | Switch-case | FSM | no sensor | 2 sensors | 3 sensors case STATE3: //robot turns right // To be filled by students as an exercise case STATE4: //stop // To be filled by students as an exercise LM1=0;LM2=0;RM1=0;RM2=0; SPEED=200;DELAY_TIME=10; motors(LM1,LM2,RM1,RM2,SPEED,DELAY_TIME); break; } ENGG1100. Ch7-Digital Logic (part 2) default: //none of above states state=STATE4; 29 16/02/15
Intro. | Robot | If-Then-Else | Switch-case | FSM | no sensor | 2 sensors | 3 sensors Demos A demo of a robot carrying two CANs and bring them simultaneously to the destination. http://www.youtube.com/watch?v=-ze2rwpXVXY&feature=youtu.be Arduino software: http://arduino.cc/en/Main/Software#toc1 ENGG1100. Ch7-Digital Logic (part 2) 16/02/15 30
Overall summary In digital logic part 1 and 2, we learned What is digital logic Digital logic operations represented by Digital logic formula method Truth table method Their implementation methods using programs Finite state machines Theory and implementations Use the above to control a robot for specific tasks ENGG1100. Ch7-Digital Logic (part 2) 16/02/15 31
End ENGG1100. Ch7-Digital Logic (part 2) 16/02/15 32
Appendix A : Answer: Exercise 2.1:Truth table example to make our robot follow the magnetic strip Case 1) S1=1 (no mag. strip detected) , S2=1 (no mag. strip detected) on both sides of magnetic strips: Robot should move forward 2) S1=1, S2=0 (robot deviates to the left side of the magnetic strip): Robot should turn right 3) S1=0, S2=1 (robot deviates to the right side of the magnetic strip): Robot should turn left 4) S1=0,S2=0 (robot reaches the terminal) : Robot should stop Magnetic strip Robot Fill in the table Case Inputs Outputs S1 S2 S1 S2 LM1 LM2 RM1 RM2 1) 1 1 1 0 1 0 S1 S2 2) 1 0 1 0 0 0 3) 0 1 0 0 1 0 4) 0 0 0 0 0 0 S1 S2 forward:LM1, LM2, RM1, RM2= 1010 turn right:LM1, LM2, RM1, RM2= 1000 turn left:LM1, LM2, RM1, RM2= 0010 S1 S2 Magnetic field detected =>Si=0 No Magnetic field detected =>Si=1 ENGG1100. Ch7-Digital Logic (part 2) 16/02/15 33
Appendix B: Answer for Ex2.3 case STATE3: LM1=1;LM2=0;RM1=0;RM2=0;DELAY_TIME=2000; motors(LM1,LM2,RM1,RM2,SPEED,SPEED,DELAY_TIME); state=STATE4; break; case STATE4: LM1=0;LM2=0;RM1=0;RM2=0;SPEED=200;DELAY_TIME=2000; motors(LM1,LM2,RM1,RM2,SPEED,SPEED,DELAY_TIME); state=STATE1; break; default: //none of above will be forced to run state4 state=STATE4; break; } 16/02/15 Exercises: explain the meaning of state 3 and 4 ENGG1100. Ch7-Digital Logic (part 2) 34