Lab 7: Arduino Basics
In Lab 7, you will develop a round-based memory game using Arduino. The game tests the player's memory by requiring interaction with LEDs and a button. The player must match the duration the red LED is on by pressing the button within a certain time threshold. Results are transferred to a PC for display. Serial communication and interrupts are used for event handling.

Download Presentation

Please find below an Image/Link to download the presentation.
The content on the website is provided AS IS for your information and personal use only. It may not be sold, licensed, or shared on other websites without obtaining consent from the author.If you encounter any issues during the download, it is possible that the publisher has removed the file from their server.
You are allowed to download the files provided on this website for personal or commercial use, subject to the condition that they are used lawfully. All files are the property of their respective owners.
The content on the website is provided AS IS for your information and personal use only. It may not be sold, licensed, or shared on other websites without obtaining consent from the author.
E N D
Presentation Transcript
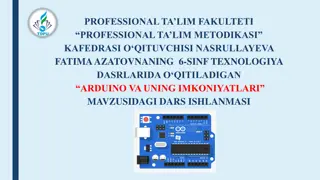
CS4101 Introduction to Embedded Systems Lab 7: Arduino Basics Prof. Chung-Ta King Department of Computer Science National Tsing Hua University, Taiwan National Tsing Hua University
Lab 7 Basic 1: Game of Memory In this lab, you are going to develop a round-based game to test the memory of the player. The game requires a button, a red LED, and a green LED. In each round, the red LED is on for x seconds, where x is set randomly between 1 to 5 seconds, and then off. The player counts the duration that the red LED is on and then presses the button for the same amount of time. If the difference between the button-press time and x is within a margin y seconds, then the player wins this round and the green LED is blinked twice (0.5 second on and off). Otherwise, the red LED is blinked 5 times (0.2 second on and off). 1 National Tsing Hua University
Lab 7 Basic 1: (cont.) At the end of each round, transfer the result to the PC, including the LED on time and button-press time. The PC displays the accumulated counts of wins and loses, and the LED on time and button-press time of the last round. All the events must be handled by interrupts. 2 National Tsing Hua University
Serial Communication to/from PC Serial communication Arduino UNO has one serial port, called UART or USART The serial port uses TX (pin 1) and RX (pin 0) to transmit and receive data 3 National Tsing Hua University
Serial Communication to/from PC Serial communication The Arduino IDE has a feature, called Serial Monitor , which is a separate pop-up window that acts as a terminal to communicate with the Arduino UNO by receiving and sending serial data Arduino s serial library supports serial communication Serial.begin() - start serial port and set baud rate Serial.println() - transmit the data to PC Serial.read() - receive the data from PC 4 National Tsing Hua University
5 National Tsing Hua University
Sample Code for Serial Communication void setup() { // Open serial port, set baud rate Serial.begin(9600); int value = 65; // data to be transmitted Serial.println(value); // print 65 Serial.println(value, DEC); // same as above Serial.println(value, HEX); // print 41 Serial.println(value, BIN); // print 01000001 Serial.println(value, BYTE); // print A } void loop() { ... } 6 National Tsing Hua University
Sample Code for Serial Communication 7 National Tsing Hua University
Pushbutton Switch Pushbutton internal: Button connection: 10K ohm resistor in series LED connection: 220 ohm resistor in series (http://www.ladyada.net/learn/arduino/lesson5.html) 8 National Tsing Hua University
Pushbutton Bounce Problem Pushbutton bounce: Push buttons often generate spurious open/close transitions when pressed due to mechanical and physical issues These transitions may be read as multiple presses in a very short time, which cause the program to confuse. The problem can be solved with hardware or software. A simple idea for debouncing: check twice in a short period of time to make sure the pushbutton is definitely pressed. (http://www.protostack.com/blog/2010/03/debouncing-a-switch/) 9 National Tsing Hua University
Sample Code for Debouncing int led_pin = 13; int button_int = 0; // Interrupt 0 is on pin 2 int toggle_on = false; // Button click switches LED void setup() { attachInterrupt(button_int, handle_click, RISING); // Register handler } void loop() { if (toggle_on) { digitWrite(led_pin, HIGH); } else { digitWrite(led_pin, LOW); } } 10 National Tsing Hua University
Sample Code for Debouncing void handle_click() { static unsigned long last_int_time = 0; unsigned long int_time = millis(); // Read the clock if (int_time - last_int_time > 200 ) { // Ignore when < 200 msec toggle_on = !toggle_on; } last_int_time = int_time; } 11 National Tsing Hua University