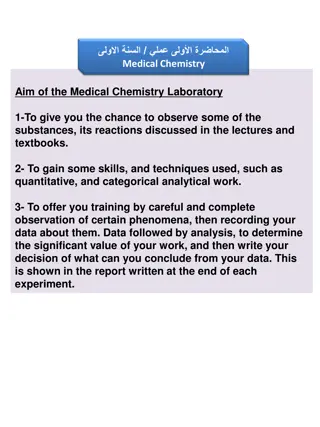
Laboratory Safety Guidelines for Protection
Laboratory safety is paramount for ensuring the well-being of individuals working in scientific environments. From personal safety rules to guidelines on handling chemicals, this comprehensive resource covers essential safety practices to safeguard lab workers, visitors, and the workspace. Following these rules can prevent accidents, promote a secure working environment, and protect against potential hazards.

Download Presentation

Please find below an Image/Link to download the presentation.
The content on the website is provided AS IS for your information and personal use only. It may not be sold, licensed, or shared on other websites without obtaining consent from the author.If you encounter any issues during the download, it is possible that the publisher has removed the file from their server.
You are allowed to download the files provided on this website for personal or commercial use, subject to the condition that they are used lawfully. All files are the property of their respective owners.
The content on the website is provided AS IS for your information and personal use only. It may not be sold, licensed, or shared on other websites without obtaining consent from the author.
E N D
Presentation Transcript
Dr. Maryam M. Hussain Ph.D. Biology Laboratory safety
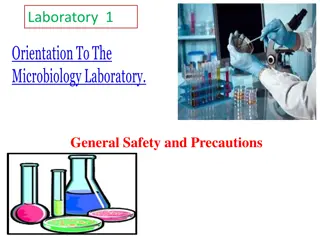
What is the laboratory? An area for Scientific Research, experimentation or analysis, i.e. to conduct observation; exploring the Scientific Method. tests, investigations, The Laboratory is used to demonstrate or practicalize what have been discussed in the class room, exploring the scientific method use for investigations.
Why does it matter? Safe working protects: You Other lab workers Cleaners Visitors Your work
LABORATORY SAFETY RULES 1) Personal Safety 2) Glassware Safety 3) Sharp Instrument Safety 4) Electrical Safety 5) Chemical Safety 6) Heat/Fire Safety
Personal Safety Rules 1- wear protective clothing: A) Eye protection : this device must worn at all times in the laboratory. B) Shoes must be worn during the entire time that you are in the laboratory (should not wear sandals.
C) lab coats may be worn to provide extra protection from accidents and spills. D) Gloves are essential. E) Students are not allowed to wear expensive clothing in the lab (do not wear jewelry, loose or baggy clothing) .
2. Notify your instructor if any spills or accidents occur. 3. After handling chemicals, always wash your hands with soap and water. 4. During lab work, keep your hands away from your face. 6. Tie back long hair.
Handling Chemicals 1. Treat all chemicals in the lab as toxic substances. 2. Smoking, drinking and eating are forbidden in the laboratory. 3. Never taste anything. Never pipette by mouth; use a rubber suction bulb. 4. Do not place your mouth on any chemical equipment. 5. Keep your hands and face clean. 6. Avoid inhalation of fumes of any kind. 7. Never leave excess or spilled chemicals on equipment. 8. Avoid violent splattering by always pouring concentrated solutions. 9. Do not point in the mouth of a reaction vessel containing chemicals toward yourself or anyone else. 10. Do not leave an on-going experiment unattended.
Additional Safety Guidelines Never do unauthorized experiments. Never work alone in laboratory. Keep your lab space clean and organized. Always inform your instructor if you break a thermometer. Do not clean mercury yourself!! Never use open flames in laboratory unless instructed. Check your glassware for cracks and chips each time you use it. Cracks could cause the glassware to fail during use and cause serious injury to you or lab mates. Clean your lab bench and equipment, switch off electricity and lock the door before you leave the laboratory.
Light Microscope Microscope
The Compound Light Microscope A light microscope has 2, sometimes 3 systems: Illuminating system, an imaging system and possibly a viewing and recording system . 1- Illuminating system : - The illuminating system concentrates light on the specimen. It usually consists of :- A- Light source: - Is a light bulb located at the base of the microscope. It illuminates the specimen by passing the light through a thin, almost transparent part of the specimen. B- Condenser lens: - Is located immediately below the specimen. It is focuses light from the light source on to the specimen. C- Iris diaphragm: - Is located just below the condenser lens. It is a knurled ring or lever that can be opened and closed to regulate the amount of light reaching the specimen .
2- Imaging system: -It improves resolution and magnifies the image. It consists of:- A- Ocular lenses : - Are the lenses that you look through. Microscopes with one ocular are monocular microscopes, and those with 2 are binocular microscopes. The ocular usually magnify the image 10 times. B- Body tube: - Is a metal casing through which light passes to the oculars. In microscopes with bent body tubes and inclined oculars, the body tube contains mirrors and prism that redirects light to the oculars. C- Objective lenses: - They are 3-4 lenses mounted on a revolving nosepiece. Each objective is actually a series of several lenses that magnify the image, improve resolution, and correct aberrations in the image. The magnifying power of each objective is etched on the side of the lens (e.g. , 4x, 10x, 40x, 100x). The stage secures the glass slide on which the specimen is mounted.
3-Viewing and recording system: - It converts radiation to a viewable and / or permanent image. It usually consists of a camera or video screen. Most student microscopes do not have viewing and recording systems.
Procedure: Use a compound Microscope: - 1:- Remove the microscope from its cabinet and carry it upright with one hand grasping the arm and your other hand supporting the microscope below its base. Place the microscope on the table in front of you. 2:- Clean all of the microscope's lenses with lens paper. (Do not use paper towels of Kim wipes, since they scratch the lenses).do not remove the oculars or any other part from the body of the microscope. 3:- Plug in the microscope and turn on the light source. 4:- Place the glass slide (with stained specimen )on the stage of the microscope.
5:- If it isn't already in position, rotate the nosepiece until the (Low power) (i.e., 4x or 10x) objective is in line with the body tube. You'll fell the objective click into place when it is (Always begin examining slides with the low- power objective). 6:- Locate the coarse adjustment knob on the side of the microscope; depending on the type of the microscope that you're using the coarse adjustment knob moves either the nosepiece with its objectives or the stage to focus the lenses on the specimen. Only a partial turn of coarse adjustment knob moves the stage or nosepiece a relatively large distance. The coarse adjustment should only be used under low magnification while the fine adjustment should be used under high magnification. properly positioned.


 lab coats may be worn to provide extra protection")