Lumbar Puncture Techniques and Indications by Mohamad Ismail Khalil
Explore the techniques, indications, and contraindications of lumbar puncture prepared by Anaesthesia specialist Mohamad Ismail Khalil from Almaarefa College of Medicine. Learn about the diagnostic and therapeutic aspects, as well as the anatomy of the spinal meninges involved in this procedure.

Download Presentation

Please find below an Image/Link to download the presentation.
The content on the website is provided AS IS for your information and personal use only. It may not be sold, licensed, or shared on other websites without obtaining consent from the author. If you encounter any issues during the download, it is possible that the publisher has removed the file from their server.
You are allowed to download the files provided on this website for personal or commercial use, subject to the condition that they are used lawfully. All files are the property of their respective owners.
The content on the website is provided AS IS for your information and personal use only. It may not be sold, licensed, or shared on other websites without obtaining consent from the author.
E N D
Presentation Transcript
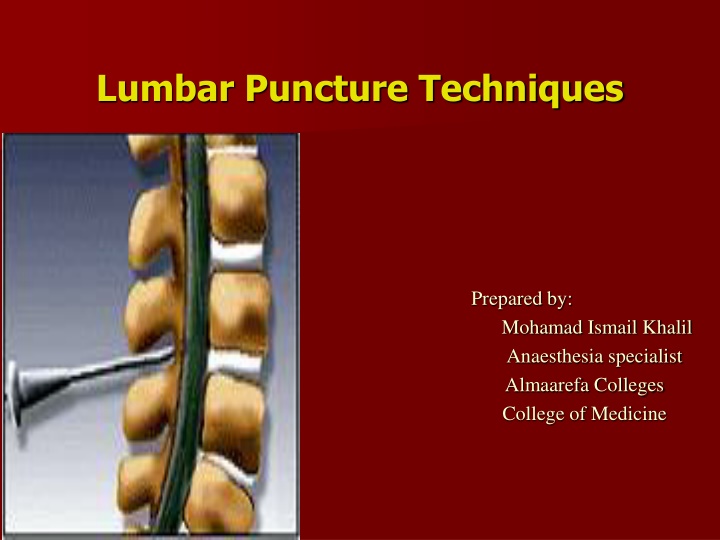
Lumbar Puncture Techniques Prepared by: Mohamad Ismail Khalil Anaesthesia specialist Almaarefa Colleges College of Medicine
objectives To know the indication and contraindication for lumber puncture. To know the technique of insertion of the lumber puncture. Too know the complication of lumber puncture.
Difinition is a diagnostic and/or therapeutic procedure in which a spinal needle is passed into the subarachnoid space and cerebrospinal fluid (CSF) is removed, CSF opening pressure is measured, and/or medications are injected
Indications for Lumber puncture Diagnostic indications: Infective pathology of unknown origin Inflammatory pathology. Subarachanoid hemorrhage (suspection of spontaneous subarachnoid hemorrhage) Malignancy and spread contrast dye into spinal canal Pressure recordings Therapeutic indications: CSF drainage treatment of idiopathic intracranial hypertension Drug delivery chemotherapy infusion of anaesthesia
Contraindications for LP Absolute Contraindications for LP 1- Patient refusal. 2- Lack of IV access. 3- infection in the tissues near the puncture site. 4- Raised (ICP) intracranial pressure. 5- uncorrected coagulopathy (Platelets < 50,000) or Disorders of coagulation or blood diathesis. 6- acute spinal cord trauma. 7-Suspected intracranial mass lesion or space occupying lesion. 8-Underlying spinal abscess. 9-Imaging evidence of midline shift.Posterior fossa tumour or other suspected 4th ventricular lesion
Relative contraindications 1-Bacteremia. 2-Preexisting neurological disease. 3-Aortic/mitral valve stenosis. 4-Previous spinal surgery. 5-Back problems. 6- psychiatric disease or emotional instability (Uncooperative).
Spinal Meninges Dura Mater: Outer most layer, Fibrous. Arachnoid Mater: Middle layer, Non-vascular Sub Arachnoid Space: Lies between the arachnoid and pia Pia Mater: Inner most layer, Highly vascular
LP trays come with: 1- Spinal needle 2- Three-way stopcock 3- Manometer 4- specimen tubes 5-Local anesthesia such as: Xylocaine /lidocaine 1% 6- Betadine: (Povidone-iodine) solution & sponge wand. 7- Drapes, gauze, and bandages.
Procedure Explain the procedure in advance and discuss each step to reduce anxiety. and the possible common complication might happen. Inquire about allergies to anesthetics. Informed consent.
Steps of LP Position of the patient: There are two positions. The preferred position is lying on their side (left lateral) with the patient's legs flexed at the knee and pulled in towards their chest, and upper thorax curved forward in an almost fetal position. The second position is the upright or sitting position. Sit the patient on the edge of bed, with their legs resting on a stool or chair, ask them to roll their shoulders and upper back forwards and the chair is positioned to bring the thighs up towards the abdomen.
Site of injection Locating the correct entry point is performed by identifying the surface anatomy of L4. This is done generally by palpating the iliac crests. An imaginary line between the highest points of the iliac crests usually corresponds to L4 . The interspace of L3/L4 or L4/L5 are used as entry points. Structures you pass through them When doing LP Skin Subcutaneous tissue Supraspinous ligament Interspinous ligament Ligamentum flavum Epidural space Dura mater and Arachnoid mater
a. Ligament flavum is a strong, elastic, yellow membrane covering the interlaminar space between the vertebrae. b. Interspinal ligaments join the inferior and superior borders of adjacent spinous processes. c. Supraspinal ligament connects the spinous processes.
Lumbar Puncture Techniques Wearing nonsterile gloves. locate L4 by palpating the right and left posterior superior iliac crests and moving the fingers medially toward the spine. Palpate the above interspace (L3-L4) and the below interspace (L4-L5) to find the widest space. Mark the entry space with a thumbnail or marker. Open the spinal tray. change to sterile gloves and prepare the equipment. Open the numbered plastic tubes and place them upright. Assemble the stopcock on the manometer. draw the lidocaine into the 10-mL syringe.
Use the skin swabs and antiseptic solution to clean the skin in a circular fashion, starting by the point of L3-L4 interspace and moving outward to include at least 1 interspace above and 1 below. Place a sterile drape below the patient and a fenestrated drape on the back of the patient. Use the 10-mL syringe and the 25-gauge needle to administer a local anesthetic. aspirate to confirm that the needle is not in a blood vessel, and then inject a small amount as the needle is withdrawn a few centimeters. Continue this process above, below, and to the sides very slightly (using the same puncture site). This process anesthetizes the entire area if redirection of the spinal needle is necessary, the area will still be anesthetized
stabilize the spinal needle with the index fingers and advance it through the skin using the thumbs. in the lateral recumbent position the bevel should face up, and in the sitting position, it should face to one side or the other. Insert the needle at a slightly cephalad angle, directing it toward the umbilicus. Advance the needle slowly. and smoothly occasionally when a characteristic pop is felt. And that means the needle penetrates the dura. withdrawn the stylet after approximately 4-5 cm and observe the CSF.
If no CSF , replace the stylet and advance or withdraw the needle a few millimeters, and recheck for CSF. Continue this process until CSF is successfully returned. For measurement of the opening pressure, after the CSF is returned from the needle, attach the manometer through the stopcock, and note the height of the fluid column.
Collect at least 1ml of CSF in each tube, starting with tube 1. If possible the CSF in the manometer should be used for tube no 1. If the CSF flow is too slow, ask the patient to cough or bear down to increase the flow. Replace the stylet, and remove needle in one quick motion. Cleanse the back of the Pt and cover puncture site and place the pt. in supine position. Collect 1ml of CSF in each tube for: Tube 1: culture & gram stain Tube 2: glucose, protein Tube 3: cell count & differential and extra CSF if desired for other lab test
Complications 1- Headache (most common) 2- Epidural or subarachnoid hematoma 3- Spinal cord trauma 4- Infection 5- Back pain (most common) 6- Hypotension, bradycardia.