Mastering PowerPoint Presentations
Enhance your PowerPoint skills with step-by-step instructions on inserting photos, changing fonts, adding WordArt, and more. Learn how to fill in guided notes, insert pictures, change font styles, and create engaging WordArt effects to elevate your presentations.

Download Presentation

Please find below an Image/Link to download the presentation.
The content on the website is provided AS IS for your information and personal use only. It may not be sold, licensed, or shared on other websites without obtaining consent from the author.If you encounter any issues during the download, it is possible that the publisher has removed the file from their server.
You are allowed to download the files provided on this website for personal or commercial use, subject to the condition that they are used lawfully. All files are the property of their respective owners.
The content on the website is provided AS IS for your information and personal use only. It may not be sold, licensed, or shared on other websites without obtaining consent from the author.
E N D
Presentation Transcript
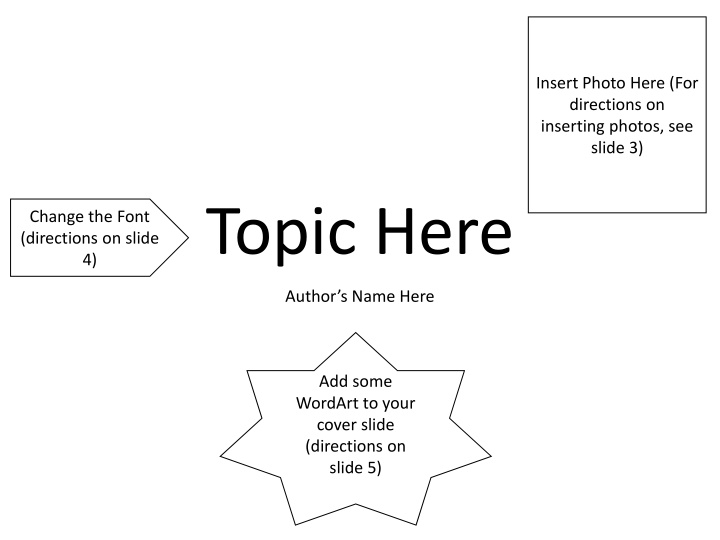
Insert Photo Here (For directions on inserting photos, see slide 3) Topic Here Change the Font (directions on slide 4) Author s Name Here Add some WordArt to your cover slide (directions on slide 5)
Filling in the Guided Notes The blanks are actually underscores that you will need to backspace away to type in your answers. Practice it _______. If you just start typing on the blank lines you will see that your letters are not underlined, but the underlined spaces stay there on the sides of your words. ____looks like this ____ It would be a great idea to change the color of your answers to something like red or blue so that you can quickly see them later February 25 Mrs. Washburn 2
Inserting Pictures On the ribbon, click the insert tab. Then choose __________________. You then type the word for the picture you want to add in the search bar and click go. When you have found the picture or clip art that you want to add, ___________________________to add it to the page. Now you will have to _________________________to where you would like it. It is simple enough to click and drag the picture somewhere else, but if it is the wrong size the steps can be a little tricky. First, you have to click on the picture. If you want to change the size, you need to ____________________over one of the corner squares: we call these handles. When you hover, you will see the pointer turn into a 2-sided arrow. When you see the __________________________you re ready to click. Click and drag in or out to change the shape. Let go of your click when you are happy with the new size. February 25 Mrs. Washburn 3
Changing the Font First, make sure you ________________you want to change. If you skip this step the computer will not change anything. Next, click on the __________ next to the font title. If you want to try a font out before you choose it, just ______________________ over it and the highlighted letters on your screen will change. If you like it, click on the font title and this will change your highlighted text. Also, if you need to change the size or color of your font, you can do that easily. Highlight the text you want to change and click the arrow next to the size or color boxes. Make your choices and the text will change. You can even make your own ____________________________. Last, if you want to make part of your text _________________, you can make it bold, italicized, or underlined. Highlight the text you want to change and click the B, I, or U button(s) in the font box. February 25 Mrs. Washburn 4
Add Word Art To add word art to your page, click on the Insert ribbon. Click on ___________________and choose a type. You can change the __________________later. When you click on your choice, a text box will show up on the page. Type the words you want in the box. Changing the color and size is just like changing the regular font. ____________ what you want to change and select the color and size for the changes. We can be more creative with word art because we can add _________________ and more. To access these special features, click _______________. To see what each effect does, click through them to explore. You can always ______ (the blue arrow that looks like it is taking you back in time up in the top left corner) if you don t like the way it looks. If you need to move the word art, it works the same way as moving a picture or table. Grab the handles or use the 4-arrow pointer to move the whole thing. February 25 Mrs. Washburn 5
Type A Title Here Type details in a text box. If you need more than one text box, or text next to a picture on the same slide, you can change the slide s Layout, which you can find on the Home Tab in the Slides Box. Change this Slide to have a space for the Title and 2 Content boxes February 25 Mrs. Washburn 6
Topic Title Here Add a table about your topic in this slide. The directions for adding a table are on the next Slide February 25 Mrs. Washburn 7
Adding a Table On the ribbon, click on the insert tab. You will see the option for Table. Click on it to open ______________. You have the choice of how many ____________________ to add (don t worry, you can add more or delete some later if you need to). Now, to move the table to a different spot on the page, it works just like a photo. You can make it bigger or smaller too. If you decide you need more rows, ________click on the table. You will see a menu pop up and there will be options to _______________rows or columns. Make your selection and it will change the table on that page. Do this as many times as you need to until your table is just right. Another thing you can do with the table is change the _____________. If your presentation has a color scheme, you can match it with your table. To do this, click on your table and a special ribbon called ________________ appears at the top. Choose design and you will see all of your color choices. You can even pick a custom color in ___________________. To type in your table, you will have to ________ in each box as you fill it in. The tab key on your keyboard will move the cursor to the next box of the table so you don t have to move your hand to the mouse each time. February 25 Mrs. Washburn 8
Slide Title This slide will contain your graphic organizer (or SmartArt). Directions are below. February 25 Mrs. Washburn 9
SmartArt or Graphic Organizers SmartArt is on the Insert tab. Start with a _______ of how you want to organize your information. Is it a list of similar things? A progression of first, next, last? A wheel of information that is cyclic? Once you have an idea of how you want to show the information, choose the __________________ that will support it. When you click on your choice and it comes on the page, it will be big and right in the middle. You can ____________ your information into the place holder text boxes before you move and resize it. The more you type, the smaller your font size will be. It does this automatically. Once you have your information typed in, you may want to change the ________. When you are clicked on your graphic, a special tab on the ribbon appears called __________. Use these tabs to change the colors or the design. Remember to use colors that are easy to look at. February 25 Mrs. Washburn 10
On this Slide you will add a Video Clip Directions are on the slide below. February 25 Mrs. Washburn 11
Adding A Video In recent versions of PowerPoint there are two choices for adding a video clip. You can load a video that you have ____________ on your computer, and you can add an online video, like from YouTube. To add a video, click on the Insert tab on the ribbon and click on __________. Make your choice of the type of video you want on the page and click it. If you choose to upload something from your computer, the box will pop up to let you look through your digital files and find the video. Select it and let it load onto the page. You can _________________ around like you would with a photo. If you choose to use a video from the internet you will need to __________ for it, or have the embed code. Copy and paste the information into the box or select your video clip from the search. It will then be added to your current page. You can choose whether to have the video start ____________ when the slide comes up, or when you click on it. To do this, right-click on the video and the option will appear on the menu. You can also set this when you do your animations. February 25 Mrs. Washburn 12
Adding Narration (Practice by narrating this slide) To add audio you will need a _______________ or a computer with a microphone built in. Click on the Insert tab on the ribbon and find Audio in the ________ box. If you have something pre- recorded on your computer, like music or a sound clip, you can ________ it into the presentation. If you are going to speak in your presentation, you will want to choose ____________. It is best to record ______ slide or section at a time so that you have more control over how it plays during the presentation. When the Record Audio feature prompts you to, speak into the microphone about your presentation. When you re finished, it will be added to the page. You can move the __________________ anywhere you want it. You can choose whether it starts automatically, or when ____________. If you want the presentation to run itself, you can add it to your animations and have it be the first thing to start for each slide. February 25 Mrs. Washburn 13
Directions for Editing Spelling and Grammar Errors You ve been typing for a while and now you notice there are __________________squiggly lines below some of your words and sentences. This is the computer s way of letting you know there might be a spelling or grammar error in your writing. If you type any word that isn t in the ______________, a red line will appear under the word. The computer has suggestions for you to change the spelling. To see the suggestions, ______________ over the misspelled word and right-click. This will bring up a menu and at the top of the menu there will be suggested spellings. Look through the suggestions to see if the right spelling or word is there. If it is, click on it and the new spelling will appear on your page. If there are no suggested spellings, or the correct word isn t on the list, you will have to __________ the spelling yourself. Names are usually underlined red because they are not dictionary words. The green underlined words or sentences mean there is a __________ error. Right-click over the word or sentence to see suggestions. Sometimes the suggestion tells you to consider revising and sometimes there will be a revised sentence to click on. You will have to decide if your sentence needs to be changed. February 25 Mrs. Washburn 14
Directions for Design In PowerPoint, there are several designs that you can choose from. To find them, click on the ___________ _____________ Look through the themes to find one that matches your requirements. The colors can be changed and your color choices are called ________. It is a good idea to choose a theme _________ you put anything on your slides or pages, because changing the design after you ve added pictures and words might move your pictures and words to unexpected places. When choosing colors for your fonts, backgrounds, and graphics it is important to remember that some colors __________________together. While it is fun to mix bright colors, you have to remember that your audience needs to be able to see and read the information. Think about the color wheel. Choose colors that are at 3 equal distances around the wheel and your pages will look fantastic. February 25 Mrs. Washburn 15
Directions for Transitions and Animations Transitions and animations are the way the _________ in the presentation come on to the screen. If you do not add transitions and animations then your next slide will show when the screen is clicked and all of the information on the slide will show up __________________. Transitions make the slides move on to the screen in an animated way. Click on the Transitions tab on the ribbon to see all of your options. For each slide in your presentation, choose ______________. Click on the transition you like to add it to your presentation. You can even apply this transition to __________ if you want to. The Animations tab on the ribbon is for your ________. If you want to reveal each piece of information only when you re ready to talk about it, you can use animations. Select the text you want to animate by ____________ it. Then click on the animation you like and it will be set for those words. You can even do this for the __________ on each page. If you want to change the order in which your animations appear you can do that even after you have them set with the Reorder Animation button. February 25 Mrs. Washburn 16
Save your Work! When it is time to save for the FIRST time, click on the _______ button and choose ____________. Then find ___________________ when the window pops up, choose _______________, give your file a _____________ and press save. The NEXT time you want to work in your file, open your ______________ folder, which you can find on the ___________. When you are done working on your file for the day, click on the ____________ button and choose ________________. February 25 Mrs. Washburn 17
Works Cited Order of information for each Citation: Author of article, article title, Website title, Publisher, Date article was published, Web, Date you read the article online, URL of the page you used. See the example for details. Guenther, Leanne. Penguin Fact Index. Kid Zone, DLTK s Inc. ND. Web. July 17th, 2015. http://www.kidzone.ws/animals/penguins/facts4.htm. February 25 Mrs. Washburn 18
Printing (Do you really need to?) The first thing to know when you print is that your transitions, animations, videos, and sounds ________ print. They only work in the software program. It is still a good idea to print the notes pages if you are going to be teaching a topic that other people are required to learn. We all learn best when we take notes. To print your presentation, click on the _____________ Button and select Print or Print Preview. You have the choice of printing one page at a time (great choice if you have to turn it in to the teacher) or _______ slides on a page (saves printer ink). If you want to have space for notes, the 3 slide notes pages are ideal. This gives lines to write on and a small picture of what the slide looks like. February 25 Mrs. Washburn 19


")