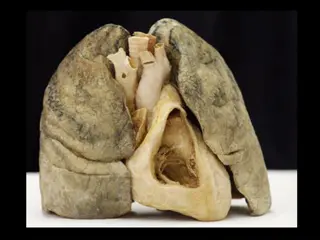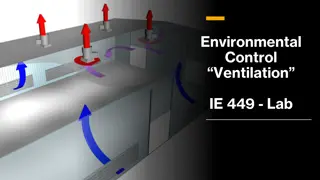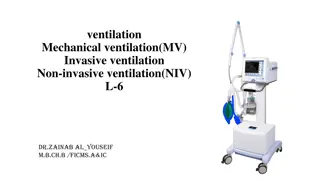
Mechanical Ventilation Types
Mechanical ventilation assists in moving air into and out of the lungs, primarily to aid in oxygen delivery and carbon dioxide removal. It is utilized for various reasons, including airway protection, adequate oxygenation, and CO2 removal. There are two main types of mechanical ventilation, namely negative pressure ventilation (NPV) and positive pressure ventilation (PPV), each serving specific patient conditions. NPV helps patients with obstructive lung disease and upper airway obstructions, while PPV delivers gas to patients under positive pressure during the inspiratory phase through Non-Invasive Positive Mechanical Ventilation (NIPMV) or Invasive Positive Mechanical Ventilation (IPMV). Non-Invasive Positive Mechanical Ventilation (NIPMV) involves delivering positive pressure through a noninvasive interface to facilitate breathing. Continuous Positive Airway Pressure (CPAP) is a highly effective treatment for certain conditions like sleep apnea, ARDS, and COPD by preventing airway collapse or blockage.

Download Presentation

Please find below an Image/Link to download the presentation.
The content on the website is provided AS IS for your information and personal use only. It may not be sold, licensed, or shared on other websites without obtaining consent from the author. If you encounter any issues during the download, it is possible that the publisher has removed the file from their server.
You are allowed to download the files provided on this website for personal or commercial use, subject to the condition that they are used lawfully. All files are the property of their respective owners.
The content on the website is provided AS IS for your information and personal use only. It may not be sold, licensed, or shared on other websites without obtaining consent from the author.
E N D
Presentation Transcript
Tracheal Anatomy The trachea begins at the lower edge of the cricoid cartilage and extends to the level of the carina. It consists of 18 to 22 anterior C-shaped tracheal rings lined by a posterior membranous wall. It starts anterior and midline in the neck below the cricoid cartilage and then it dives posterior in the mediastinum. The esophagus starts at the same level and lies at the left posterior border of the trachea. The thyroid gland is found anterior and lateral to the proximal trachea with the isthmus projecting apically at the level of the second or third tracheal ring. The structure associated with this procedure s deadliest complications is the innominate artery. It crosses the anterior aspect of the trachea in an oblique fashion inferior to the third or fourth tracheal ring.
Timing The advantages of tracheostomy in the setting of prolonged mechanical ventilation are well established. However, the timing of replacing a temporary artificial airway (ETT) with a tracheostomy has been controversial14 because of two main challenges. One is the inability of clinicians to predict the need for prolonged mechanical ventilation accurately within several days of initiation. There is also ongoing debate regarding early versus late tracheostomy. Early timing has been generally defined as within 3 to 10 days,
The most positive study on early tracheostomywas a prospective randomized trial involving several centers by Rumbak et al.21 In this study, early tracheostomywas associated with significantly lower mortality, nosocomial pneumonia rate, and shorter duration of ICU stay and mechanical ventilation. Several other studies have demonstrated no difference in mortality but decreased duration of mechanical ventilation.22,23 Systematicreviews and meta-analysis of randomized trials have also shown no difference in rates of mortality24,25 but were variable relative to mechanical ventilation duration and ICU length of stay. Patients with severe head trauma often require tracheostomy for airway protection because of poor cough and clearanceofsecretions, rather than the need for mechanical ventilation
Organization of Care and Safety During Bedside Tracheostomy Tracheostomy is one of the most hazardous procedures performed in the ICU. Although intraprocedural complications are rare, vascular injury resulting in hemorrhage, loss of airway control, or airway injury is catastrophic and may rapidly result in death, with rates as high as 75%27,28 for loss of airway control. It is prudent to take appropriate precautions to avoid these problems or manage them when they arise.
The first step is appropriate patient selection. There are few absolute contraindications and a small number of relative contraindications (described elsewhere in this chapter). The development of a team approach and a safety checklist for bedside tracheostomy has been demonstrated to decrease complications. This should include a well-trained lead physician and assistant; an airway management practitioner who is capable of reintubation if necessary and will manage the ventilator; a nurse or other provider to administer sedation and pain medication and monitor the patient s clinical status; and a circulator who can run for supplies. If bronchoscopic support is planned, a skilled bronchoscopist should be included. Some practitioners consider thatsuch bronchoscopicassistance is required for PDT, but the literature does not support improved complication rates. The bronchoscope should be available immediately for emergencies, even if not used routinely. Ultrasound has also been used as an adjunct to avoid vascular injury but it has not yet been demonstrated to be of benefit in this setting. If the primary proceduralist is not a surgeon, it is appropriate to have surgical backup in the hospital. It is therefore wise to plan elective bedside tracheostomyduring daytime hours to ensure the availability of maximum personnel support in an emergency.
The equipment for the procedure should be in the room before starting, as well as any equipment that may be needed to deal with unplanned events. An assortment of tracheostomy tube sizes should be available as well as endotracheal tubes and laryngoscopes for reintubation. If PDT is planned, a surgical tracheostomy tray should be in the unit, as well as equipment for cricothyrotomyshould the need arise. Good lighting is essential and headlamps may be of benefit. The team should prepare for bedside percutaneous or surgical tracheostomyas they would for any operation. This includes discussion of the plan for sedation, the procedure itself, the roles of the team members, and any particular concerns regarding the individual patient. Structuring this practice with the use of a World Health Organization style checklist has been demonstrated to reduce complication rates significantly for bedside tracheostomy
Techniques Percutaneous (Box 14.3) PDT, also known bedside tracheostomy, is the placement of a tracheostomy tube. This technique uses a small skin incision and dilation of the subcutaneous tissue into the tracheal lumen without direct surgical visualization of the trachea. It is considered minimally invasive and is often done at the bedside in the ICU, avoiding the risks of transporting a critically ill patient and the costs of the operating room. PDT is done with continuous monitoring of the patient s vital signs and often is performed under direct bronchoscopicvisualization
The most common technique used is the Ciaglia technique (Video 14-1). With this technique, there is no sharp dissection involved beyond the skin incision. The patient is positioned and prepared in the same way as for the standard operative tracheostomy. Deep sedation is administered and all steps are done under bronchoscopic vision. The endotracheal tube is withdrawn under bronchoscopic guidance about 1 to 2 cm below the vocal cords to expose the space below the first tracheal ring by using digital pressure at 2 cm above the sternal notch while looking at the bronchoscopicview. The incision site is selected to correspond to the space between the second and third tracheal rings. Lidocaine 2% with epinephrine is used for local anesthesia and then a 2-cm incision is made. The pretracheal tissue is then cleared with blunt dissection. The operator enters the tracheal lumen below the second tracheal ring with an introducer needle through the incision (Fig. 14.2). The tract between the skin and the tracheal lumen is then serially dilated over a guidewire and stylet. A tracheostomy tube is placed under direct bronchoscopicvision over a dilator. Placement of the tube is also confirmed by visualizing the tracheobronchial tree through the
tracheostomy. The tracheostomy tube is then secured to the skin with sutures and a tie or device encircling the neck. Although there is a learning curve to the technique, there are several advantages of PDT. The time required for bedside PDT is considerably shorter than that for an open tracheostomy. Theelimination of operating room scheduling issues and costs, as well as the risks of transport, provide benefit to the patient and critical care team. In fact, the cost of performing PDT at the bedside is roughly half that of performing open surgical tracheostomy in the operating room.35