New Holland E57C Cab Tier IV (final engine) Mini Excavator Service Repair Manual Instant Download
New Holland E57C Cab Tier IV (final engine) Mini Excavator Service Repair Manual Instant Download
Download Presentation

Please find below an Image/Link to download the presentation.
The content on the website is provided AS IS for your information and personal use only. It may not be sold, licensed, or shared on other websites without obtaining consent from the author. If you encounter any issues during the download, it is possible that the publisher has removed the file from their server.
You are allowed to download the files provided on this website for personal or commercial use, subject to the condition that they are used lawfully. All files are the property of their respective owners.
The content on the website is provided AS IS for your information and personal use only. It may not be sold, licensed, or shared on other websites without obtaining consent from the author.
E N D
Presentation Transcript
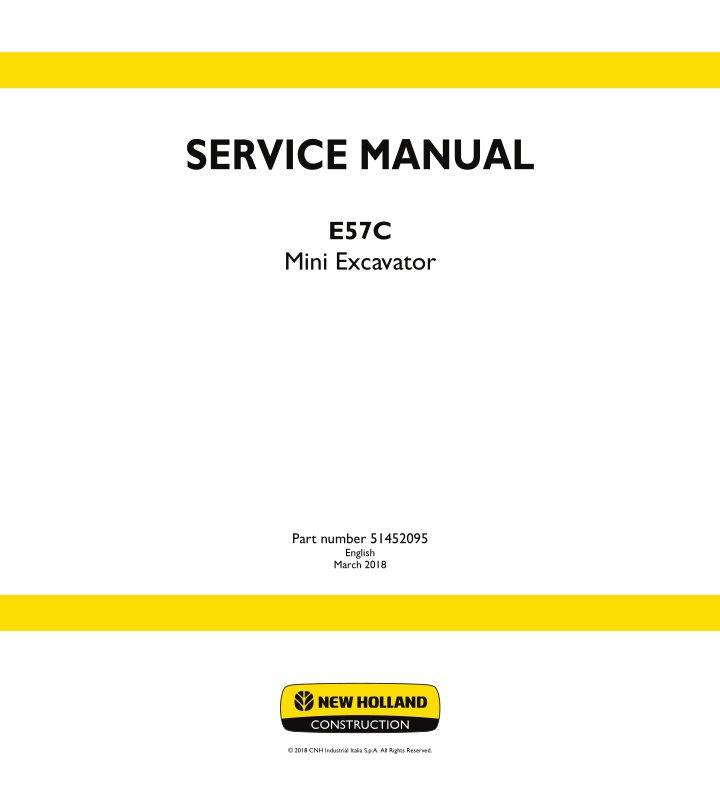
SERVICE MANUAL SERVICE MANUAL E57C Mini Excavator E57C Mini Excavator 1/1 Part number 51452095 English March 2018 Part number 51452095 2018 CNH Industrial Italia S.p.A. All Rights Reserved.
SERVICE MANUAL E57C Cab - Tier IV final engine 51452095 20/06/2018 EN
Contents INTRODUCTION Engine....................................................................................... 10 [10.001] Engine and crankcase ............................................................. 10.1 [10.106] Valve drive and gears .............................................................. 10.2 [10.101] Cylinder heads ..................................................................... 10.3 [10.105] Connecting rods and pistons....................................................... 10.4 [10.103] Crankshaft and flywheel............................................................ 10.5 [10.216] Fuel tanks .......................................................................... 10.6 [10.206] Fuel filters .......................................................................... 10.7 [10.218] Fuel injection system............................................................... 10.8 [10.202] Air cleaners and lines .............................................................. 10.9 [10.254] Intake and exhaust manifolds and muffler ....................................... 10.10 [10.501] Exhaust Gas Recirculation (EGR) exhaust treatment............................ 10.11 [10.400] Engine cooling system ........................................................... 10.12 [10.414] Fan and drive .................................................................... 10.13 [10.304] Engine lubrication system........................................................ 10.14 Hydraulic systems....................................................................... 35 [35.000] Hydraulic systems.................................................................. 35.1 [35.300] Reservoir, cooler, and filters........................................................ 35.2 [35.106] Variable displacement pump ....................................................... 35.3 [35.359] Main control valve.................................................................. 35.4 [35.357] Pilot system ........................................................................ 35.5 [35.355] Hydraulic hand control ............................................................. 35.6 [35.356] Hydraulic foot control............................................................... 35.7 [35.352] Hydraulic swing system ............................................................ 35.8 [35.353] Hydraulic travel system ............................................................ 35.9 [35.354] Hydraulic central joint ............................................................ 35.10 51452095 20/06/2018
https://www.ebooklibonline.com Hello dear friend! Thank you very much for reading. Enter the link into your browser. The full manual is available for immediate download. https://www.ebooklibonline.com
[35.736] Boom hydraulic system .......................................................... 35.11 [35.737] Dipper hydraulic system.......................................................... 35.12 [35.738] Excavator and backhoe bucket hydraulic system................................ 35.13 [35.734] Tool quick coupler hydraulic system ............................................. 35.14 [35.360] Hammer and rotating bucket hydraulic system .................................. 35.15 [35.739] Swing arm hydraulic system ..................................................... 35.16 [35.741] Dozer blade cylinders ............................................................ 35.17 Pneumatic system ...................................................................... 36 [36.100] Pneumatic system.................................................................. 36.1 Frames and ballasting................................................................. 39 [39.140] Ballasts and supports .............................................................. 39.1 Tracks and track suspension........................................................ 48 [48.100] Tracks .............................................................................. 48.1 [48.130] Track frame and driving wheels.................................................... 48.2 [48.134] Track tension units ................................................................. 48.3 [48.138] Track rollers ........................................................................ 48.4 Cab climate control..................................................................... 50 [50.100] Heating............................................................................. 50.1 [50.200] Air conditioning..................................................................... 50.2 Electrical systems....................................................................... 55 [55.000] Electrical system ................................................................... 55.1 [55.100] Harnesses and connectors......................................................... 55.2 [55.525] Cab engine controls................................................................ 55.3 [55.015] Engine control system.............................................................. 55.4 [55.201] Engine starting system............................................................. 55.5 [55.301] Alternator........................................................................... 55.6 [55.302] Battery.............................................................................. 55.7 [55.011] Fuel tank system ................................................................... 55.8 51452095 20/06/2018
[55.014] Engine intake and exhaust system................................................. 55.9 [55.012] Engine cooling system ........................................................... 55.10 [55.013] Engine oil system ................................................................ 55.11 [55.640] Electronic modules............................................................... 55.12 [55.512] Cab controls...................................................................... 55.13 [55.036] Hydraulic system control ......................................................... 55.14 [55.524] Cab controls (Lift arm, Boom, Dipper, Bucket)................................... 55.15 [55.518] Wiper and washer system........................................................ 55.16 [55.404] External lighting .................................................................. 55.17 [55.514] Cab lighting ...................................................................... 55.18 [55.408] Warning indicators, alarms, and instruments .................................... 55.19 [55.DTC] FAULT CODES.................................................................. 55.20 Booms, dippers, and buckets ....................................................... 84 [84.910] Boom............................................................................... 84.1 [84.912] Dipper arm ......................................................................... 84.2 [84.100] Bucket.............................................................................. 84.3 Dozer blade and arm................................................................... 86 [86.110] Dozer blade ........................................................................ 86.1 Platform, cab, bodywork, and decals............................................. 90 [90.150] Cab................................................................................. 90.1 [90.120] Mechanically-adjusted operator seat............................................... 90.2 [90.105] Machine shields and guards ....................................................... 90.3 51452095 20/06/2018
INTRODUCTION 51452095 20/06/2018 1
INTRODUCTION Foreword - Important notice regarding equipment servicing All repair and maintenance work listed in this manual must be carried out only by qualified dealership personnel, strictly complying with the instructions given, and using, whenever possible, the special tools. Anyone who performs repair and maintenance operations without complying with the procedures provided herein shall be responsible for any subsequent damages. The manufacturer and all the organizations of its distribution chain, including - without limitation - national, regional, or local dealers, reject any responsibility for damages caused by parts and/or components not approved by the manu- facturer, including those used for the servicing or repair of the product manufactured or marketed by the manufacturer. In any case, no warranty is given or attributed on the product manufactured or marketed by the manufacturer in case of damages caused by parts and/or components not approved by the manufacturer. The manufacturer reserves the right to make improvements in design and changes in specifications at any time without notice and without incurring any obligation to install them on units previously sold. Specifications, descriptions, and illustrative material herein are as accurate as known at time of publication but are subject to change without notice. In case of questions, refer to your NEW HOLLAND CONSTRUCTION Sales and Service Networks. 51452095 20/06/2018 3
INTRODUCTION Safety rules Personal safety This is the safety alert symbol. It is used to alert you to potential personal injury hazards. Obey all safety messages that follow this symbol to avoid possible death or injury. Throughout this manual you will find the signal words DANGER, WARNING, and CAUTION followed by special in- structions. These precautions are intended for the personal safety of you and those working with you. Read and understand all the safety messages in this manual before you operate or service the machine. DANGER indicates a hazardous situation that, if not avoided, will result in death or serious injury. WARNING indicates a hazardous situation that, if not avoided, could result in death or serious injury. CAUTION indicates a hazardous situation that, if not avoided, could result in minor or moderate injury. FAILURE TO FOLLOW DANGER, WARNING, AND CAUTION MESSAGES COULD RESULT IN DEATH OR SERIOUS INJURY. Machine safety NOTICE: Notice indicates a situation that, if not avoided, could result in machine or property damage. Throughout this manual you will find the signal word Notice followed by special instructions to prevent machine or property damage. The word Notice is used to address practices not related to personal safety. Information NOTE: Note indicates additional information that clarifies steps, procedures, or other information in this manual. Throughout this manual you will find the word Note followed by additional information about a step, procedure, or other information in the manual. The word Note is not intended to address personal safety or property damage. 51452095 20/06/2018 4
INTRODUCTION Safety rules - General information Cleaning Clean the metal parts with cleaning solution that meets the standard and steam cleaning. (except for bearings) After cleaning, dry well, and inject oil in all parts. Also inject oil into the bearings after drying. Inspection When disassembling parts, check all the parts. If there are any worn or damaged parts, replace them. Inspect carefully to prevent initial breakdowns. Bearing Replace any loose bearings. Air dry bearings before installing them. Needle bearing When inserting needle bearings, be very careful not to damage them. Apply grease to the section where the needle bearing will be inserted. Gear Check that there is no wear and no damage. Oil seal, O-ring, gasket Always install new oil seals, O-rings, and gaskets. Apply grease to sections where oil seals and O-rings will be inserted. Shaft Check that there is no wear and no damage. Check the bearings and check for damaged oil seals on the shaft. Service parts Install NEW HOLLAND CONSTRUCTION genuine service parts. When placing an order, check the parts catalog. It contains the NEW HOLLAND CONSTRUCTION genuine part numbers. Any breakdowns arising from the installation of non-genuine parts are not covered by the warranty. Lubricants (fuel, hydraulic oil) Use the oil from the specified company or specified in the operator's manual or service Manual. Any breakdowns arising from any fuel or hydraulic oil other than those specified are not covered by the warranty. 51452095 20/06/2018 5
SERVICE MANUAL Engine E57C Cab - Tier IV final engine 51452095 20/06/2018 10
Engine - Engine and crankcase Engine - Change fluid - Engine oil and oil filter Quantity: 11.6 L (3.1 US gal) NOTE: replace the oil while the engine is warm but not hot. Doing so helps the oil in flowing. 1. Park the machine on a flat and level place. Stop the engine, remove the starter key. 2. Place a container with a capacity of 20 L (5.3 US gal) under the drain plug. 3. Remove the cover of drain plug (2) and connect the special tool (Part Number 51477132) (1). 4. Open the engine hood, remove the filling plug and drain the oil. 1 SMIL18MEX0579AA 5. Clean the area around the engine oil filter (1) and re- move it with the specific tool provided with the machine. 2 SMIL16MEX0623AA 6. Apply an oil film finely to the seal of a new filter. 3 SMIL14CEX2751AA 51452095 20/06/2018 10.1 [10.001] / 34
Engine - Engine and crankcase 7. Install the new filter. Turn the filter (3) until the seal touches the filter head. Tighten the filter to 19 23 N m (14 17 lb ft) NOTE: do not use a filter wrench for tightening the filter. Overtightening can damage the filter and its seal. 8. Install the cover drain plug. 9. Add new engine oil to the engine. Install the filling plug (2). 10. Run the engine for several minutes to check that there are no leaks at the filter and at the drain plug. 11. Stop the engine and check the oil level with the dip- stick. Add oil if necessary. 4 SMIL16MEX0623AA NOTE: always wait 15 min to allow the oil to return to the sump before checking the oil level. 51452095 20/06/2018 10.1 [10.001] / 35
Engine - Engine and crankcase Engine - Remove WARNING Avoid injury! Shut off the engine, remove the key, and make sure all machine motion stops before you service the machine. Failure to comply could result in death or serious injury. W1128B WARNING Chemical hazard! Use caution when opening the quick coupler cap from the load port. There may be product left in the port. Failure to comply could result in death or serious injury. W1039A WARNING Crushing hazard! The lifting systems must be operated by qualified personnel who are aware of the correct procedures to follow. Make sure all lifting equipment is in good condition, and all hooks are equipped with safety latches. Failure to comply could result in death or serious injury. W0256A WARNING Heavy objects! Lift and handle all heavy components using lifting equipment with adequate capacity. Always support units or parts with suitable slings or hooks. Make sure the work area is clear of all bystanders. Failure to comply could result in death or serious injury. W0398A WARNING Burn hazard! Before performing any service on the hydraulic system, you must allow it to cool. Hydraulic fluid temperature should not exceed 40 C (104 F). Failure to comply could result in death or serious injury. W0241A WARNING Escaping fluid! Hydraulic fluid or diesel fuel leaking under pressure can penetrate the skin and cause infection or other injury. To prevent personal injury: Relieve all pressure before disconnecting fluid lines or per- forming work on the hydraulic system. Before applying pressure, make sure all connections are tight and all components are in good condition. Never use your hand to check for suspected leaks under pressure. Use a piece of cardboard or wood for this purpose. If injured by leaking fluid, see your doctor immediately. Failure to comply could result in death or serious injury. W0178A WARNING Chemical hazard! When handling fuel, lubricants, and other service chemicals, follow the manufacturer's instructions. Wear Personal Protective Equipment (PPE) as instructed. Do not smoke or use open flame. Collect fluids in proper containers. Obey all local and environmental regulations when disposing of chemi- cals. Failure to comply could result in death or serious injury. W0371A 51452095 20/06/2018 10.1 [10.001] / 36
Engine - Engine and crankcase 1. Set the battery disconnect switch to O position (OFF position) to cut off any power supply in the electrical system of the machine. (For details, see Mechanical battery isolator - Dynamic description (55.302)) 2. Discharge the air conditioning system (refer to Air con- ditioning - Discharging (50.200)). 3. Remove the Radiator. For details, see Radiator - Re- move (10.400). 4. Loosen the clamps and remove the cab heating hoses (2). 5. Loosen the clamp and remove the fuel hose (3) from the fuel filter (1). 1 SMIL16MEX3552BB 6. Close the fuel pre-filter cock (1). 7. Loosen the clamp and remove the fuel pre-filter hose (2) from the fuel pre-filter (3). 8. Use a wrench [ 13 mm] to loosen the bolts (4), and then remove the fuel pre-filter (3). 2 SMIL16MEX3553AB 51452095 20/06/2018 10.1 [10.001] / 37
Engine - Engine and crankcase 9. Use a wrench [ 17 mm] to disconnect the two hoses (3) from the air conditioning compressor (1). 10. Disconnect the electrical connector CN-28 (2) from the air conditioning compressor (1). 11. Remove the screw (5) then remove the electrical con- nector (4) from the air conditioning compressor. 3 SMIL16MEX3554BB 12. Use a wrench [ 17 mm] to remove the bolt and then disconnect the earth strap (2) from the engine. 13. Disconnect the electrical connector CN-145 (1) of the electrical fuel feed pump. 4 SMIL16MEX3555AB 14. Disconnect the electrical connector CN-302 (1). 15. Disconnect the electrical connector CN-304 (1). 16. Disconnect the electrical connector CN-301 (3). 17. Disconnect the electrical connector CN-303 (4). 5 SMIL16MEX3556AB 51452095 20/06/2018 10.1 [10.001] / 38
Engine - Engine and crankcase 18. Disconnect the electrical connector CD-18 (1) of the engine oil pressure switch. 6 SMIL16MEX3557AB 19. Disconnect the electrical connector CN-80 (1) of the pre-heater glow plugs. 7 SMIL16MEX3558AB 20. Disconnect the electrical connector CD-10 (1) from the air cleaner. 8 SMIL16MEX3559AB 21. DisconnectthetwoelectricalconnectorsCN_300B(1) and CN-300C (4) from the air exhaust muffler (3). 22. Disconnect the electrical connector CN-300A (2) from the air exhaust muffler (3). 9 SMIL18MEX0273AB 51452095 20/06/2018 10.1 [10.001] / 39
Suggest: If the above button click is invalid. Please download this document first, and then click the above link to download the complete manual. Thank you so much for reading
Engine - Engine and crankcase 23. Move the cap. 24. Use a wrench [ 13 mm] to remove the nut and discon- nect the wire (1). 25. Disconnect the electrical connector (2) from the alter- nator. 10 SMIL16MEX3562AB 26. Remove the nut to disconnect the wire (1). 27. Move the cap and then remove the nut to disconnect the wires (2) and (3). 11 SMIL16MEX3538AB 28. Loosen the clamp (1) and remove the air hose (2) from the air cleaner. 12 SMIL16MEX3561AB 29. Drain the hydraulic oil. 30. Use a wrench [ 19 mm] to disconnect the hose (1). 31. Use a wrench [ 22 mm] to disconnect the hose (3). 32. Use a wrench [ 24 mm] to disconnect the hoses (2). 33. Use a wrench [ 24 mm] to disconnect the hose (5). 34. Use a wrench [ 24 mm] to disconnect the hoses (4). 13 SMIL16MEX3491AB 51452095 20/06/2018 10.1 [10.001] / 40
https://www.ebooklibonline.com Hello dear friend! Thank you very much for reading. Enter the link into your browser. The full manual is available for immediate download. https://www.ebooklibonline.com

