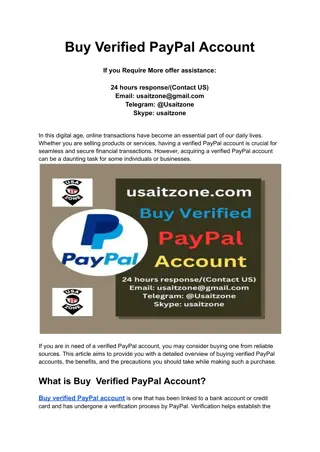
Setting Up a PayPal Account for Nonprofit Fundraising in 2022
Learn how to add a PayPal account for nonprofit fundraising in 2022, starting by going to PayPal's website, setting up your account with business details, and confirming your identity to access lower fees for donations.

Download Presentation

Please find below an Image/Link to download the presentation.
The content on the website is provided AS IS for your information and personal use only. It may not be sold, licensed, or shared on other websites without obtaining consent from the author. If you encounter any issues during the download, it is possible that the publisher has removed the file from their server.
You are allowed to download the files provided on this website for personal or commercial use, subject to the condition that they are used lawfully. All files are the property of their respective owners.
The content on the website is provided AS IS for your information and personal use only. It may not be sold, licensed, or shared on other websites without obtaining consent from the author.
E N D
Presentation Transcript
Adding a PayPal account Updated October 2022
Go to PayPal.com Up top, click Business, then Credit Card Processing
Scroll down... Then click More about our Donate Button
Go to Nonprofit fundraising Your class needs to have an EIN under Dartmouth s non-profit umbrella for this route (you should have one). This will enable you to get you lower fees for Class Dues payments, which are technically donations
This brings you to a new page https://www.paypal.com/us/webapps/mpp/donations Click Get Started Today
Add your email and click Next It is STRONGLY recommended that you do not use a personal email address, as you will likely not be the treasurer forever. Lots of classes have a class Gmail/internet account that is shared among officers. Click Next
Create password, fill in your address Create a password (write it down) and then fill in your contact information (personal information for the treasurer). The Business Name is Dartmouth Class of XXXX Click on to the next page...
Add more information Select Nonprofit organization Educational Up to $4,999 monthly sales Add your EIN (you can add it later too) Enter a class website if you have one Fill in some information about your class (sample to the right) Click Continue
Confirm identity You can change this information later but PayPal needs to tie all their accounts to a US citizen This should be your contact information as treasurer You need last 4 digits of your SSN and DOB Click Submit
Success! Well, the beginning. This should bring you to your Business Account welcome page. Click Account Setup
Confirm your email The first step is to confirm your email address Log in to the email address you provided and click the link in the email You ll have to enter your account password to verify it s you Now your email is confirmed
Verify your bank account Click Linking your bank account on the Account Setup screen On the next screen, select your bank If you are a Ledyard treasurer, click I have a different bank
Fill in routing and account number This is found on your bank account checks Add the 9-digit routing number Add the account number If you don t have a bank account yet, do that first and then come back to this step This should be your CLASS bank account, never a personal account
Verification process Once you hit submit, PayPal will send two small amounts (in cents) to your bank This will take 2-3 days usually Log into your bank account and find the amounts after 2-3 days Then, log back in to PayPal and click Linking your bank account again Press Confirm
Verification process continued Once you have received the amounts, type them in and press Submit
Verification process continued Now your bank is confirmed, press Continue
Other details to confirm/add At the top, click Tools, then Business Setup, then Account Setup
Make business name clear Click third link
Make business name clear Type in business names your classmates will recognize, such as:
Create Donate Button for website Return to Business Setup (dropdown under Tools up top) Click create a Donate button within the blue link
Create Donate Button, cont. If that link doesn t show up, you can also go to Tools, then All Tools, then after a couple clicks scroll down and click PayPal buttons Then click Create New Button on the right:
Create Donate Button, cont. Fill in basic information Donate button with credit card logos is my suggestion so classmates can pay with a PayPal account or credit/debit card
Create Donate Button, cont. If dues are fixed, then choose Donors contribute a fixed amount If classmates can choose amount OR if you have projects, then choose Donors enter their own contribution amount (suggested) Use secure merchant ID
Create Donate Button, cont. Save your button for the future
Create Donate Button, cont. Add special features if you want If you do have projects, you can add a special instructions box No need for address No need for cancelled checkout or thank you pages (unless you want to direct people to one) Click Create Button once done
Use your Button There are two ways to use your button, either in an email by using a custom URL link or embedding some code on a webpage like your class website
How to put the button on your class website If you re a little tech savvy, you can probably do this... Log in to your website (you need login credentials granted through Alumni Relations), then go to the desired page, switch to HTML mode and copy the code in Or ask your webmaster or the College for help
How to put a link in an email If you are sending a class dues email solicitation, you can insert a hyperlink within the email The link can go to your class webpage or directly to PayPal Just insert a text link (Pay Class Dues) and use the permanent custom URL shown under Email as the hyperlink to direct your classmates to:
Now you can get paid! You should be able to accept class dues payment through your classmates, either by a button on your website or through email You can transfer money from PayPal to your bank account whenever you want You can send people money electronically from PayPal (even if you don t have a balance), this is great for reimbursement PayPal also has tools to refund payments quickly Sample class dues page on how I have set up the button and other information about dues: http://2008.dartmouth.org/s/1353/clubs-classes-interior.aspx?sid=1353&gid=342&pgid=4770
Testing it out I would recommend testing out the payment system yourself before emailing out a link to the class or directing folks to your class website You can go through the payment process and see if there is anything confusing (and then edit the button or web page accordingly if needed) Once you pay dues, the email account for your PayPal account will get an email confirmation and so will the dues payer
PayPal resources - FYI PayPal has a lot of resources if you have questions about how to use the site (see Help at the bottom) I would recommend going to More up top and then clicking Welcome Tour if you re pretty new to PayPal
Updating preferences - FYI If you want to edit anything, click Profile in the upper right and then Profile and Settings Under My business info is where you can add your Class EIN, update your SSN if you have a treasurer change, and update contact information Under My money is where you can update bank account and look at monthly statements Under My settings is where you can add users to the account and adjust email notifications (I would unsubscribe from Offers and News and updates) Under My selling tools is where you can edit your Buttons and do fancy stuff (mostly not necessary) Under those 4 links are Quick Links for the most common changes
Congrats! You should be all set with a confirmed bank account, confirmed email address and buttons/links to be able to receive payments from your classmates Since you registered as a nonprofit, you should have lower fees than a normal business (nonprofits get 2.2% + .30 per transaction)