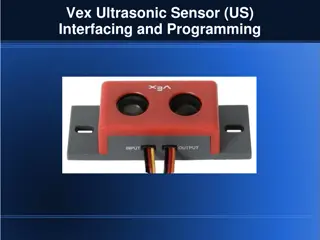
Ultrasonic Sensor Applications

In this detailed guide, you will explore the applications and workings of ultrasonic sensors like HC-SR04. Learn how these sensors can detect objects in a range from 2cm to 400cm using ultrasonic waves. Understand the principles behind ultrasonic sensor technology and how it resembles dolphins and bats' echolocation. Discover the components of an ultrasonic sensor and how it functions to measure distances accurately. Dive into coding examples and learn how to implement ultrasonic sensors in your projects.

Download Presentation

Please find below an Image/Link to download the presentation.
The content on the website is provided AS IS for your information and personal use only. It may not be sold, licensed, or shared on other websites without obtaining consent from the author.If you encounter any issues during the download, it is possible that the publisher has removed the file from their server.
You are allowed to download the files provided on this website for personal or commercial use, subject to the condition that they are used lawfully. All files are the property of their respective owners.
The content on the website is provided AS IS for your information and personal use only. It may not be sold, licensed, or shared on other websites without obtaining consent from the author.
E N D
Presentation Transcript
Ultrahangos szenzor HC-SR04 nagy hat t vols g ultrahangos szenzor. T vols g m r s re s objektum detekt l s ra haszn lj k. A hat t vols g 2cm s 400cm k z tt mozog. A szenzornak ultrahangos ad ja s vev je van (hasonl elven m k dik mint a delfinek s a denev rek). https://people.vts.su.ac.rs/~pmiki/_DALJINSKA_NASTAVA_MIKROKONTROLERI/21.04/ UZ01.mp4 https://people.vts.su.ac.rs/~pmiki/_DALJINSKA_NASTAVA_MIKROKONTROLERI/21.04/ UZ02.mp4
Ultrahangos szenzor A szenzor 40000Hz-es ultrahangot bocs t ki, s ha akad lyba tk zik, visszaver dik a vev h z. Az ultrahang idej nek terjed s b l s a hang sebess g b l ki lehet sz molni a t vols got.
Ultrahangos szenzor Vcc +5V Trig Trigger (Gerjeszt s) Echo Echo (Visszhang) GND GND
Ultrahangos szenzor Van akad ly Nincs akad ly
Idmrs pulseIn() fggvny Szintakszis: pulseIn(pin, Value) pin a l b amelyiken az impulzus sz less g t m rj k Value LOW ili HIGH Visszat r rt k: az impulzus sz less ge mikroszekundumokban vagy 0 ha az impulzus t l sok ig tart.
Ultrahangos szenzor - bekts Trig pin 11 Echo pin 12
Program #define echo 11 // Echo Pin #define trig 12 // Trigger Pin long travel_time, distance; // Duration used to calculate distance void setup() { Serial.begin (9600); pinMode(trig, OUTPUT); pinMode(echo, INPUT); }
Program void loop() { digitalWrite(trig, LOW); delayMicroseconds(2); //Sending a high pulse to trigger the Ultrasound Module digitalWrite(trig, HIGH); delayMicroseconds(10); digitalWrite(trig, LOW); travel_time = pulseIn(echo, HIGH); //Calculating the distance distance = (travel_time*0.034)/2; // Sending the distance to computer Serial.println(distance); //Delay for next reading. delay(30); }
Szmll IC 4511 ramkrrel https://people.vts.su.ac.rs/~pmiki/_DALJINSKA_NASTAVA_MIKROKONTROLERI/ 21.04/count01.mp4
4511 ramkr A, B, C, D Arduino 2, 3, 4, 5 A LSB D MSB D C B A
Program const int A = 2; const int B = 3; const int C = 4; const int D = 5; int count = 0; //the variable used to show the number void setup() { pinMode(A, OUTPUT); //LSB pinMode(B, OUTPUT); pinMode(C, OUTPUT); pinMode(D, OUTPUT); //MSB }
Program void to_BCD() { if (count == 0) //write 0000 { digitalWrite(A, LOW); digitalWrite(B, LOW); digitalWrite(C, LOW); digitalWrite(D, LOW); } if (count == 1) //write 0001 { digitalWrite(A, HIGH); digitalWrite(B, LOW); digitalWrite(C, LOW); digitalWrite(D, LOW); } void loop() { count++; delay(200); if (count == 10){ count = 0; } to_BCD(); //convert to binary } ... // do 9 }
Program int led = 13; // the pin that the LED is attached to int sensor = 2; // the pin that the sensor is attached to int state = LOW; // by default, no motion detected int val = 0; // variable to store the sensor status (value) void setup() { pinMode(led, OUTPUT); // initalize LED as an output pinMode(sensor, INPUT); // initialize sensor as an input Serial.begin(9600); // initialize serial }
Program void loop(){ val = digitalRead(sensor); // read sensor value if (val == HIGH) { digitalWrite(led, HIGH); // turn LED ON delay(100); if (state == LOW) { Serial.println("Motion detected!"); state = HIGH; // update variable state to HIGH } } else { digitalWrite(led, LOW); // turn LED OFF delay(200); // delay 200 milliseconds if (state == HIGH){ Serial.println("Motion stopped!"); state = LOW; // update variable state to LOW } } } // check if the sensor is HIGH // delay 100 milliseconds


 függvény")