Using Home Ribbon for Text Formatting in Microsoft Office
Discover how to efficiently format text in Microsoft Office using the Home tab ribbon. Explore options within the Clipboard group, understand fonts and their sizing, apply shortcuts for bold, italic, and underline styles, utilize font and paragraph launchers, and master cut-and-paste techniques. Enhance your document layout by aligning text, experimenting with font changes, and making use of the Office Clipboard task pane. Dive into the world of text formatting with ease

Download Presentation

Please find below an Image/Link to download the presentation.
The content on the website is provided AS IS for your information and personal use only. It may not be sold, licensed, or shared on other websites without obtaining consent from the author.If you encounter any issues during the download, it is possible that the publisher has removed the file from their server.
You are allowed to download the files provided on this website for personal or commercial use, subject to the condition that they are used lawfully. All files are the property of their respective owners.
The content on the website is provided AS IS for your information and personal use only. It may not be sold, licensed, or shared on other websites without obtaining consent from the author.
E N D
Presentation Transcript
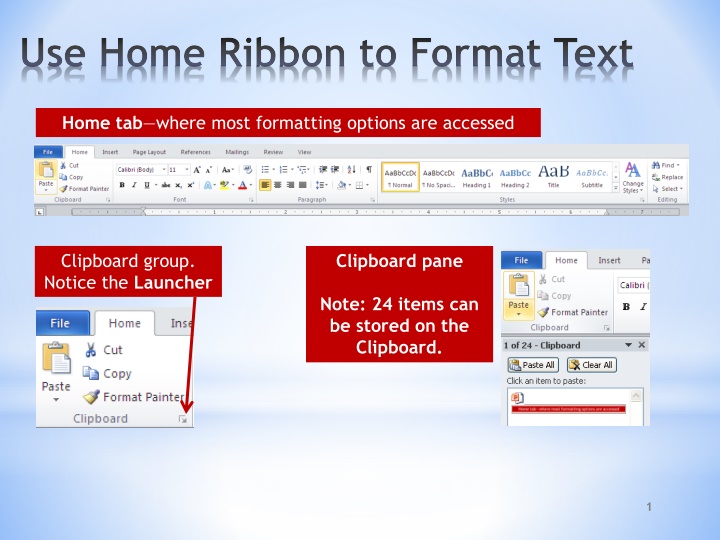
Use Home Ribbon to Format Text Home tab where most formatting options are accessed Clipboard group. Notice the Launcher Clipboard pane Note: 24 items can be stored on the Clipboard. 1
This is the Office Clipboard task pane. Office Clipboard The launcher in the Clipboard group actually opens the Clipboard. 2
Use Home Ribbon to Format Text Format Painter Copies format not text 3
Fonts 1 point = 1/72 of an inch 4
About Fonts Continued Change Font Change Point Size 5
About Fonts Continued WYSIWYG What you see is what you get. The fonts appear as they will in the document. Live Preview Select your text and then hover over a different font. You will see the selected text in the font selected. 6
Hot Keys (Shortcuts) CTRL + B Apply Bold attribute CTRL + I Apply Italic attribute CTRL + U Apply Underline attribute CTRL + SHIFT + F Change Font Face attribute CTRL + SHIFT+ P Change Font Size attribute Grow Font Size attribute CTRL + Shift + > CTRL + Shift + < Shrink Font Size Note: Grow Font (means enlarge font). However, the vocabulary you must recall is Grow Font. 7
Font and Paragraph Launchers Launching dialog boxes gives more options Note: change tabs here too. 8
Blank documents default to left alignment. Aligning Text in a Document Left Ctrl+ L Right Ctrl + R Center Ctrl + E Justify Ctrl + J 9
Cut and Paste Text Cut a selected item: Ctrl + X Right-clicking on selected text launches the short-cut menu Copy a selected item: Ctrl + C Paste an item: Ctrl + V 10
Paste Special Live Preview works with Paste Special options too. Keep Source Formatting K Hover over each option to see how it affects the pasted text. 11
Apply Styles Styles are predefined formatting combinations of fonts, colors, and paragraph formatting that are designed to save time. 12
Apply Styles Continued Click the down arrow in Styles group to see more options. 13
Apply Styles Continued Click Launcher in Styles group to see more options. 14
Borders Paragraph borders: affects just the selected paragraph Page border: affects the entire page (document) 16
Borders and Shading All 3 The Borders and Shading dialog box appears when you click on Borders and Shading from the Borders drop-down menu. First things first: key all info first, and then format document. This will eliminate many issues with some of the auto formatting features in Word. 17


")