Why a Professional Headshot Matters
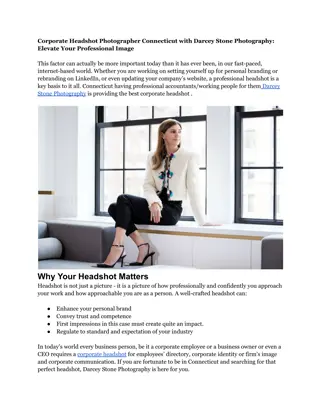
A professional headshot reeks of confidence, professionalism, and approachability. It is nothing close to an unclear, dark, or casually snapped selfie.

Download Presentation

Please find below an Image/Link to download the presentation.
The content on the website is provided AS IS for your information and personal use only. It may not be sold, licensed, or shared on other websites without obtaining consent from the author.If you encounter any issues during the download, it is possible that the publisher has removed the file from their server.
You are allowed to download the files provided on this website for personal or commercial use, subject to the condition that they are used lawfully. All files are the property of their respective owners.
The content on the website is provided AS IS for your information and personal use only. It may not be sold, licensed, or shared on other websites without obtaining consent from the author.
E N D
Presentation Transcript
Why a Professional Headshot Matters
Introduction Before we get started, let's take a gander at why you need a professional headshot. Your headshot is, for many, the first impression they get of you online. You're likely using your headshot when networking, seeking new job opportunities, or trying to establish your business. A professional headshot reeks of confidence, professionalism, and approachability. It is nothing close to an unclear, dark, or casually snapped selfie.
How to Take a DIY Professional Headshot 1. Location Lighting is the most important aspect of a professional headshot. Natural light is always the best, so take your photo near a large window with diffused light; morning or late afternoon is the best time. Avoid direct sunlight to prevent harsh shadows and squinting.
2. Camera or Smartphone Setup Put your camera or phone at eye level on a tripod or stable stand. If there's no tripod, stack some books and use a shelf to stabilize the camera. Consider the timer or voice control capabilities of your device so that it automatically clicks the photo without help. 3. Frame Your Shot Correctly Place your face and shoulders in the center of the frame. The most effective headshots are taken at an angle, just above eye level, of your head and upper torso.
4. Dress to Impress Wear neutral-colored, plain clothing that provides a good contrast with your background. Avoid clothes with busy patterns, bright colors, and anything with logos. Your outfit should be clean and pressed. 5. Use Good Posture and Expression Maintain good posture, shoulders relaxed, sloping forward from the waist Smile natural smile; be careful not to make a forced smile as that doesn't look real
6. Clean Background The clutter in the background might draw attention away from your face. Try to have some shots taken with a plain or textured background so that even the focus will be on you. For an outdoor location, a neutral-colored wall or a softly blurred background can do 7. Take Many Shots Don't settle for the first picture you take. Take multiple shots with slight variations in angles and expressions. Then you have options to choose the most flattering and professional-looking images
8. Edit Your Photo for a Polished Look Editing will enhance your headshot without making it look unnatural. Brightness, contrast, and sharpness can be adjusted to make your features stand out. Remove blemishes, adjust color balance, and fine-tune details using tools like Lightroom, Snapseed, or Photoshop.
www.capturely.com capturely.com 10951 Huston St., Los Angeles, CA 91601