Radiology Techniques at Al-Mustaqbal University College

This collection of radiographs showcases the imaging techniques used in the Radiology Techniques Department at Al-Mustaqbal University College, focusing on upper limb radiographs including views of the wrist, lateral view, and forearm. Detailed instructions for positioning and capturing these images are provided for educational purposes.

Download Presentation

Please find below an Image/Link to download the presentation.
The content on the website is provided AS IS for your information and personal use only. It may not be sold, licensed, or shared on other websites without obtaining consent from the author.If you encounter any issues during the download, it is possible that the publisher has removed the file from their server.
You are allowed to download the files provided on this website for personal or commercial use, subject to the condition that they are used lawfully. All files are the property of their respective owners.
The content on the website is provided AS IS for your information and personal use only. It may not be sold, licensed, or shared on other websites without obtaining consent from the author.
E N D
Presentation Transcript
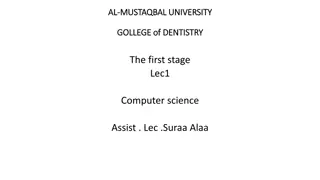
Ministry of Higher Education and Scientific Research Al-Mustaqbal University College Radiology Techniques Department Radiographs of Upper limbs Karar Haider
PA view of wrist 1- Film size : 8 * 10 , no Bucky 2- CR is vertical to metacarpal area 3- The carpal interspaces are better demonstrated in AP position 4- Minimum SID_ 40 inches (102 cm ) resting on film
Lateral view of wrist 1- Film size : 8 * 10 , no Bucky 2- Rest the arm & forearm on table 3- Centre the film to carpals & adjust the hand so that the wrist is in a true lateral position with medial surface of hand touching the film 4- CR is vertical to wrist joint 5- This position is used to demonstrate displacement in fractures
Wrist for scaphoid 1- Film size : 8 * 10 , no Bucky 2- Position the wrist for a PA position 3- Turn the hand outwards until the wrist is in extreme ulnar flexion 4- CR to scaphoid (10 _ 15 degree proximal or distal angulation may be needed )
Forearm AP view 1- Film size : 10 * 12 or 11 * 14 according to the length of forearm ( including wrist & elbow ) take 2 views on the same film , no Bucky 2- Seat the patient with the forearm supinated & elbow extended 3- CR is vertical to midpoint of forearm ( midway between the wrist & elbow )
forearm lateral view 1- Film size : 10 * 12 or 11 * 14 according to the length of forearm ( including wrist & elbow ) 2- Flex elbow 90 degree , adjust the forearm in a true lateral position ( with the thumb side up ) 3- CR is vertical to midpoint of forearm