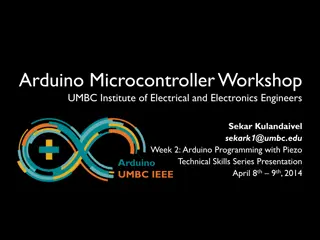
Arduino Pins Overview for Beginners
Learn about the digital and analog pins on an Arduino board, understanding their functionalities and capabilities, including PWM pins, power pins, SPI pins, I2C pins, and LED indicators. Explore how to use each pin effectively for various projects.

Download Presentation

Please find below an Image/Link to download the presentation.
The content on the website is provided AS IS for your information and personal use only. It may not be sold, licensed, or shared on other websites without obtaining consent from the author. If you encounter any issues during the download, it is possible that the publisher has removed the file from their server.
You are allowed to download the files provided on this website for personal or commercial use, subject to the condition that they are used lawfully. All files are the property of their respective owners.
The content on the website is provided AS IS for your information and personal use only. It may not be sold, licensed, or shared on other websites without obtaining consent from the author.
E N D
Presentation Transcript
Getting Started With Arduino and CEP Problem
Digital Pins (0-13) Pins 0 to 13: These are digital input/output pins that can be used as either inputs or outputs using pinMode(), digitalWrite(), and digitalRead() functions. Each pin operates at 5V and can provide or receive a maximum of 40 mA of current. Pin 0 (RX) and Pin 1 (TX): Used for serial communication. RX is used for receiving data, and TX is used for transmitting data. These are connected to the USB-to-TTL serial chip, so avoid using them if you're using the USB port for programming. PWM (Pulse Width Modulation) Pins (3, 5, 6, 9, 10, 11) Pins 3, 5, 6, 9, 10, and 11: These digital pins can be used as PWM outputs using the analogWrite() function. PWM is used to simulate analog output, commonly used for dimming LEDs or controlling motor speed.
Analog Pins (A0-A5) Pins A0 to A5: These are analog input pins, capable of reading a voltage between 0 and 5V using the analogRead() function. They have a 10-bit resolution, returning values from 0 to 1023. Power Pins Vin: Input voltage to the Arduino board when using an external power source (6-20V). You can supply voltage through this pin or the power jack. 5V: The regulated power supply used to power the microcontroller and other components on the board. Can come from USB, Vin (through the regulator), or an external power supply. 3.3V: A 3.3V supply generated by the onboard regulator. Maximum current draw is 50 mA. GND: Ground pins. RESET: Resets the microcontroller. Can be used to restart the program from the beginning.
Other Pins AREF (Analog Reference): Used to set an external reference voltage (0-5V) as the upper limit for analog inputs. IOREF: Provides the voltage reference at which the microcontroller is operating (usually 5V on Arduino Uno). Allows the shields to adapt to the board's voltage. SPI Pins (10, 11, 12, 13) Pin 10 (SS - Slave Select): Used to select the SPI slave device. Pin 11 (MOSI - Master Out Slave In): Sends data from the Arduino to the connected SPI device. Pin 12 (MISO - Master In Slave Out): Receives data from the connected SPI device. Pin 13 (SCK - Serial Clock): Provides the clock signal used to synchronize data transmission.
I2C Pins (A4, A5) SDA (A4): Serial Data Line used for I2C communication. SCL (A5): Serial Clock Line used for I2C communication. LED Indicators Pin 13 (Built-in LED): Onboard LED connected to digital pin 13. This LED is handy for testing simple sketches without connecting external LEDs. Communication Pins TX/RX LEDs: Indicate serial data transmission (TX) and reception (RX). These LEDs blink when data is being sent or received via the USB-to-serial chip and USB connection.
SPI (Serial Peripheral Interface) Devices SPI (Serial Peripheral Interface) is a synchronous serial communication protocol used primarily to communicate between a master device (such as a microcontroller like the Arduino) and one or more peripheral devices (like sensors, displays, or memory chips). It s widely used because of its speed and simplicity, especially when high-speed data transfer is required.
Key Components of SPI Communication: 1. Master and Slave Devices: Master: The device that controls the communication, typically a microcontroller (e.g., Arduino). o Slave(s): The devices that respond to the master's commands, such as sensors, displays, SD cards, etc. o 2. SPI Signals: MOSI (Master Out Slave In): The line through which data is sent from the master to the slave. o MISO (Master In Slave Out): The line through which data is sent from the slave back to the master. o SCK (Serial Clock): The clock signal generated by the master to synchronize data transfer. o SS (Slave Select): A line used by the master to select which slave device to communicate with. When SS is low, the slave device is active; when high, it is inactive. o
How SPI Works: 1. Data Transfer: SPI is a full-duplex communication protocol, meaning data can be sent and received simultaneously. 2. Clock Control: The master generates the clock signal on the SCK line, which dictates the timing of data transmission. 3. Slave Selection: Only the slave with its SS line pulled low communicates with the master. Multiple slaves can be connected to the same SPI bus, and the master controls which one to communicate with by toggling the corresponding SS line.
Advantages of SPI: High Speed: SPI supports high data rates compared to other protocols like I2C. Simplicity: The protocol is straightforward, with minimal software overhead. Full Duplex: Data transmission in both directions simultaneously increases efficiency. Common SPI Devices: Sensors: Gyroscopes, accelerometers, temperature sensors. Memory Devices: EEPROM, Flash memory. Displays: OLEDs, LCDs. SD Cards: Used for data storage in many embedded applications.
CEP Problem Based on CEP Problem Based on Embedded System and IoT Embedded System and IoT Q1. How would you design a smart irrigation system for an agricultural field using appropriate microcontrollers, sensors, and actuators to monitor soil moisture levels, weather conditions, and plant growth? The system should automatically regulate water flow and trigger alerts when critical thresholds are crossed, ensuring optimal water usage and plant health. Develop a detailed schematic of the system and provide a comprehensive list of required components.
CEP Problem Based on Embedded System and IoT CEP Problem Based on Embedded System and IoT Solution: Problem Overview: The goal is to design a smart irrigation system that monitors soil moisture levels, weather conditions, and plant growth, automatically regulating water flow to ensure optimal water usage and plant health. The system will also trigger alerts when critical thresholds are crossed. Below is a detailed solution covering both hardware and software components.
CEP Problem Based on Embedded System and IoT CEP Problem Based on Embedded System and IoT Solution: 1. System Requirements The system should be capable of: Monitoring soil moisture to determine when watering is required. Monitoring weather conditions (rain, temperature, humidity) to adjust irrigation based on environmental conditions. Monitoring plant growth using relevant sensors to optimize watering based on plant maturity or health. Controlling water flow using solenoid valves to open or close irrigation lines. Sending alerts if soil moisture drops below a critical level or if weather conditions suggest extreme dryness or flooding. Logging data to cloud storage for analysis and long-term optimization of irrigation patterns.
CEP Problem Based on Embedded System and IoT CEP Problem Based on Embedded System and IoT Solution: 2. Components Required Microcontroller: ESP32 or Arduino: A microcontroller with built-in Wi-Fi for remote monitoring and control. The ESP32 is recommended for its better processing power, dual-core functionality, and built-in wireless capabilities. Sensors: Soil Moisture Sensor (Capacitive Type): Measures soil moisture to determine when to irrigate. Example: Capacitive Soil Moisture Sensor (YL-69). Temperature and Humidity Sensor (DHT22 or SHT31): Monitors the ambient temperature and humidity to optimize irrigation based on weather conditions.
CEP Problem Based on Embedded System and IoT CEP Problem Based on Embedded System and IoT Solution: Rain Sensor: Detects rainfall to prevent unnecessary watering. Ultrasonic Distance Sensor (optional): Monitors plant height/growth or could be replaced by more advanced sensors like NDVI (Normalized Difference Vegetation Index) sensors for plant health. Weather Station (optional): Integrates wind speed, rainfall, and UV sensors to optimize irrigation during extreme weather. Actuators: Solenoid Valve: Controls the water flow in the irrigation system. It opens or closes based on signals from the microcontroller. Relay Module: Acts as a switch for high-power devices (solenoid valves or water pumps).
CEP Problem Based on Embedded System and IoT CEP Problem Based on Embedded System and IoT Solution: Power Supply: 12V or 24V DC Power Supply: Powers the solenoid valves and the entire system. Solar power could be used for energy efficiency in remote fields. 5V Step-Down Converter: To provide power to the microcontroller and sensors from the 12V/24V supply. Communication: Wi-Fi or LoRa Module: Provides remote communication for data logging and alerting. ESP32 has built-in Wi-Fi, while LoRa is suitable for long-range applications. Cloud Platform: ThingSpeak/AWS IoT/MQTT Protocol: For remote data logging and real-time alerting. The microcontroller sends sensor data to the cloud for analysis and triggers notifications via the cloud platform if required.
CEP Problem Based on Embedded System and IoT CEP Problem Based on Embedded System and IoT Solution: Power Supply: 12V or 24V DC Power Supply: Powers the solenoid valves and the entire system. Solar power could be used for energy efficiency in remote fields. 5V Step-Down Converter: To provide power to the microcontroller and sensors from the 12V/24V supply. Communication: Wi-Fi or LoRa Module: Provides remote communication for data logging and alerting. ESP32 has built-in Wi-Fi, while LoRa is suitable for long-range applications. Cloud Platform: ThingSpeak/AWS IoT/MQTT Protocol: For remote data logging and real-time alerting. The microcontroller sends sensor data to the cloud for analysis and triggers notifications via the cloud platform if required.
CEP Problem Based on Embedded System and IoT CEP Problem Based on Embedded System and IoT Solution: 3. System Design Main System Components: 1. ESP32 Microcontroller is the central brain that collects data from various sensors, processes it, and controls the solenoid valves via relays. 2. Sensors: The Soil Moisture Sensor is placed near the plants and connected to the microcontroller s analog input to continuously monitor soil water content. o The Temperature and Humidity Sensor (DHT22) and Rain Sensor are placed in open-air locations to monitor environmental conditions. o
CEP Problem Based on Embedded System and IoT CEP Problem Based on Embedded System and IoT Solution: 1. Water Flow Control: The solenoid valves are connected to water pipes that distribute irrigation. The microcontroller, using a Relay Module, controls these valves based on sensor data. 2. Power Supply: A DC power supply unit is used to power the solenoid valves and sensors. The microcontroller is powered through a step-down converter.
CEP Problem Based on Embedded System and IoT CEP Problem Based on Embedded System and IoT Solution: 4. Software Design The software needs to perform the following tasks: Read sensor data for soil moisture, temperature, humidity, and rain status. Process the sensor data and decide when to water the plants. Control solenoid valves based on sensor thresholds and weather conditions. Send alerts if any parameters (like low soil moisture) exceed the predefined thresholds. Log data to the cloud for analysis and future optimization.
CEP Problem Based on Embedded System and IoT CEP Problem Based on Embedded System and IoT Solution: 4.1 System Flow 1. Sensor Data Collection: Soil moisture is measured in real-time. o Temperature, humidity, and rain sensors provide context for adjusting watering schedules based on environmental conditions. o 2. Decision Making: If the soil moisture falls below a certain threshold, and the weather sensors indicate no rain, the system opens the solenoid valves to irrigate the field. o If it's raining or soil moisture is adequate, irrigation is skipped. o
CEP Problem Based on Embedded System and IoT CEP Problem Based on Embedded System and IoT Solution: 3. Water Control: The relay module is triggered to open/close the solenoid valve for watering. o Valves are automatically closed once soil moisture reaches a safe level. o 4. Data Logging and Alerts: Data is logged to the cloud using an IoT platform (like ThingSpeak or AWS IoT). o Alerts (via email, SMS, or app notification) are triggered if soil moisture or temperature reaches critical levels. o 4.2 Pseudo Code
CEP Problem Based on Embedded System and IoT CEP Problem Based on Embedded System and IoT Solution: 5. Conclusion This smart irrigation system integrates sensors, actuators, and cloud connectivity to manage irrigation in an automated and efficient way. By monitoring soil moisture, weather conditions, and plant growth, the system optimizes water usage while ensuring plant health. Real-time alerts and data logging to the cloud make it robust, allowing remote monitoring and adjustments. This system demonstrates how modern agricultural practices can be enhanced using IoT, real-time data, and automation to conserve water, improve crop yield, and reduce manual labor.
CEP Problem Based on Embedded System and IoT CEP Problem Based on Embedded System and IoT Q2. How would you design a smart energy management system for a commercial building using appropriate microcontrollers, sensors, and actuators to monitor and optimize energy consumption? The system should track occupancy, lighting, HVAC (Heating, Ventilation, and Air Conditioning) usage, and power loads from various appliances, automatically adjusting based on occupancy and time of day. It should also trigger alerts when energy usage exceeds certain limits or when equipment failures are detected. Develop a detailed schematic of the system and provide a comprehensive list of required components

")
")

")
")
 Devices")