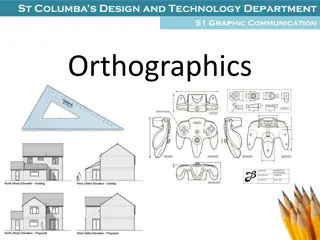
Understanding Orthographic Projection Techniques
Explore the concept of orthographic projection with examples of front, top, and side views. Learn how to identify different views and create a paper box model for hands-on practice. Enhance your understanding of orthographic isometric projections through visual aids and step-by-step instructions.

Download Presentation

Please find below an Image/Link to download the presentation.
The content on the website is provided AS IS for your information and personal use only. It may not be sold, licensed, or shared on other websites without obtaining consent from the author. If you encounter any issues during the download, it is possible that the publisher has removed the file from their server.
You are allowed to download the files provided on this website for personal or commercial use, subject to the condition that they are used lawfully. All files are the property of their respective owners.
The content on the website is provided AS IS for your information and personal use only. It may not be sold, licensed, or shared on other websites without obtaining consent from the author.
E N D
Presentation Transcript
Unit 3 Understanding Orthographic Projection
What is Orthographic Projection? Orthographic Isometric
Which view is it? Front, Top, or Side
Which view is it? Front, Top, or Side TOP B D
Which view is it? Front, Top, or Side
Which view is it? SIDE Front, Top, or Side C E
Which view is it? Front, Top, or Side
Which view is it? FRONT Front, Top, or Side A
Which view is it? Front, Top, or Side
Which view is it? Front, Top, or Side FRONT A
Which view is it? Front, Top, or Side
Which view is it? TOP Front, Top, or Side B C E
Which view is it? Front, Top, or Side
Which view is it? SIDE Front, Top, or Side D F
Paper Box Overview Students will need: Printed copy of paper box Scissor Tape or a glue stick Writing utensil to label each side